minor updates

sitting on the fence

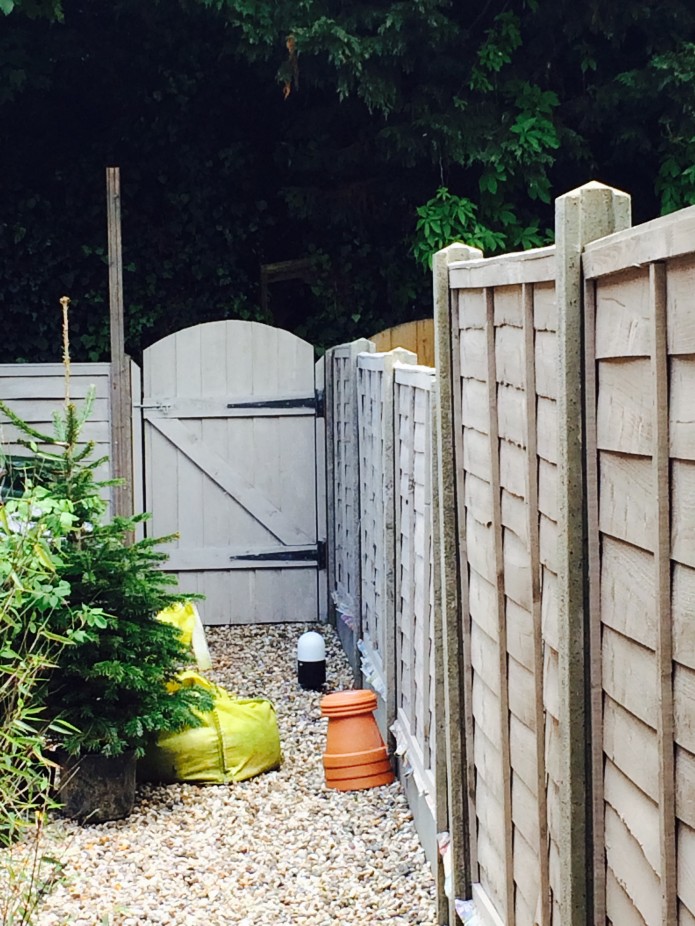
We spent the bank holiday weekend painting the garden fence.

I say we. It’s not easy painting a fence with one arm in a sling… so booyaa did the vast majority of the work. I don’t know where he finds the energy, but I’m grateful for it nonetheless.

We’ve been putting up with a very un-boolou garden for a year, and this year we’ve decided that it’s going to get done. Partly it stems from when we were painting the dining room and we took it in turns to keep Betsy entertained in the garden. Sitting out in the sunshine next to the small flower bed we created last year was really very pleasant and we’d both love to use the garden more than we do (which is barely at all). Between the uneven surface, the skiddy gravel, the trip hazard manhole covers, the slope upwards to the back, and the overhanging trees full of shade and pigeons*… well, it’s not a very welcoming space.

We now have a quote for landscaping that’s affordable, and are pencilled in for the last week of June for the work to happen. Between now and then we need to clear out the junk that’s accumulated at the back of the garden, paint the fence, pot up the plants we’ve not long since put in the ground (hugely nervous about that) and grow some annuals to fill out what will be about ten times our current growing space.

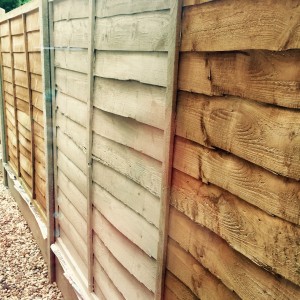
So this weekend we tackled the fence. I faffed about choosing the colour using the Cuprinol website colour tester. My first choice was ash black, which mimics the scorched weatherboard of the local (well, Suffolk) architecture, but decided it would be too strong a look for our small garden, and certainly wouldn’t look very urban Victorian terrace. I couldn’t possibly go ‘Forest Green’ or ‘Conker’ or whatever those fake-natural dark shades are, so I chose “Muted Clay” which looked modern and fresh, and a mid-tone greige (that’s grey-beige to the non-initiated). I hoped the ugly concrete fence posts would blend in a little, as they really stand out against the orangey-brown colour we started with and guessed that the green of the plants would stand out nicely against a light, neutral colour.

The weather was forecast to be dry but cloudy, so we thought we’d get the whole fence painted once round. We were even optimistic enough to think we might get both coats done. Ha ha ha. How naive we were. Rain stopped play after 3 panels on the first coat. It dried up again later and while I was cooking dinner booyaa went and stormed through to the end of one side. We got one coat on half of the fence done by the end of the day.

Orange-greige side-by-side comparison

Orange-greige side-by-side comparison

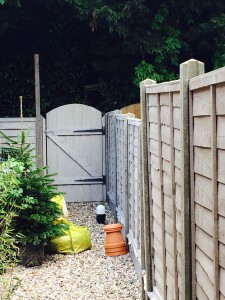
We think the fence was all replaced at the same time, but because it’s weathered differently in places the paint has changed the colour in a subtly different way too. The gate at the back, which is a better quality finish than the fence, has a much stronger colour. The barely touched by sun panels along the side return have changed the least. I mean, they’re not orange any more, but they’re not as strongly coloured as other parts of the fence. After just one coat the fence looked like it had had all the colour bleached out of it. It was a ghost fence.

Shades of greige

Different finish on different wood

Thank heavens for bank holidays, eh? Monday was forecast cloudy with possible showers in the afternoon. We got started after breakfast and finished the first coat on the rest of the fence and started on the second coat by early afternoon. We ran out of paint halfway through the second coat. With no more of our chosen colour in the local Wilko’s, and neither of us fancying a trip to B&Q on a bank holiday Monday, we’re hoping Wilko’s will have more in stock during the week so we can finish off next weekend. But for now, we’ve re-Betsy-proofed the garden and called it a day.

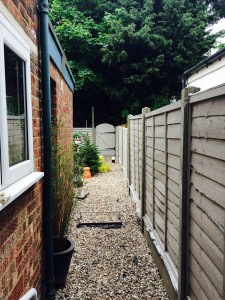
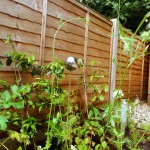
Where the second coat has dried it still looks like we’ve got a ghost fence. The plants show up really well against it, both of us are pleased to see the back of the orangey-brown colour we had before, and it achieves the aim of drowning out the otherwise really noticeable concrete fence posts. The fresh green plants look great against it, and I can’t wait for something blue to flower because I think that’s going to look really vibrant. But on its own it’s a bit meh. Lucky we’ll have a garden full of cosmos and cornflowers in a couple of months.

Side return

The Ghost Fence in all its glory

*Dad says they’re collared doves. They look like what most of us heathens think of as wood pigeons. They’re big, noisy things, that’s the important point.

more floor

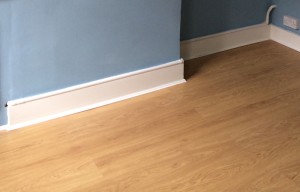
The floor in the living room is laminate straight over concrete. A couple of the neighbours have concrete floors in the front room, so I think something must’ve happened to make people rip out the wood and lay concrete. (Flood? Though I can’t see how the river could get this far. Really bad woodworm? Possibly. After all, there was woodworm elsewhere in the house. Some bonkers 1960s craze? Who knows.)


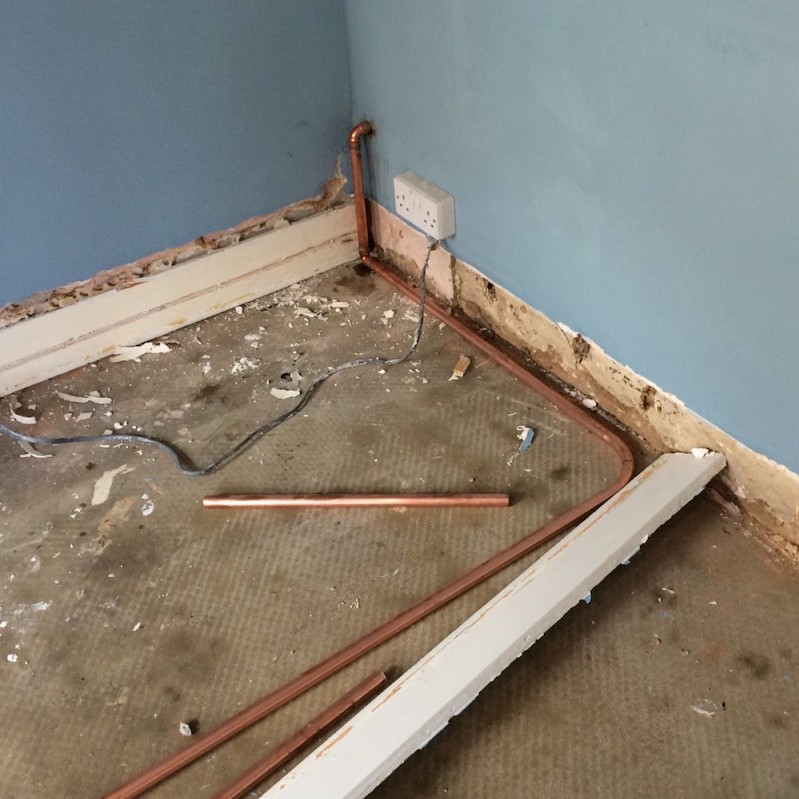
laminate flooring and gas pipe running along the top of the skirting board

laminate flooring and gas pipe running along the top of the skirting board

Anyway, I’m sure you can imagine that makes for a cold, cold floor. Not such an issue in summer, but it was very chilly when we moved in early Spring, and we’re not looking forward to an icy floor through the depths of winter.

Because the floor’s concrete we don’t have much room to manoeuvre. We don’t want the whole pneumatic-drilling-the-floor kind of work, so we had to find a way of insulating and recovering in less than 2 inches before the door wouldn’t open. You can buy sheets of polystyrene insulation which are about an inch thick. Bingo.

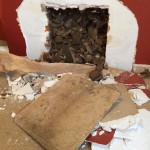
So, this week the builders came and took off the skirting boards and lifted the laminate flooring. Then the gas engineer came to move the gas pipe, which was running along the top of the skirting boards, and lay it out of the way for when we get a woodburner. This step wasn’t linked to the new floor except that since we’re lifting the floor it seemed like a good time to do it. (You can see the pipe above the skirting in the photo at the top.)

One wall of skirting had been routed out to hide some cabling. We didn’t see that until it became clear that the skirting was somehow tied to a plug. Interesting.

concrete floor, new pipe, cable routing

concrete floor, new pipe, cable routing

The next day the sheets of insulation went down, followed by half a tree of tongue and groove. The old skirting boards were reused. The badly damaged pieces were flipped over. We considered getting new skirting but we had enough to reuse so it seemed pointless to buy new.

And now it’s time to sand everything, floorboards, skirting, cupboard doors, the lot. Then we’ll be repeating the process from the dining room of staining and varnishing the floorboards. Cue aching arms by Sunday evening.

Saturday and Sunday

The stickers on the floorboards were an absolute nightmare to get off. I tried a combination of damping them with water and scraping with a metal spatula and soaking off the adhesive with rubbing alcohol. I was concerned we’d end up with square patches, so, while I sanded the rest of the woodwork that I’d started on Saturday, booyaa sanded all of the floor with the orbital sander.

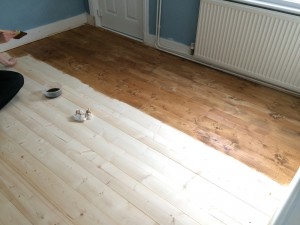
By then we were both exhausted, but we found enough energy to stain the floor. That was my job. When you start painting on the stain you panic that it’s horrendously dark and artificial looking and you’ve made a huge mistake. But we remembered feeling this way with the dining room floor and that turned out really well once it was finished. And, as I carried on painting myself out of the room, the first boards were drying and starting to look like old pine, as planned.

livingroom-floor-staining

action shot of me painting on the scary brown stain

Then I went to have a long, extremely welcome shower while the stain dried. Then first coat of hard wax went on. That was booyaa’s job. It’s really hard work. You have to drag the applicator in one firm sweep from one side of the room to the other, with no stopping and going back over because that will make it patchy. It takes 4-5 hours to dry, but we’re leaving it overnight to be on the safe side.

Clean up time and dinner. Luckily dinner is easy. So very tired.

Tomorrow the second coat of hard wax varnish goes on and we’re done.

Tuesday

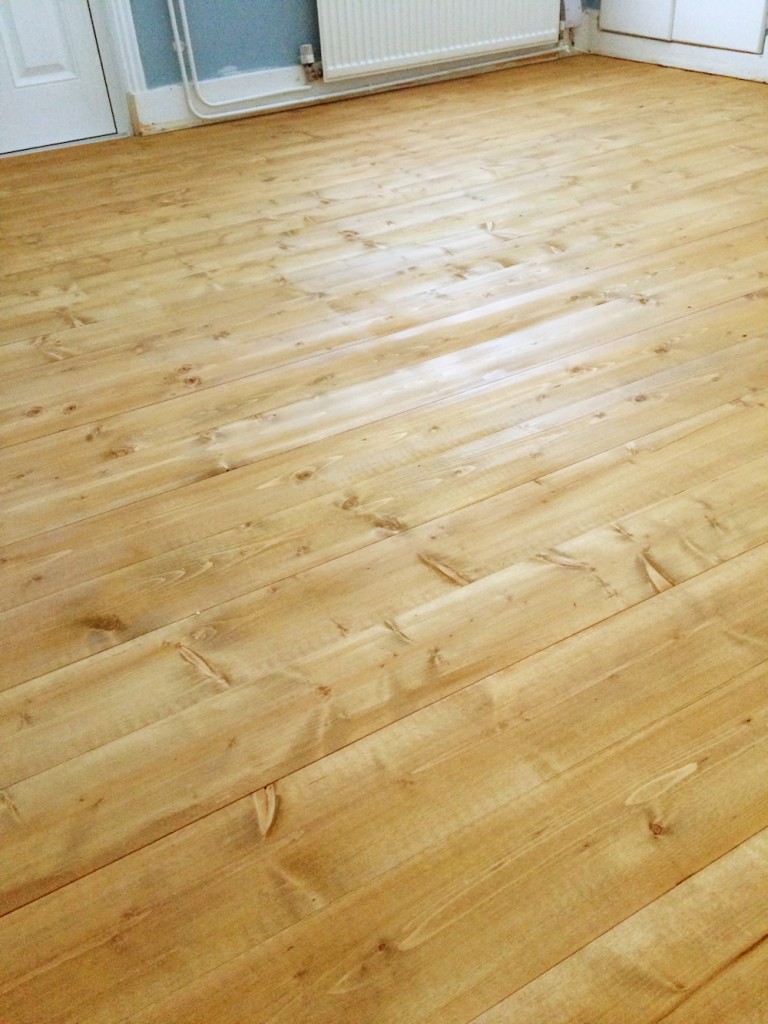
livingroom-floor-varnished

tongue and groove stained and varnished

All done! New floor!

The wood isn’t as attractive as the wood we have in the dining room. They’re different products from different places. In the dining room the grain is really nice with a few knots and the planks are quite wide. The living room wood is narrow, it was much paler to start with so the finish is lighter now, and there aren’t that many boards with attractive grain. The knots are weird, triangular shaped, like the wood was cut at an angle. I’m pleased that most of it ends up being covered up by rugs and furniture. But is it warm? Because that was the main reason for doing this. And the answer is: yes it is! I mean, it’s not like having underfloor heating (I wish) but it’s markedly less chilly than before.

And now it’s time to paint the living room. I’m getting fed up of spending my evenings at the dining room table.

how does your garden grow

Considering it’s nearly October I’m very impressed with some of our garden plants.

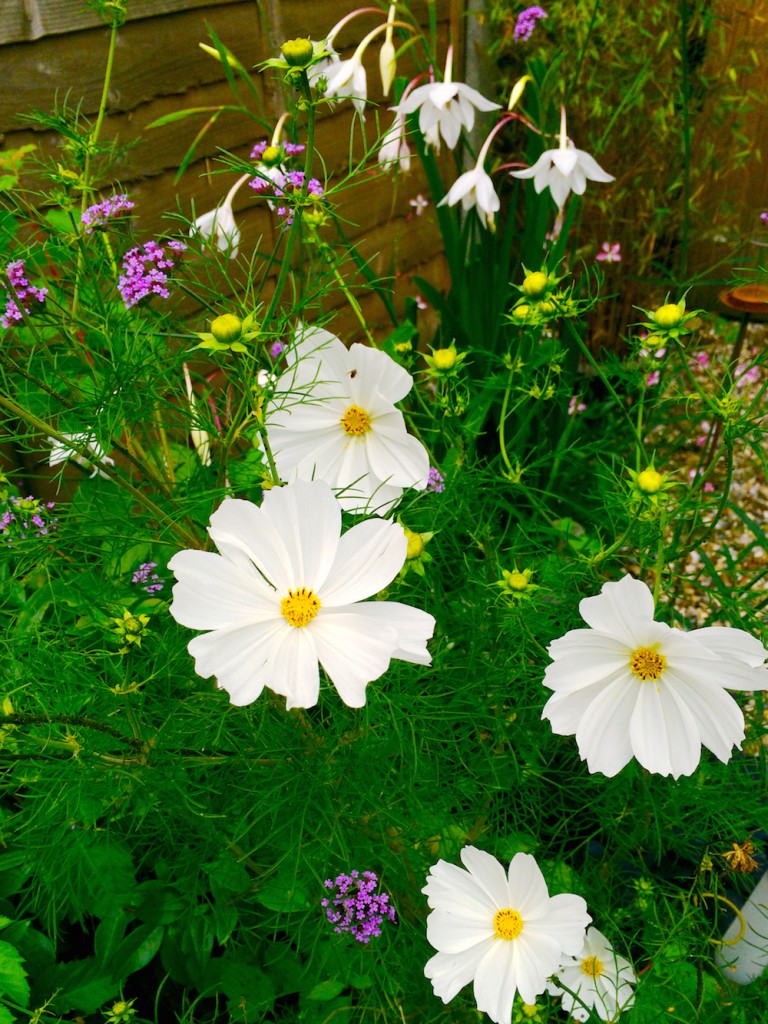
Besides a couple of permanent shrubs, we bought some summer bedding plug plants and seeds to grow our own. We had white nigella flowers that were very pretty but short-lived. There was another white flower that was pretty but the stems grew curved rather than straight so they got lost amid the foliage. The white cosmos started off ok but have gone on to give a fabulous display, despite being hounded by blackfly.

The verbena bonariensis is as magnificent as ever, though a little floppy and requiring an awful lot of tying in.

cosmos and verbena being very tall

cosmos and verbena being very tall

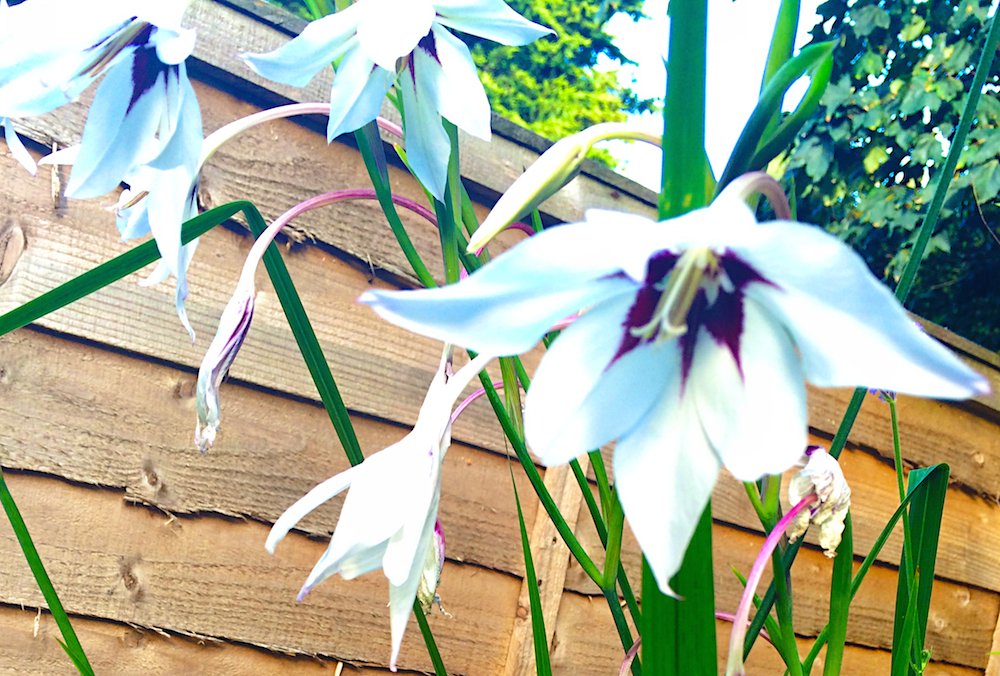
Then the surprise hit, the Abyssinian gladioli. Tall green leaves and large white flowers with deep purple centres. Really impressive.

Abyssinian gladioli

Abyssinian gladioli

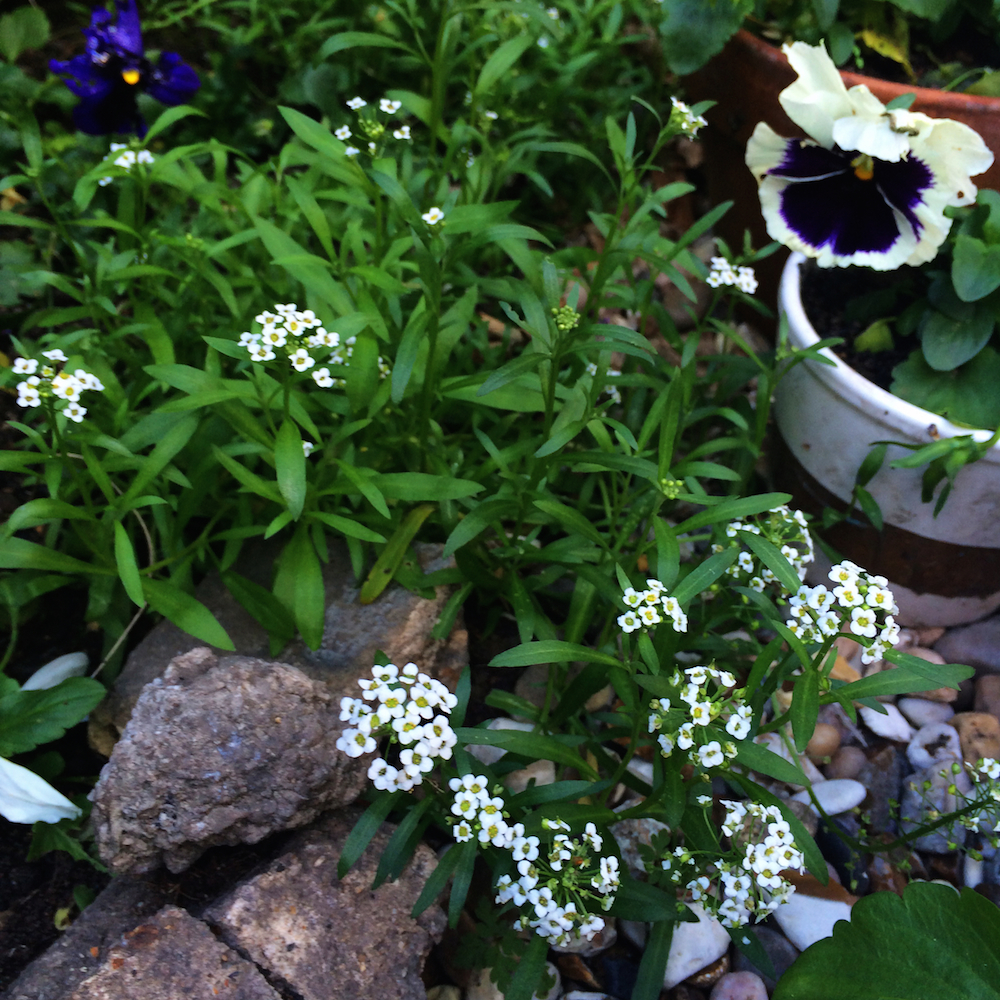
I scattered a few alyssum seeds around and they started to knit together to make little frothy mounds at the very front of the bed.

alyssum

alyssum

The poppy seeds didn’t take (Fairy Wings, a mix of white and pink field poppies), neither di the borage I sowed to fill in some gaps, but the seeds were old and we didn’t need the filler in the end. The angelica plant never flowered, though the leaves look parched so it probably has a disease of some sort, not that we’ve been able to identify it.

Our clematis that hasn’t flowered for years seems to have settled in well. One branch has entirely died while the other has raced all over and tied itself to everything it could get hold of. The honeysuckle didn’t flower this year either, which was somewhat disappointing. The philadelphus flowered fairly well and for longer than usual, so it must be happy to be out of its pot. And the star jasmine flowered for the first time in years. Only a few tiny little trusses of flowers, but still.

In the food garden we managed to get a handful of tomatoes but that’s all. The potatoes were lovely but we didn’t get that many. And finally the squash plants only produced one tiny little squash. We’re starting to get our heads round that we simply don’t get enough sun to grow food.

The pots are now full of pansies to keep us going over winter and I’ll be making a couple of large pots of “bulb lasagna” for layers of hope and colour from early spring.

progress! six months on

endless DIY

Sometimes you have to remind yourself to take a break.

We don’t go out much and we’re not big tv watchers either, but we do have one hobby that will take up as much time as we give it. That’s LOTRO, also known as Lord of the Rings Online. It’s a massively immersive game where you take your character into a rich, visual interpretation of Tolkien’s Middle Earth and there you interact with hundreds of other characters played by other real people, just like you. It’s not everyone’s idea of fun, I know, but we both love it. We play together, helping each other out and fighting orcs, goblins and trolls together. We could easily (and sometimes do) spend three or four hours playing. And sometimes we take a break for dinner before going back online for another couple of hours.

But when there’s this much DIY on the to-do list, well we tend to limit our game time to an hour here and there. This weekend we had a long session, to the detriment of our sleep patterns… A couple of weeks ago, after long sessions of DIY every weekend, booyaa went on strike, as it were. He downed tools and we spent the weekend playing LOTRO and cooking nice food, and we tried to simply enjoy our house for a couple of days. That was really nice. We’d both like to do that more often.

So we’re talking about rounding up some of the bigger projects. Looking at what we can complete and trying to have some time off before we start anything new.

So, current state of play for the bigger projects.

  • Finish off the dining room fireplace – we’re getting someone in to do that for us. Just waiting for them to slot us into their schedule.
  • Finish off the floor in the dining room – that was supposed to happen this weekend but one of the steps in the process took longer than expected and held up the whole project. Hopefully we’ll get the rest done next weekend.
  • Decorate kitchen, dining room, living room and staircase – all in one go, as soon as we’ve got the fireplace and floor finished in the dining room. Again, we’re not doing this ourselves. We’ve got quotes and it’s honestly not worth the hassle. Outsourced!
  • Landscape the garden – we don’t think we can afford to get someone in to do this (though we haven’t requested quotes) and it seems like too much for us to do ourselves, so we’re scaling back our plans and going to build just one flower bed for now. As long as there’s something to enjoy this summer.

Since we couldn’t work on the newly-sanded floor this weekend we spent about half of our time doing some of the smaller jobs that have been on the list for weeks. Plenty of things we’d started but never finished, or we were waiting for something to be able to complete it. Or just excuses ;) But we tore through a bunch of stuff:

Re-fitted the bedroom blinds and curtain poles (one of the blinds had a dodgy mechanism so we were waiting for a replacement; in the meantime we realised we’d have to move it around so that we could the drill into the tight corner we had to deal with). Now, to make the curtains. (Procrastination klaxon!)

We have a built-in cupboard in our bedroom. It’s just a rack of shelves in an alcove, nothing fancy. We’ve had each of the shelves piled up with bags of out-of-season clothes, spare duvets, guest bedding and so on. But we have so little clothes hanging space in this house, just the one tiny wardrobe, that we decided to convert it into a wardrobe. We’ve put two rails in, one at the back and high up for dresses and coats and the other at the front lower down for shirts. It’s a bit weird, but the space was too deep to waste. We’ve still got the highest and lowest shelves to use, too. So all in all, it’s maxed out all the possible storage space.

Following on from this, we sorted through some of those bags of clothes and bedding and vacuum-bagged as much as we could. Each of the bags then went into a plastic box and in the loft, out of the way.

Emptied the garden shed. We didn’t have much choice about this: someone answered our ad on Gumtree, so it had to be done! With any luck they’ll also take some of our gravel to use as a base for the shed.

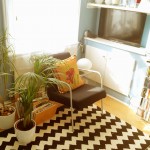
booyaa fitted the TV bracket in the living room. We started this weeks back, but the wall crumbled and we had to fill it with polyfilla, then we couldn’t get the huge bolts lined up and had to redo it. Ugh. It’s a very unforgiving piece of kit. You need a specialist drill bit and screwdriver because the bolts are so long and the slot is too wide for your average screwdriver. But at last it’s up and the tv is hidden away in the alcove. We can stop using the hallway shoe cabinet as a tv stand, to my immense relief.

Lastly, we hung up the hanging plant pot in the bathroom for our spider plant. It’s been sitting on the windowsill for weeks. Tiny job, but still.

And that’s where we’re at with tiny jobs. Next weekend we’ll revisit the dining room floor. The major jobs on the list will take up the next four to six weeks, but we’re not doing most of it, so it looks like we’ll get our weekends back very soon. Hurray! More time to enjoy the work we’ve done so far.

tools of the trade

Planning and costing is quite a complex business.

You need to work out what to do first. You need to get quotes or check multiple places online. Then you need to agree which one you like best or work out a budget. There are lots of lists, snippets of information, emails in different inboxes. How do you keep track of it all?

We use spreadsheets on Google Drive to make detailed cost calculations. We generally have a list of requirements down the left, so for the new bathroom, for instance, it would have lines for the various trades, each of the items of sanitary ware, floor and wall tiles, paint, cabinets, accessories and so on. Then we have two columns, one for the budget option and another for the one we’d really like, or if it’s a ‘nice to have’. Then we have links to products. That means we can calculate the cost fairly accurately and we know when we’ll be able to afford to do that. We can decide if we’d rather wait and save a little longer so that we can pick from the top-end column.

Spreadsheets are fantastic for this kind of thing. We use the online version purely because that way it’s dynamic: we can both edit them and see the changes in real time. If you have a gmail account then you have access to Drive. You could share a static file on Dropbox or similar instead.

For jobs we’re going to do ourselves or other house-based to-dos we use Trello. By default you get three columns in Trello: To do, Doing, Done. You can colour-code cards (that’s a single item) so we’ve got ours linked to different rooms and projects. You can comment, add notes, assign to someone on your team, set a deadline and more. It’s really useful. I mostly use it on my laptop, but the iPhone app is fully functional. It’s a free service, you just need an email address to create an account.

To get started, create your board and assign it to the team or invite interested parties so that they can see everything on the board. Make a card for every to-do. Colour-code or sort them according to your needs. If you have a complex project you could set up a separate board for that so that you can have different labels and rules. You can create/name your own columns per project on one board, but to be honest I’d have a different board for each project instead so you still follow the to do/doing/done method. As you tick things off you move them across the columns. It’s a very satisfying end to the weekend, dragging items to the Done column.

The last thing I’d add is that for bigger changes, whether they’re big on work or money, then mulling things over, sleeping on it, is always worth it. Just because you’ve planned it, doesn’t mean you can’t change your mind if a better, neater, or cheaper solution comes up. So give it time. For me, the desire to want everything done right now is tempered by perfectionism, wanting to get it right first time. So we never make a final decision straight away. We come back to it a few days later and see how we feel, or leave it on a to-do list until we know we’ve exhausted all our options.

sticky fingers

The kitchen worktops feel permanently sticky. If you touch them nothing comes off on to your fingers but there’s this annoying tackiness. I think it’s probably down to a badly implemented combo of Danish oil and varnish. We had a new worktop fitted along one side, so that we could move the sink and fit a dishwasher, and we decided to sand off the surface of the old worktop and then oil them both. Hopefully this way they’ll match by the time we’ve finished. The old worktop obviously is ‘seasoned’ now, so there might be a slight difference in colour, but we’re giving it a go.

So over the long weekend me and my hangover (so unfair! I had all of two glasses of wine last night) got out the little mouse sander and went to work. If you want to do this here are the things I learnt.

  • Whatever it was coating the worktop, there was a lot of it and it clogged up the sandpaper really quickly. booyaa suggested using a stiff brush to get rid of the build-up. That worked a treat. The layers of gunk weren’t wearing the sandpaper sheets out, it was just clog.
  • My secondary school woodwork teacher sat on my shoulder and reminded my to sand with the grain for the entire duration of the task. So that was nice.
  • Use the mouse’s nose to get into corners. If you have a nose extension (apparently it’s called a ‘detail finger attachment’ but we all know it’s a nose extension) you might find that useful for going over edges and corners. You’ll work out for yourself that the way you hold the mouse affects the range of sanding, and the little nose might help you even things up.
  • You’re going to get very dusty. It’s quite noisy and not really the ideal hangover activity. I used a very lightly dampened cloth to wipe away some of the dust so I could see where I needed to go over. A hoover is also a handy ally.
  • Sand until there’s not a single bit of sheen left. If it’s shiny, your oil won’t take. Since you’re going to all this effort you might as well get the best surface you can.
  • I used loose sandpaper and a sanding block to finish off the last few bits.

Oiling. This is not as messy as you might think, but I do recommend you do this once you’ve tidied up after dinner and leave it to dry overnight. You’ll need three coats before you can start using your worktop with gay abandon. In between, put all your trays on the worktop and use them. We had one for the kettle and tea-making gear. Another next to the sink for the compost caddy and soaps. The last one was for dirty dishes which don’t go in the dishwasher. That will save your sanity.

I used a fairly cheap own-brand Danish oil. Danish oil is a mix of linseed oil and varnish, and it’s sometimes called ‘wiping varnish’, which is a very accurate description. It’s designed to protect the wooden worktop but without creating a solid coat which varnish would do. I’ve since read up on these things and apparently the Best Ever Worktop Oil is called Osmo Top Oil, so I’ll be swapping to that in future. Here are your steps and recommendations for using standard Danish oil.

  • Make sure the surface is clean and dry. Use a lint-free cloth to spread the oil over the surface of the worktop.
  • Work slowly, apply a thin, even coat. Once you get to the end go back and wipe any excess oil away. There wasn’t any excess in my case, so perhaps I was a little stingy.
  • Make sure you cover the edges of the worktop too.
  • Leave to dry overnight.
  • If the grain lifts then sand lightly before applying another coat the next day.
  • After three coats the wood should be waterproofed and protected. Leave the final coat for 24 hours then, if you want, you can buff the surface to a shine. I chose not to.

(I tried taking before and after photos but you don’t appreciate the difference in a photo. At least, not with my poor photographic skills.)

let there be light

At last, we have lights!

living room light fitting

living room light fitting


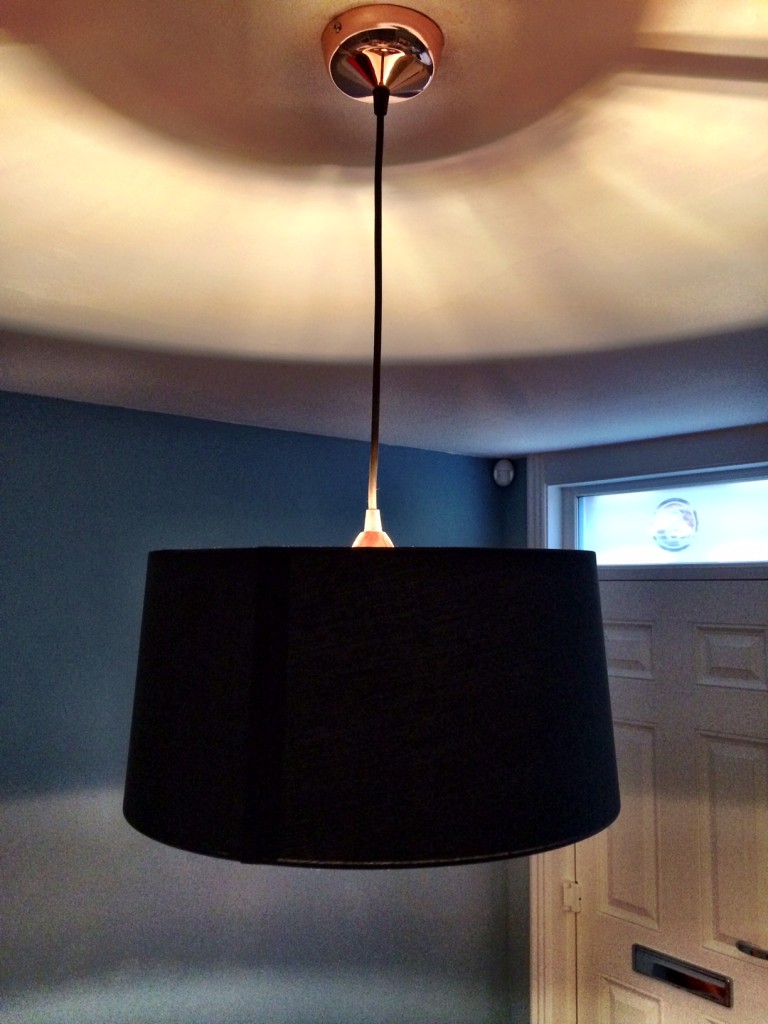
The living room light is from Habitat. It’s a plain black fabric shade with a copper lining, plus a replacement rose and cable (the existing light was an all-in-one) which is also black and copper. Looks a bit pants with the blue walls in here, but once we go dark grey I think it will be just perfect.

dining room light

dining room light

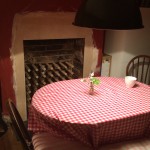
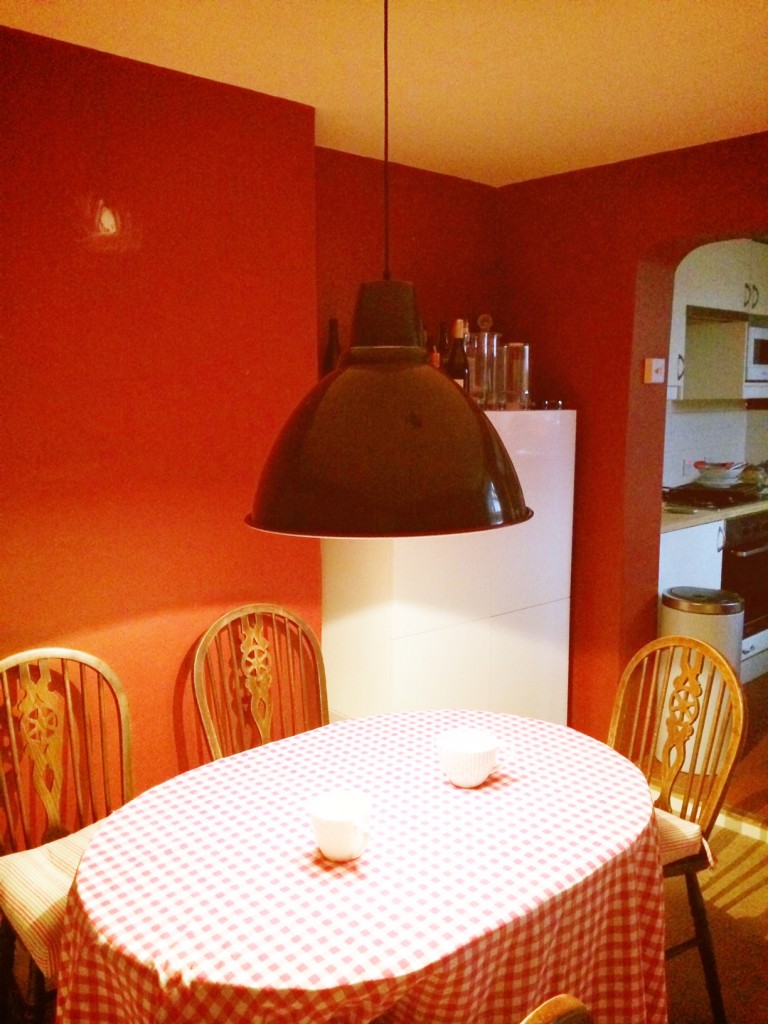
The dining room light is a trusty Ikea industrial style metal pendant. It’s huge. The cable is draped over a hook so that the light shines over the dining table. We’ll need a lamp or two in here, though, as the room is quite dark now that the main light is now low and off-centre.

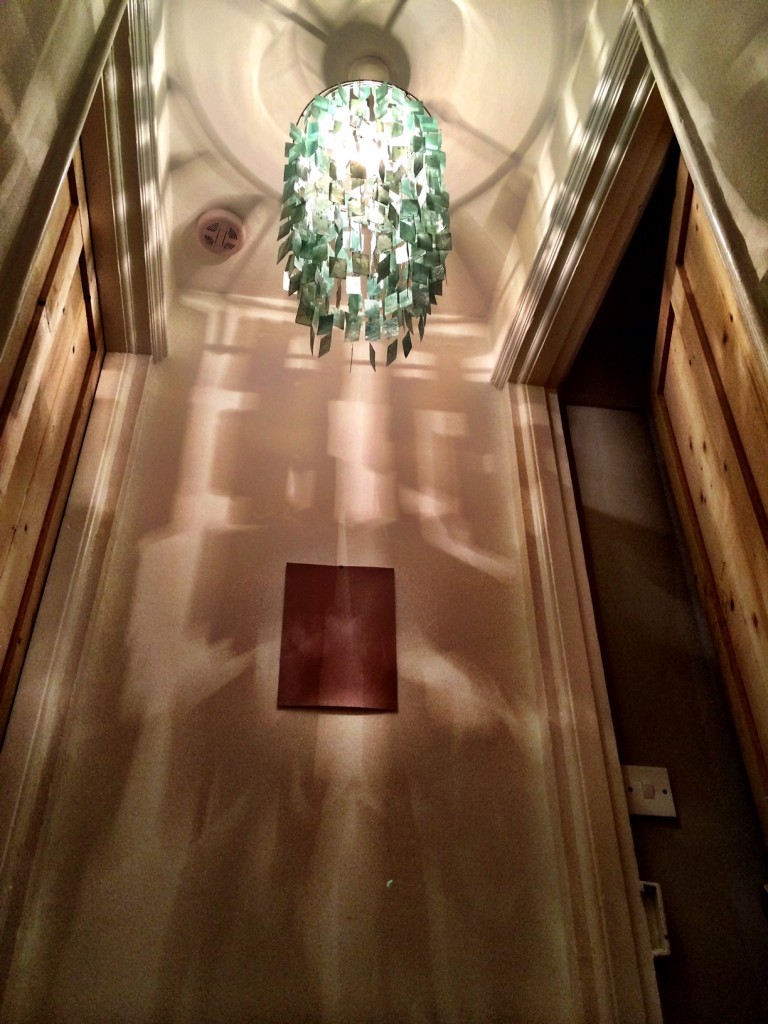
pendant light shade at the top of the stairs

pendant light shade at the top of the stairs


The hallway pendant is one we bought five years ago. It was a treat. It was quite pricey, but we saw it in Heal’s in Kingston and both loved it. It matched the duck egg accessories in our bedroom at the time and, well, we splashed out. The duck egg doesn’t go so well with the colour of the bedroom walls here so we’ve decided to put this up at the top of the stairs where the patterns it casts make quite an impact.

PRODUCTS
Habitat light fitting is the Pendel in copper with the Grande shade.
The industrial style pendant from Ikea is called Foto and comes in various colours in the smaller size. We opted for the extra large one in dark grey here.

down and out in Paris and Colchester

We’ve become plongeurs. With no dishwasher for the first time in oh-so-many years we’re taking turns with the Marigolds to manage the pile of dirty dishes I magic out of thin air each day.

I love cooking for us, but it’s tempting to choose freezer-to-oven-to-table dishes so that we don’t have piles of utensils, pans and bulky casserole dishes to clean afterwards.

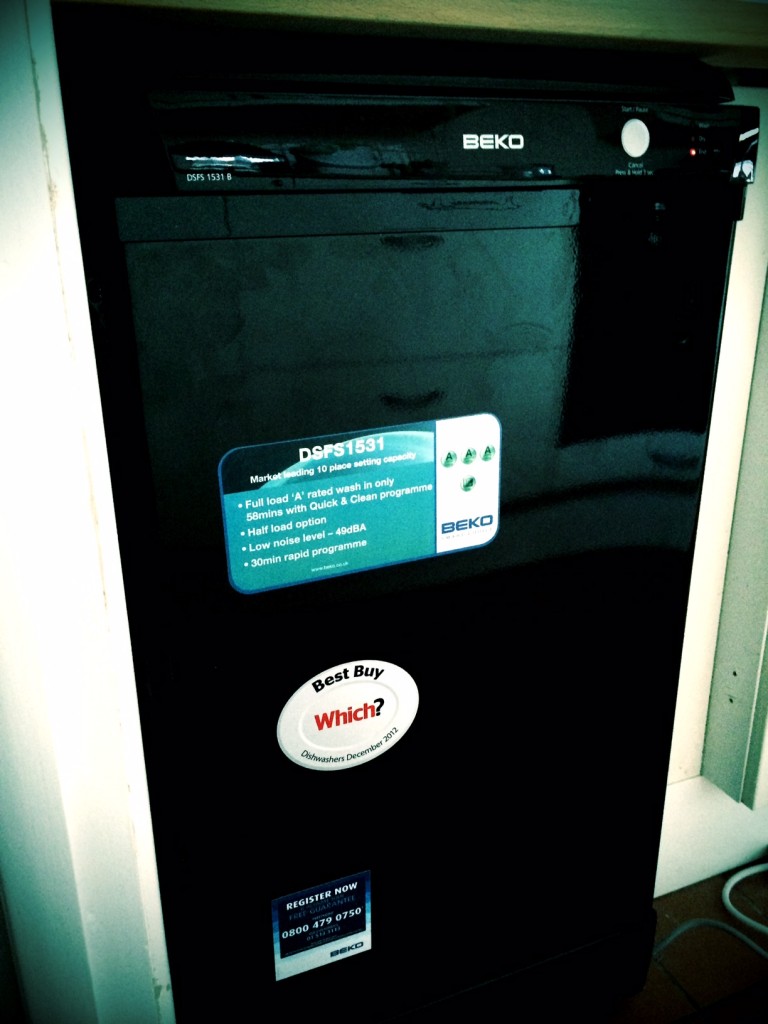
Light, though, at the end of the shift. Today we had a dishwasher installed. Since we’re making do with the kitchen as-is we also have to make do with a freestanding dishwasher. So I bought a black one, perhaps this can be Darth Maul (slender, matt) to accompany our Darth Vader (broad, shiny) fridge-freezer. A local plumber has a handy joiner-painter dad and between the two of them they moved the sink, pulled out one of the cupboards and plumbed in the dishwasher.

dark and moody dishwasher

dark and moody dishwasher

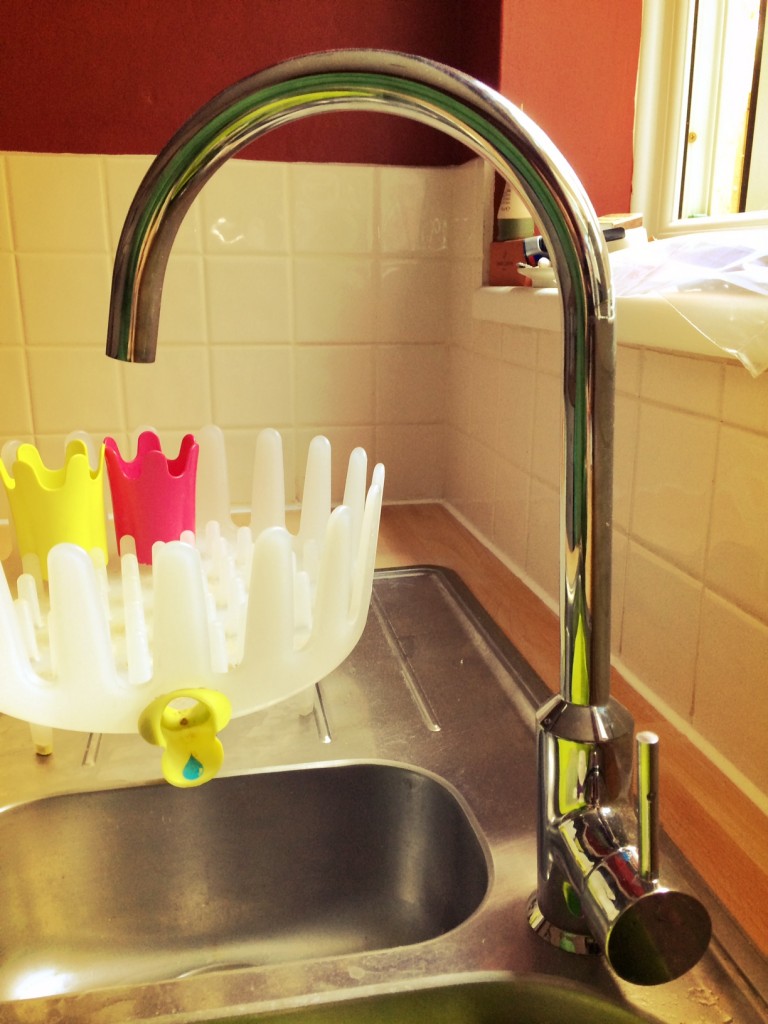
We swapped the stupid tap, too low to rinse a casserole dish under, for a super tall one. Shiny.

tall and shiny

tall and shiny

Next, Mr Joiner-Painter is going to paint the kitchen cupboards for us. This will help mask the bodged cupboard that’s become dishwasher space, and the unorthodox black appliances will blend in, too, since the lower cupboards are going to be dark grey.

Onwards and upwards.

PRODUCTS:
Dishwasher is a slimline Beko DSFS1531B in black. I bought it from Next Domestic Appliances. They’d sold out of the one I wanted in John Lewis… I wouldn’t normally use anyone buy John Lewis for a substantial purchase but buying from Next turned out to be fine. Customer service and delivery process was easy and helpful.
Tap is a Ringskär in chrome finish, £80 from Ikea.
Fitting by Hughes Heating/Hughes Home Improvements, who are super friendly and helpful.

keep on movin’

We have so many interdependent tasks and just can’t get it all done at the same time. Every Friday we make a list of Things To Do over the weekend, and we never finish them all. Most frequently it seems the problem is that we’re not accounting for problems which arise part way through. Like the crumbling plaster everywhere. Nearly every time we want to attach something to a wall or ceiling we have to fill the intended drill hole with Polyfilla (other brands are available) and wait for it to set before we try again.

But the real issue is that there’s nowhere obvious to start. So many tasks are linked to others, it’s really hard to choose the next thing. After a chat with a wise friend I realised the truth I’d known but not recognised for some time. Just get on and do something. Pick the thing that most appeals at that moment. Or the thing that’s going to make your day-to-day life easier. Just do it. (Other trainers are available.)

So from now on it’s just about looking at the list and doing one of the things on it. Accepting that I can’t do everything. Acknowledging that it will take time. There’s no van waiting round the corner with an instant makeover team and tv crew ready to transform the house in 2 days. (Thank goodness, really, as their décor choices are generally dire.)

So this weekend we did a little bit of gardening and planned the first phase of turning a yard full of gravel into a gorgeous garden. We got the kitchen ready for the dishwasher installation. We’ve given up trying to fit the new lights, and are going to pay to make it someone else’s problem. A few things went up in the loft to free up some space downstairs, and we crowbarred all the guest pillows and duvets into vacuum bags and shoved them in the sofabed. Vacuum bags are such a godsend. And we finally ate the slightly scary salsify. (It turned up in the veg box and we had no idea what to do with it. Hugh Fairly-Longname suggested roasting with garlic and lemon, so we did, along with beetroot and blue potatoes.)

We’ve met a few more neighbours. booyaa got help off a lovely couple and their daughter when the topsoil delivery arrived but our wheelbarrow wouldn’t move. And he chatted over the back fence to the guy next door who was procrastinating over mowing the lawn. But that was a great opportunity to chat about the ridiculous tree in the garden that backs onto ours. We’re going to team up and sort it out.

Next weekend is Easter, so we have 4 solid days. Might manage to get the carpet up finally. And I have to make four curtains (*procrastination klaxon*).

Come back to the 80s with me.