TIL

spring in the garden

Winter wasn’t very kind to the garden. So many plants withered to almost or absolute nothing. We were both despondent when March came around and there seemed to be as much bare soil as there was last June when we’d just started planting out. Two months later, though, and things are looking up. Plants we thought had died off have sprung back to life. We had some geraniums that I thought were evergreen but are, we now see, in fact deciduous, and they’ve filled out their patch and started flowering. The sweet woodruff died back to scraggy stems, booyaa was convinced it was never coming back, but it’s now a mass of bright green leaves and I spy the start of tiny flowers. (They’re such pretty plants. I hope they spread soon.)

sweet woodruff late winter starting to show new growth
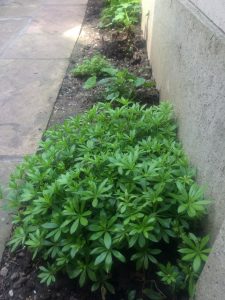
sweet woodruff late winter starting to show new growth


sweet woodruff in May

sweet woodruff in May

The rose bushes are two distinct stories. The older one (by a year) is zooming up the rose arch. Every few days I have to tie in another wayward branch as it reaches out to scratch you as you walk by. The younger rose has put on some growth but it suffered more over winter, and has had to fight harder to make its spring comeback. There are already over a dozen buds on them, which is about the total of last year from May to September. Looks like I might get an actual bunch of roses (as opposed to a single bloom) by my bed this year.

We had a number of biennials, mostly acquired from the lovely Ben at Higgledy Garden. Some of them didn’t make it – Betsy trampling, slugs, don’t know what else – but we prudently kept some in pots in our little nursery in the side return. So anything that didn’t make it over winter direct sown has been planted out in the past two weeks.

We tried direct sowing some wildflowers and other bits and pieces, but we don’t seem to have much luck. One patch was decimated by the pigeons (thanks guys!) and the other, well, maybe it dried out or didn’t get enough sun, I don’t know. So I’ve resown everything in those little coir pots and all the windowsills are groaning under the weight of seed trays. It’s working. We’ll have a second round of cosmos to plant out in a couple more weeks, we’ve got more alyssum (last year’s is still going, but you can’t have too much of that delicious honey scent, I say) california poppy and cornflowers (those colours will zing!) for the pots by the front door, calendula for Betsy’s garden (they’re non-toxic to dogs, so if she eats them it’s ok) and masses of dill to fill in any gaps in the main garden with feathery green leaves.

The chamomile that gets trodden on (and that Betsy likes to pee on) is looking a bit bashed and we’ve lost one or two plants over winter, but all around the edge of the patio where it’s been mostly protected by stacks of pots and the barbecue, so Betsy has kept off it, it’s lush and vibrant and gorgeous. I’ve just planted out another two dozen tiny plants to fill in gaps and start on the path to the shed. And there’s a tray of chamomile growing in the downstairs bathroom. It takes forever to grow into a viable plant. It’s a real slow burner. But by the end of June we’ll have another 40 or 50 plants to expand our scented pathways.

tiny little columbine has survived the winter too

tiny little columbine has survived the winter too

We bought a bench. We were going to upcycle the storage chest into a bench (and we still might) but we both knew it would take us a long time to get around to it. So, having seen a bench I loved, I scoured the internet for a similar but much cheaper option. It’s not first choice, design-wise, but now it’s in the garden I don’t care. The last two days I’ve been out with my morning coffee at 8am when it’s still quiet and enjoyed the sun, the birds tweeting and checking up on the plants everywhere. Watching things grow on a day-to-day basis is such a joy. Then Betsy barges in and tramples on tender plants, or barks at the birds and spoils my reverie. But still. (No photo yet. Will do that when it’s in its proper place.)

the pulmonaria made it through winter

the pulmonaria made it through winter

booyaa planted tons of bulbs last autumn. We bought some species tulips, crocuses and mixed snowdrops, which came up and cheered us from January to March. Then the big tulips started to come through in April. They took their time opening, but the garden right now is a riot of big, blowsy flowers. They’re all pretty over the top, especially compared to my usual restrained palette. We have huge white-tinged-with-green flowers, they’re as big as peonies. Then slim, pointed ones in a deep purple (much darker and more velvety in real life than they come out in the photo). Then there are some bright pink multi-headed ones, just about to open up. We can see the glossy, strappy leaves of alliums poking through, too. June should see a haze of purple take over the garden if they all come up.

blowsy tulips

Last year’s nigella has self-seeded everywhere. We had some in a couple of pots and a neighbour gave us some dried seed heads which I tied upside down from an obelisk and now we’re awash with them. I’ve noticed that between the nigella, chamomile, cosmos and dill we’re going to be very feathery come high summer.
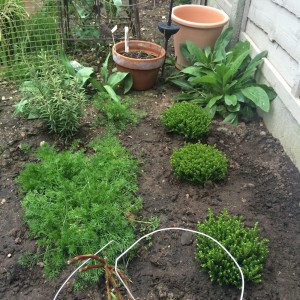
self-sown nigella and new shrubs along the fence

self-sown nigella and new shrubs along the fence

The deciduous honeysuckle, which has barely grown and never flowered since we got it – counts on fingers – 8 years ago, is romping up its obelisk like a crazy thing. It will need cutting back and retraining since it’s all lopsided from being retrofitted to the structure, but I’m quietly confident it’s happy now, we’ll get some flowers soon, and next year, with some careful tying-in, it will cover the obelisk from top to bottom.
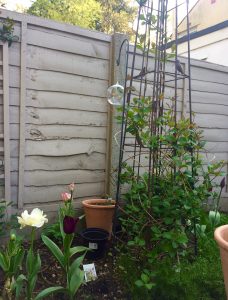
honeysuckle climbing skywards

honeysuckle climbing skywards

Garden bargain hunting has gone well this year, with the discovery of lovely terracotta pots from Wilko at £10 each. They look just like your traditional Italian pots, rolled top and all, that normally cost an arm and a leg, but they’re a tenner! I can’t quite get over it. So we’ve bought lots of them. We’ll have plants moving round the garden to fill in gaps and these look just lovely in among the greenery.

you can spot one of the big rolled-top pots here

you can spot one of the big rolled-top pots here

The side return’s little nursery has been great and saved us so much money. It’s just a metal wire shelf unit we picked up for about ten pounds at Wilko but because the side return is fairly sheltered we’ve been able to overwinter young plants there, and now it’s spring we’re hardening off seedlings and growing them on before they go out into the garden. It’s meant we haven’t bought many full-size plants or plugs from the garden centre, other than a couple I picked up on a whim. (I’ve got a lovely marguerite that I just couldn’t walk past, and some trailing lobelia for containers and baskets.)

We’re trying slug-killer nematodes for the first time this year. We’ll be doing the second treatment this weekend. You do two treatments, six weeks apart, to first kill them and then break the breeding cycle. We still have a few snails around, but there’s a lot less damage to plants than we’ve had in previous years. Fingers crossed. Also on pest/disease/garden downsides: we’ve not had too much bother with weeds over winter and into spring. i’ve pulled out a few blades of couch grass trying to muscle in on the chamomile and there’s something that looks like speedwell that I’m just leaving because I like it. There’s another weed/wildflower depending on your take which next door are inundated with that creeps into our side that I’ve been ripping out. (I’ve forgotten its name. Big bright green leaves, tiny blue flowers. Like a forget-me-not’s ugly big sister.) We have a stripe of unidentified seedlings that I’m hoping I sowed last year and they’ve finally germinated. Otherwise we’re about to get eaten by triffids, because boy are they growing fast. The tiny tender buds on the roses are starting to attract aphids so it’s time for Vitax 2-in-1 – it worked last year to clear them and let the buds grow to full flowers.

pots of pansies along Betsy's fence

pots of pansies along Betsy’s fence

DIY-wise, we’ll be painting the shed and the storage bench – just as soon as I can decide which colour to choose – and making a brick platform to put our new bench on. (The bench is currently sitting with its legs about five centimetres submerged into the soft topsoil.) I’ve made a start on painting the back door, though I didn’t get the last coat on before rain stopped play last weekend. It will need replacing soon, but we’re hoping three coats of paint and some woodfiller will keep it going for another year or two. And the patio and side return need cleaning. The rose-coloured stone has an unpleasant greenish hue. I’m going to try a mild cleaner and scrubbing brush first. If that fails I’ll be asking a friend to lend us his pressure washer.

And that’s your springtime garden round up for 2016. It’s been hard work and there’ve been plenty of disappointments along the way but even now, only half finished, it’s a lovely place to spend your time. As it fills out towards mid-summer it’s going to get better and better. It will be full to bursting with plants and flowers, scents and textures, buzzing bees and fluttering butterflies.

how to adjust a door hinge

I know, a serious post title. Whatever next?

After replacing the living room floor (which I’ll post about later this week) we found that the front door stuck when you opened it fully. The door’s been a bit of a pain since we moved in, as it needs a good slam to close. Then the type of lock is a newfangled thing that we’re not used to. So this was enough to spur me into action.

I looked up adjusting the uPVC door. Amid loads of really unhelpful advice and confusing explanations I found two forums which made it really clear. Thanks, community.screwfix.com and mybuilder.com.

You can adjust vertically and horizontally. So if your door has a gap at the top and scrapes along the floor, you need to jack it up. If you have a gap down one side or your lock is too tight you’ll want to move it sideways. When there are three hinges the combination of adjustment options gives you a fair bit of control.

Our door tilted to the right at the top, which means when it swings open the lock side of the door hits the floor before the rest of the bottom of the door. You can see the gap between the door and the frame is wider at the top than at the bottom. To straighten the door I needed to tighten on the horizontal. The way you do that is by turning the screw that sits on the side of the hinge. In my case it was a clockwise to tighten, as it should be. Tighty righty, loosey lefty.

Different types of hinges and different manufacturers offer different adjustment options. Some have adjustments within the pin itself. In that case you need to pop the cap off the top of the hinge and use a screwdriver to lift/lower the door on the pin. Ours only has the hex screw set into the right of the hinge. The pin isn’t adjustable.

So, allen key in hand, I adjusted the top hinge, which was clearly the culprit, and then tightened the middle hinge a little, as advised, to keep the door straight. We tested the door and adjusted bit by bit until the door stopped sticking on the floor when it was fully open and the gap between the door and frame was even all the way down.

booyaa locked himself out and let himself in again to test that my changes hadn’t affected the locking mechanism (which can happen, if you move the door the lock doesn’t line up the same as it used to) and – bonus! – you don’t need to slam the door to close it anymore. I was so happy. I patted myself on the back and demanded booyaa do the same.

Are we there yet?

The bathroom isn’t finished. I know. How long does it take? Well, we were away on holiday for a week and the bathroom fitters were going to complete the bathroom then. We got back to find a few things that needed changing (some of which, it turned out, we couldn’t change) and a couple of things which that the builders wanted to discuss before going ahead.

Things I wasn’t happy about but we couldn’t change mostly came down to a combination of wonky and fragile walls.

The toilet unit, after all that fuss, has a gap of about 15mm at the top rather than sitting flush with the wall. (flush! a joke! totally not on purpose.) The argument goes that the unit is snug at the bottom but the wall is wonky on both the vertical and horizontal plane so by the time we get to the top there’s a noticeable gap. (Solution is to put a trailing plant on top of the unit to mask the side. I think it might work. Fake it till you make it and all that.)

The electrics were a bit of a nightmare too. We’ve ended up with 3 unattractive boxes on the wall above and to the side of the door. One is an isolator for the fan and it’s in a fairly good place and not too prominent. The next one would ordinarily go the other side of the ceiling and you wouldn’t see it but that room’s loft space is almost inaccessible so it’s on the wall instead. A bit wonky, unfortunately, and not intended to be on display. Finally, there needs to be an isolator type box for the Saniflo and the volume of cables requires a big chunky box. There was an alternative suggestion, when I said it looked awfully messy and I’d like a better solution, to put all threee boxes in a single box. I said “Yeah! Let’s do that!” and then they said, “Except your bricks crumble as soon as you look at them and we wouldn’t want to have to make yet another channel through that space which should have a lintel but doesn’t.” Basically the ceiling might fall down… So that’s pretty much ruled that out.

I don’t like the placement of the extractor fan. It’s too prominent. Because the ceiling slopes on that side it means the fan is very much within eye-level range, so I’d have preferred it tucked a little more into the corner. But meh. I can live with it. (Qué remedio.)

They didn’t fit a shower pump as there was a misunderstanding between the plumber and the project manager, and it’s not as cheap or straightforward as they’d led me to believe, so they want us to live with the shower and make our minds up later.

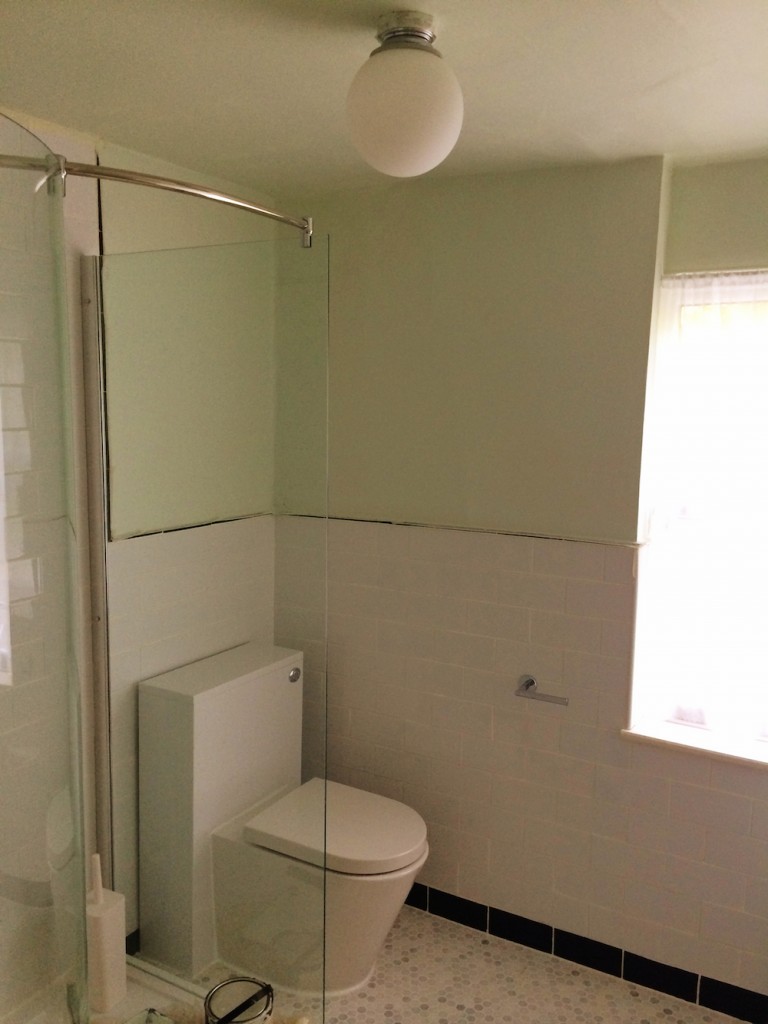
The floor needed sealing very last of all, and that happened on Friday. Since then we’ve started on the painting. booyaa spent hours on Saturday sanding down the plaster over the crumbled bits and channels they made for cables. That was quite a feat. Today he masked off the bathroom and did the first coat. We think the colour will turn out to be the right choice, but we’ll reserve judgement until the second coat is on and the accessories are in.

mid-painting, which is why you can see masking tape, and a pot of paint in the shower...

mid-painting, which is why you can see masking tape round the tiles, and a pot of paint in the shower…

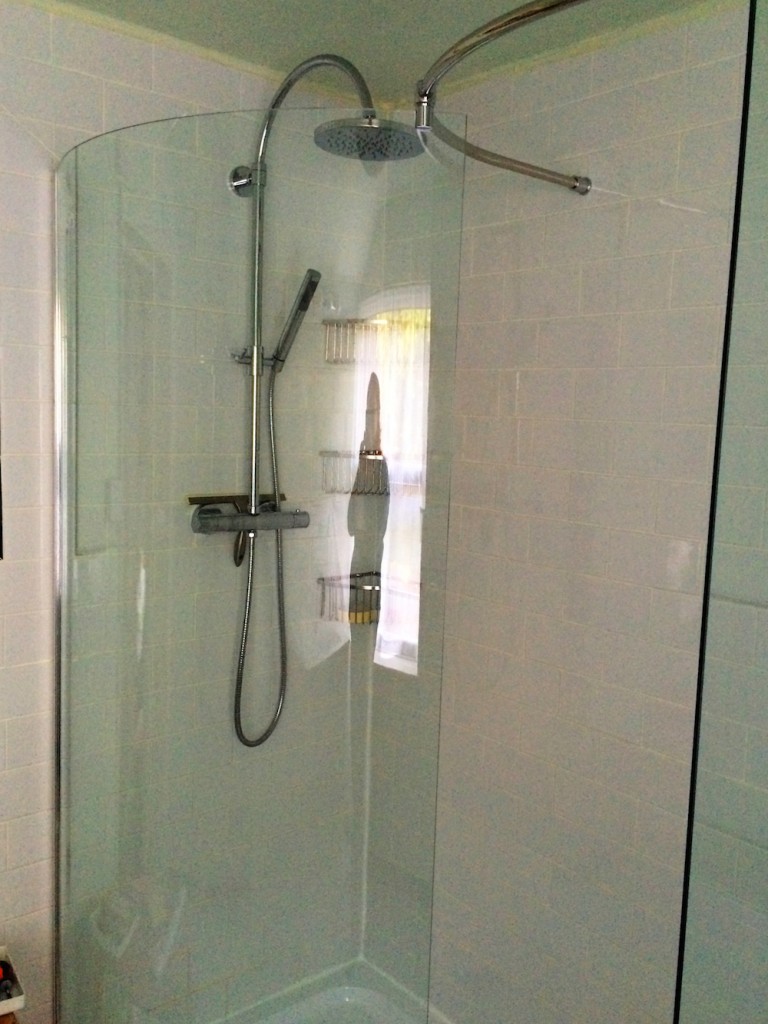
One exciting thing is that we’ve both had middle-of-the-night trips to the loo without tripping down the stairs. Hurrah! And we’ve both tried out the shower. Hurrah! The shower is very nice. I love walking straight in with no doors. It also looks nice with its curves. And the overhead drench showerhead is just amazing. I’m so used to wetting my hair by tipping my head back but with this one practically your whole body is getting wet at the same time. The thermostat is great. You set it at the right temperature and it won’t go above or below it. We tested out the water pressure. While I was in the shower booyaa flushed the downstairs toilet and ran the taps. I noticed a drop of pressure but at least it didn’t turn cold. We think we’ll go ahead with the shower pump having experienced the pressure drop. In the mornings here the pressure is really low as everyone in the street is competing for water from the mains. I had cold showers for days on end because the pressure was too low for the boilet to kick in. No point having a fancypants bathroom if you can’t have a good strong shower.

bathroom-nearlythere-shower

tricky getting a good shot of the whole shower but hopefully you can appreciate the beautiful curved glass, which is not that green in real life

THINGS I’VE LEARNED
What have we learned so far, now we’re near the end?
Have all the walls straightened before you start. I would definitely, were I to do this again, have the whole room reskimmed to get it as straight as possible.
Don’t go away, even when you think the builders have nearly finished. It’s so much easier to choose to do something a particular way than change it after it’s been done the way you wouldn’t have chosen.
The picture you have in your head is absolutely the Perfect World scenario. Dial down your expectations. If you don’t, you’ll be disappointed with the real thing when it’s presented to you.


bathroom building: week one

The bathroom building begins! Here’s how week one went.

DAY 1

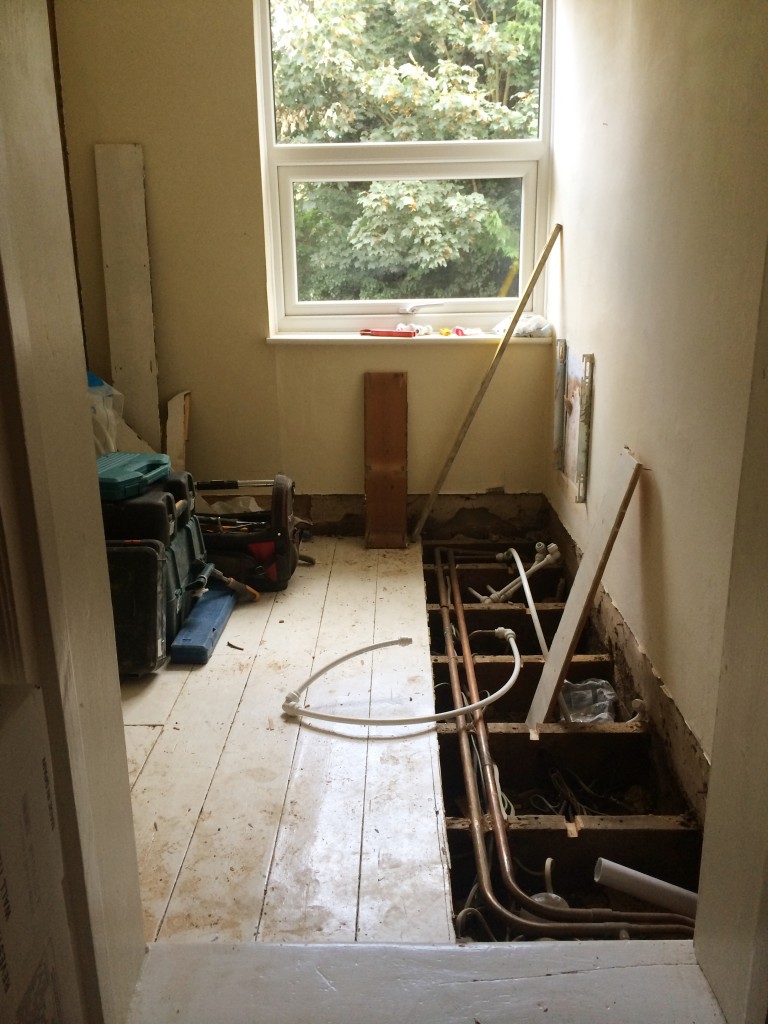
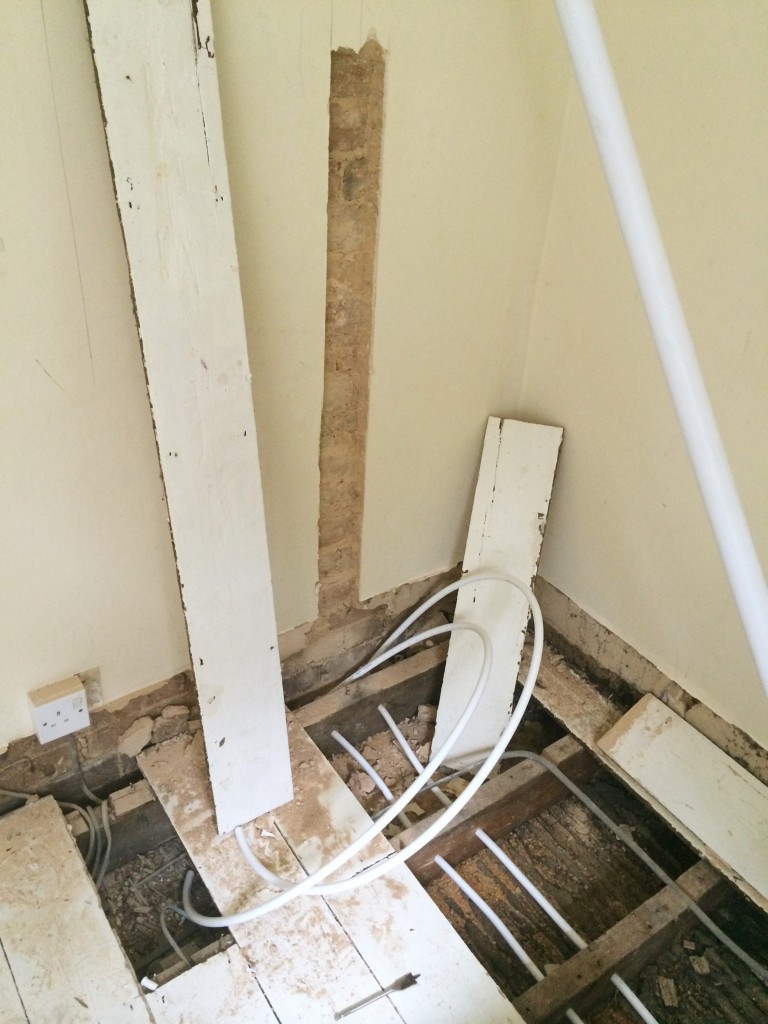
The plumber pulled up the floorboards, and investigated the existing pipework from the heating. He dismantled the boxing round the boiler and attached pipes to take the water upstairs.

First gotcha came along, with a problem of how to get the pipes from our main water entry point through the floor. An error of judgement during the planning stage meant they thought the boiler was under the bathroom-to-be, but it’s not. Directly above the boiler is the flat roof. A phone call to the boss resolved the issue. There’ll be some more pipework on show in the back lobby, but we care not a jot. It’s a place of passage, we won’t notice it. There’s going to be a small box in the kitchen to cover up where the pipes go upstairs, but again, we don’t mind. It’ll be fine once it’s painted. Plus, hopefully we’ll have the kitchen redone in a couple of years and we tackle hiding pipes neatly then.

We had to duck under dangling pipes to get into the downstairs bathroom, which was interesting. They’re now partly hooked up, so we’re free from accidental middle-of-the-night garotting.

pulling up floorboards

pulling up floorboards

DAY 2

3 men with drills, stone cutters, hammers and chisels took the house apart. We have gaps in the brickwork, pipes dangling out of internal and external walls, great chasms cut into the walls of the bathroom.

There’s dust EVERYWHERE.

starting to make holes in walls

starting to make holes in walls

DAY 3

The plumber spent the day finishing off the pipework. All the pipes are now in place and joined up. They’re not all fixed down, but we have water upstairs now. high fives

The electrics are half done with cables ready for the extractor fan and the mirror light. The socket and light switch have gone.

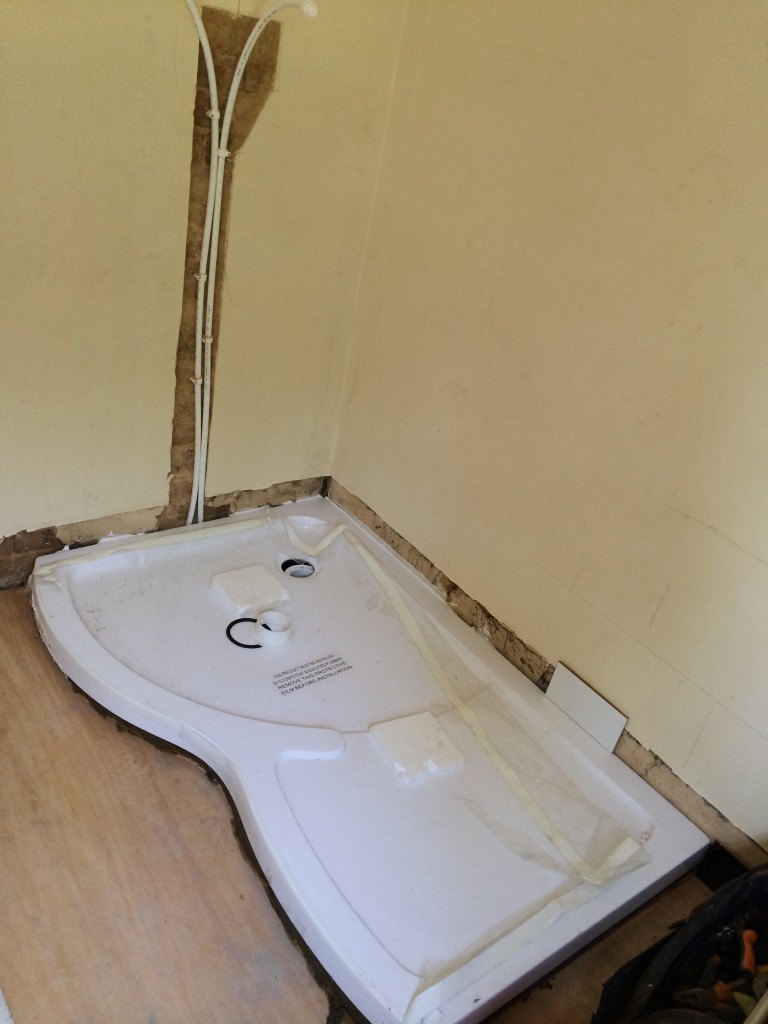
The floor is partly covered in ply, there’s a layer of cement and the shower tray is set into it. My first purchase to be used. Have I made the right choice? It looks smaller than I thought. minor panic

An hour later booyaa came home and said something along the lines of, “Whoa, that’s huge.” So maybe it was just bathroom planner’s nerves.

shower tray sitting on its cement base

shower tray sitting on its cement base

DAY 4

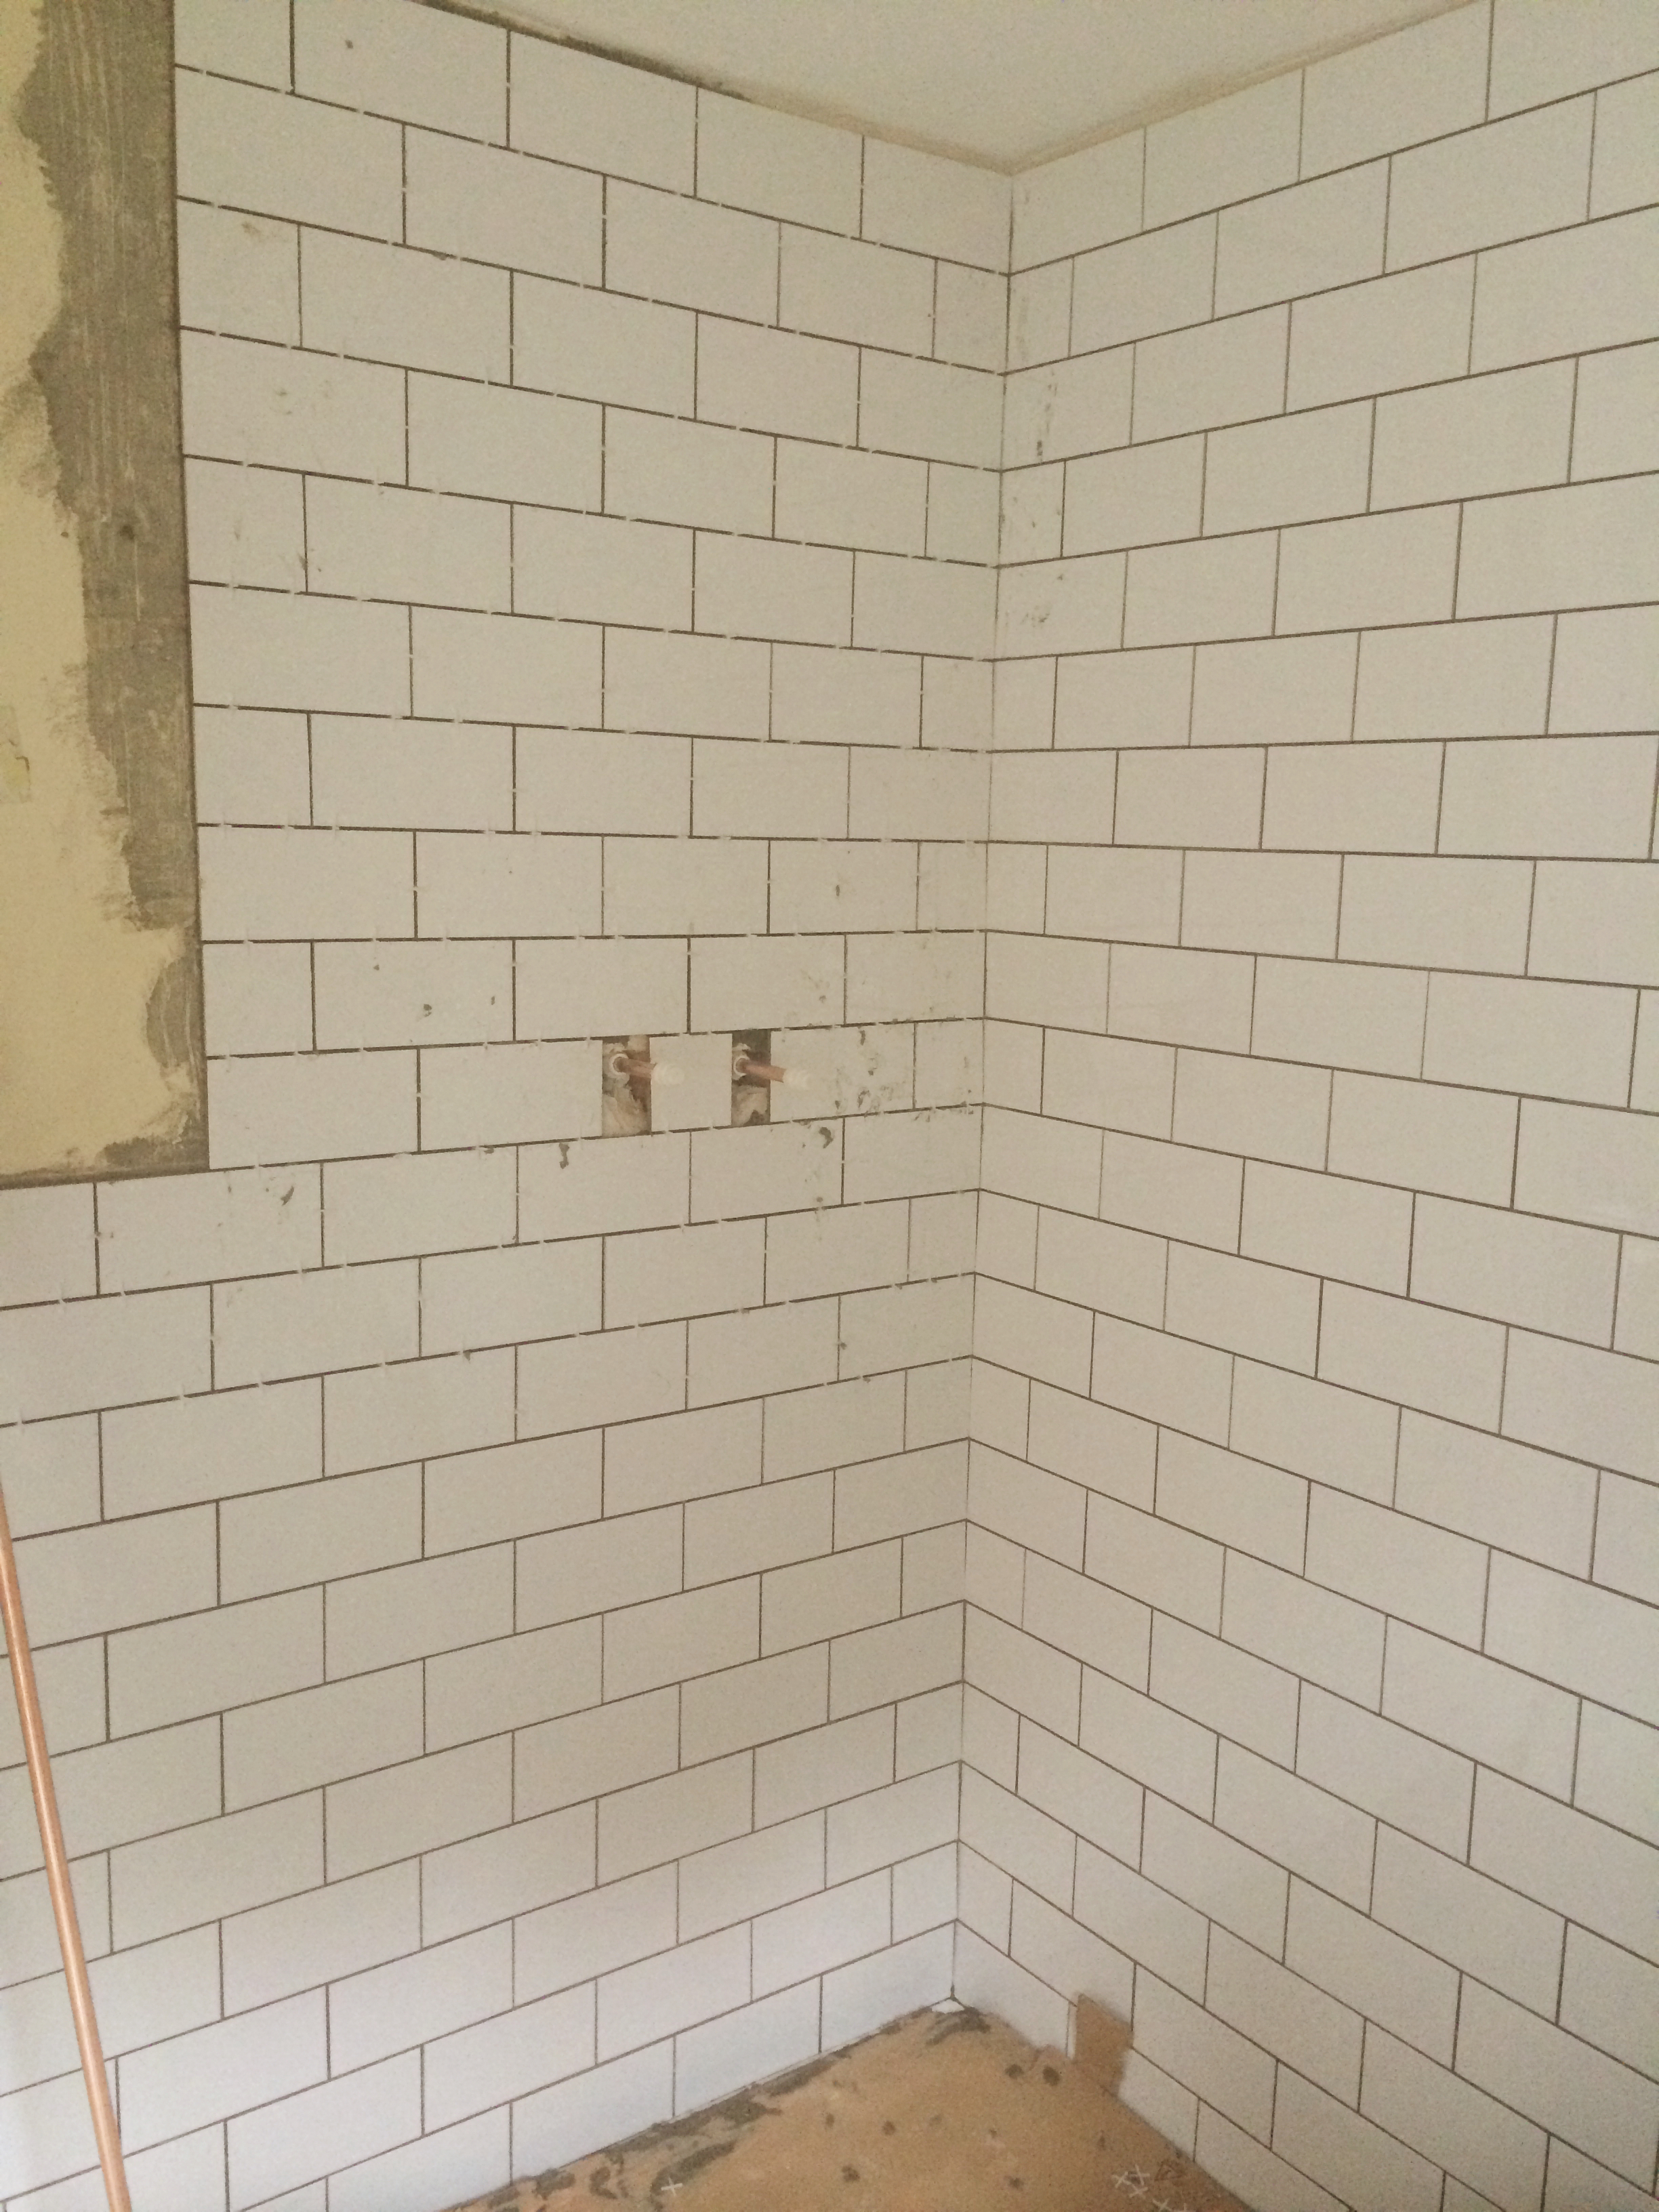
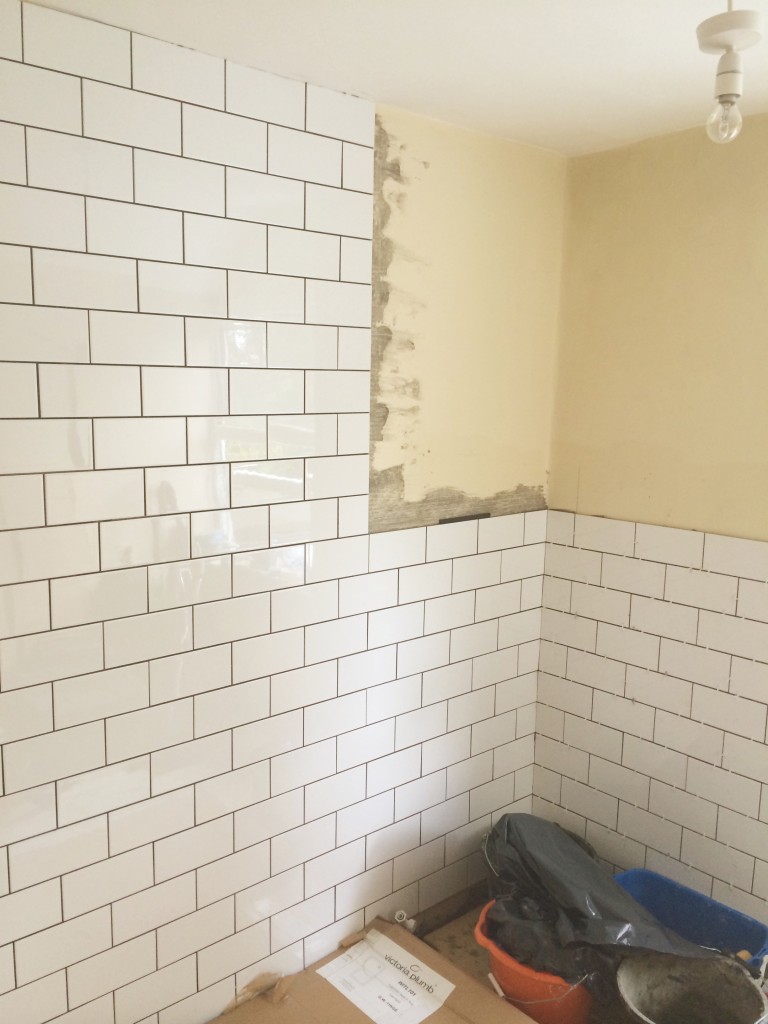
The tiles are going on! It’s really starting to look like a bathroom. There’s a wall and a half done so far. They’re not grouted yet, so it’ll look cleaner with white grout instead of grey adhesive.

tiles!

tiles!

It’s very tempting to sing Down in the Tube Station at Midnight in here.

And that’s it until Monday.

THINGS I LEARNED

Smaller tiles are fiddly and take longer to fit. Which is obvious when you think about it. But if we’d chosen large format tiles, as is the trend these days, they would have looked horrendous because of our wobbly walls. The plumber, with his tiler’s hat on today, said we’re much better off with smaller tiles. He’s able to compensate for the bumps and lack of square corners. If we’d used large format tiles they would have been wonky, or, presumably, we’d have to have the walls replastered first.

showered up

We decided we wanted a bathroom upstairs. We had no idea how much it would cost, but going to the loo in the middle of the night with the perilous staircase we have, well, it’s not much fun. Having a shower in the bath? I’m so over it. Time for a real, walk-in shower. We considered upgrading the downstairs bathroom to have a decent shower in it which would have been a relatively cheap upgrade, but that wouldn’t fix the coming-downstairs-half-asleep issue.

So we got some quotes from bathroom fitters, took the one who actually turned up when he said he would, and got planning.

We didn’t go to a one-stop bathroom shop as I expected that to be really expensive. It’s undoubtedly more stressful doing it yourself, but it means we got to choose our products from the places we wanted them from, rather from the range a high street bathroom shop offers. I felt like the bathroom fitters were advising me on the best I could have for my situation, not on what would cost the most, because they would only get paid for the work they did. It made no difference to them what type of taps I wanted.

Going through our requirements and wishes with the bathroom fitters meant changing a few things I’d chosen as they wouldn’t work. There were a couple of issues I hadn’t considered. Things I learned:

WATER IN-WATER OUT

If you currently have a bathroom downstairs in an extension added on to the kitchen, and you’re planning on installing a brand new bathroom upstairs you need to consider how to get the water up there and the waste back out again. You will probably need to put pipes up from the kitchen or wherever your boiler is through the ceiling and into the room above. You might end up with a few pipes running up the wall in your kitchen or new boxing inside a kitchen cabinet.

There’s a minimum ‘fall’ required for waste. So you can’t have a straightforward horizontal pipe from your shower running under the floorboards to join the pipes that run down the outside wall, as it’ll just clog up. And without putting you off your breakfast, the toilet is an even more tricky matter. We were persuaded that a Saniflo was our only option without having to cut the backs out of kitchen cupboards to accommodate some considerable boxing. We plan to renovate the kitchen and remove the existing bathroom, but we can’t do that yet, otherwise we could combine the two projects and resolve the waste issue. Never mind. Saniflo it is. (Don’t read the Mumsnet thread on the joys/horrors of fitting a Saniflo if you’re remotely squeamish.)

TILING

The floor is at a slight angle in that room – great for shower waste, not so great for getting nice neat rows of tiles. Equally, wobbly walls with crumbly plaster. Fun tiling times! The tiler tells me that smaller tiles are more accommodating for getting a good finish on wonky walls. Big tiles are quicker to fit. We’ve got brick tiles which he says are fairly forgiving, as long as they cut well. Another “who knew!” moment – different tiles are more/less easy to cut. It’s obvious when you think about it, but some are fragile and will crack raggedly. Others make a good clean break. Our marble mosaic tiles are probably not cuttable, so let’s hope the hexagonal form fits round the curved shower tray.

FLOORS

Despite it being an old house we don’t need to strengthen the floor before we put in the sanitary ware. I had assumed we would. There’s a lot of very heavy stuff going in that room. But two different plumber-builders said it’s not necessary, so let’s trust them. They will seal the floor with plywood sheets before they tile, but we could have had that done under the floorboards and not had floor tiles. That would have been a much cheaper option, so consider that if you like the painted floorboards look and are on a tight budget.

SHOWER PUMP

I want a super-drenchy shower so we need a pump. In our case it’s getting installed next to the boiler downstairs and will kick in automatically when the hot water is turned on in the upstairs bathroom. The pump is a pricey piece of kit, but unless your house is blessed with amazingly high pressure water flow, you’ll need one for a decent shower experience. Especially if the boiler is downstairs. If you have a water tank in the loft you might be ok. Aah, gravity.

So that’s what I learned. Here’s what we had to do to get this ready.

PRE-PLUMBER PREP

The study never really finished becoming a study. I worked in there a few times but thanks to foot-thick walls (sturdy house, this) the wifi signal collapsed before it got to my desk. So I mostly worked at the dining room table. I never finished unpacking and sorting everything out. It became a bit of a dumping ground for things that didn’t have a home. When we made the decision to install the bathroom we started creating a study corner in the guest room, but never dealt with the random stuff left in the ex-study.

The week before the bathroom fitters were due to arrive we finally faced our demons. We opened the boxes and sorted them into bin/recycling; find a home for them in the house; repack and put the box in the loft. We tidied the guest room and organised the boxes of bathroom stuff so that the plumber and tiler and whoever could actually get in and do their work.

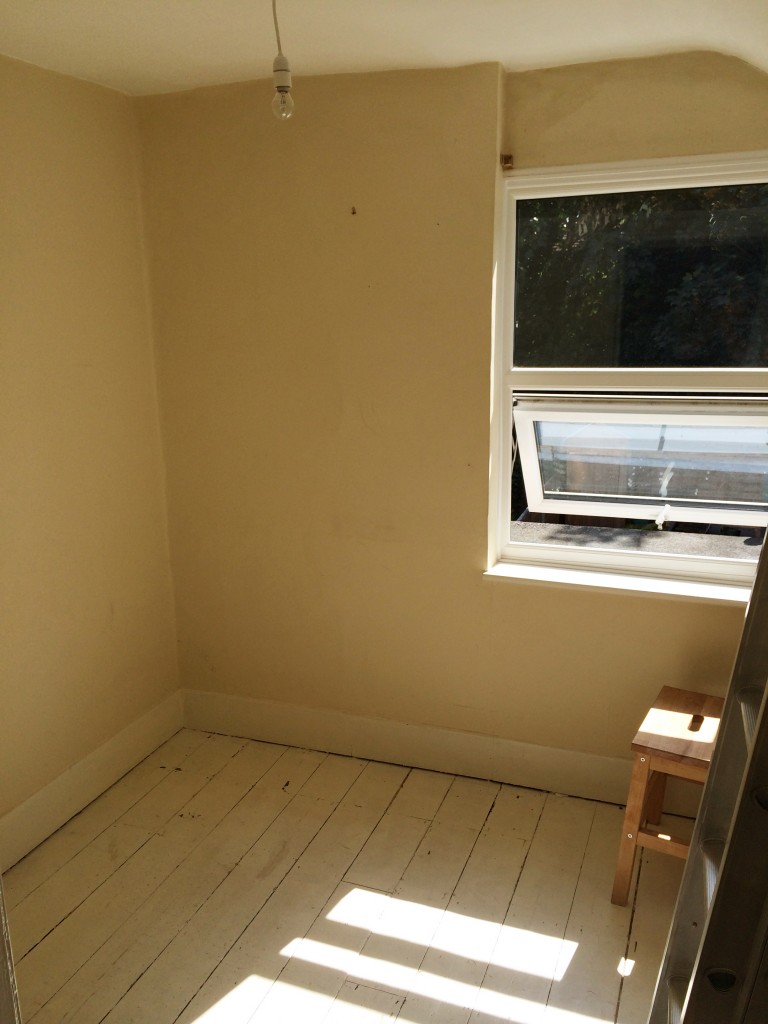
empty room, ready for bathroomising

empty room, ready for bathroomising

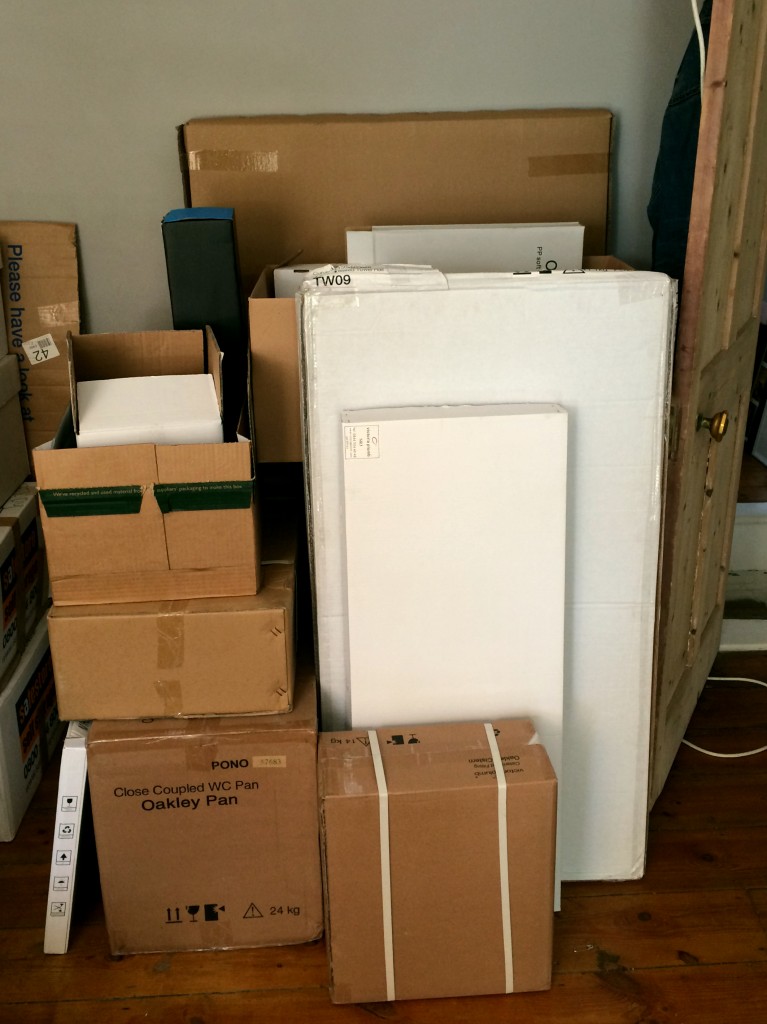
boxes of sanitary ware and fittings

boxes of sanitary ware and fittings

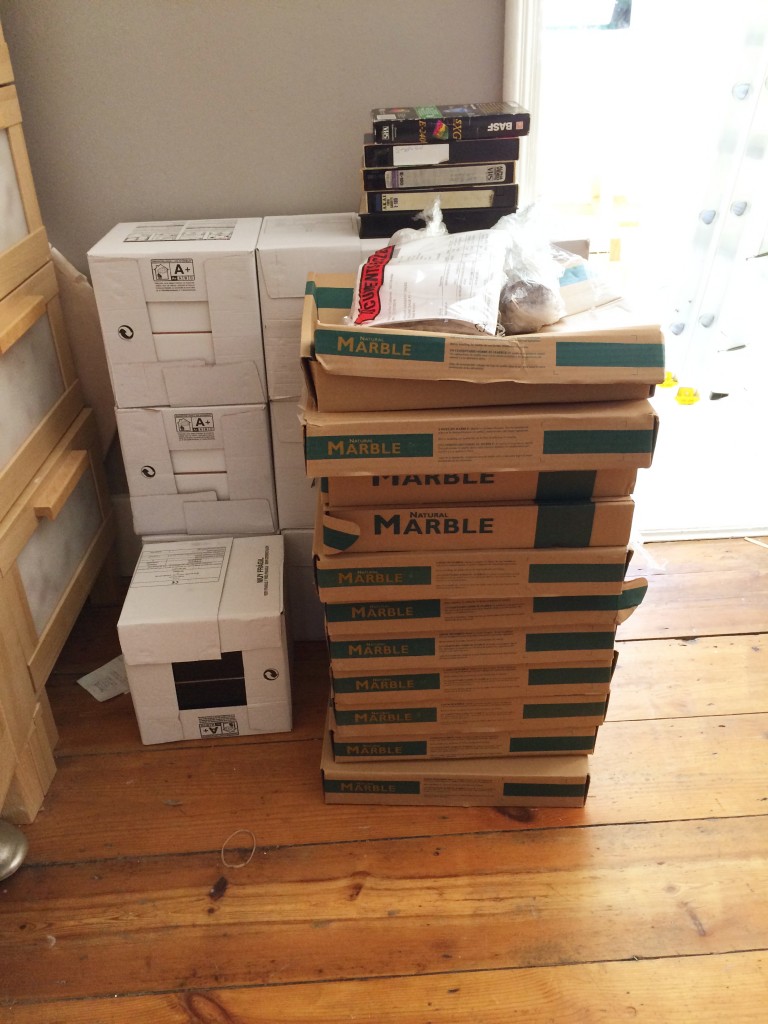
piles of tiles

piles of tiles

NEXT: bathroom fitting, day by day.

utterly floored

This has been a ton more effort – and cost – than we’d anticipated. It goes in four stages: ripping up carpet and repairing floorboards; sanding the floor; finishing with varnish or paint. Here are stages 1, 2 and 3.

Three weeks ago

ICKY CARPET
The carpet in the dining room and up the stairs smelled of cat pee (even after dousing it repeatedly with a cat-pee treatment spray) and was a depressing beige colour. Both of us had decided we wanted to pull it up and restore the floorboards underneath. Bare floors look great and are easy to keep clean – and since we’re planning on getting a pair of puppies soon it’s a more sensible option.

What concerned us, though, was that in a number of places you could feel a depression in the floor under the carpet. I was worried we’d have unusable boards. We did a quick exploratory carpet lift in the tiny square at the bottom of the stairs and our hearts sank. It was covered in two pieces of board of the sort you’d use to board out a loft. Boards on the floor, yes. Floorboards, no.

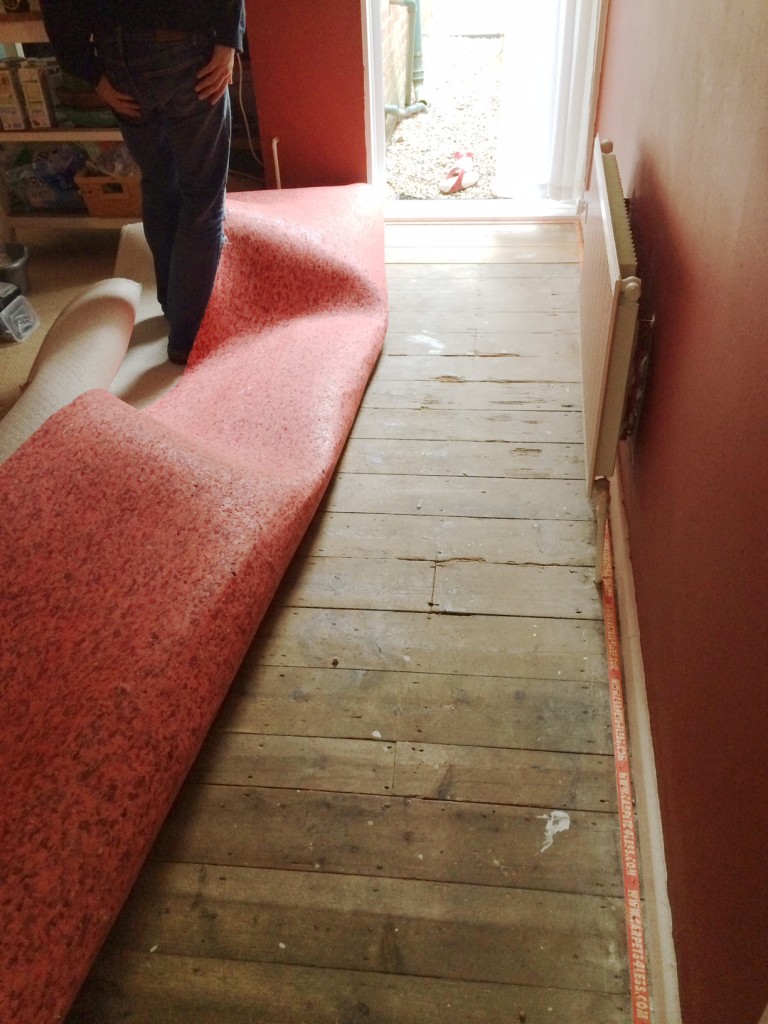
A week later we removed the whole carpet. We cut it into strips and rolled it up. It’s in the shed. Another thing that needs to go to the tip. What we found when we lifted the carpet was a fairly decent if dirty and smelly floor. We let it air for a few days and then I gave it a really good scrub. It came up a shade lighter and didn’t smell quite so musty. Progress!

floor-removing-carpet

Pulling up the carpet

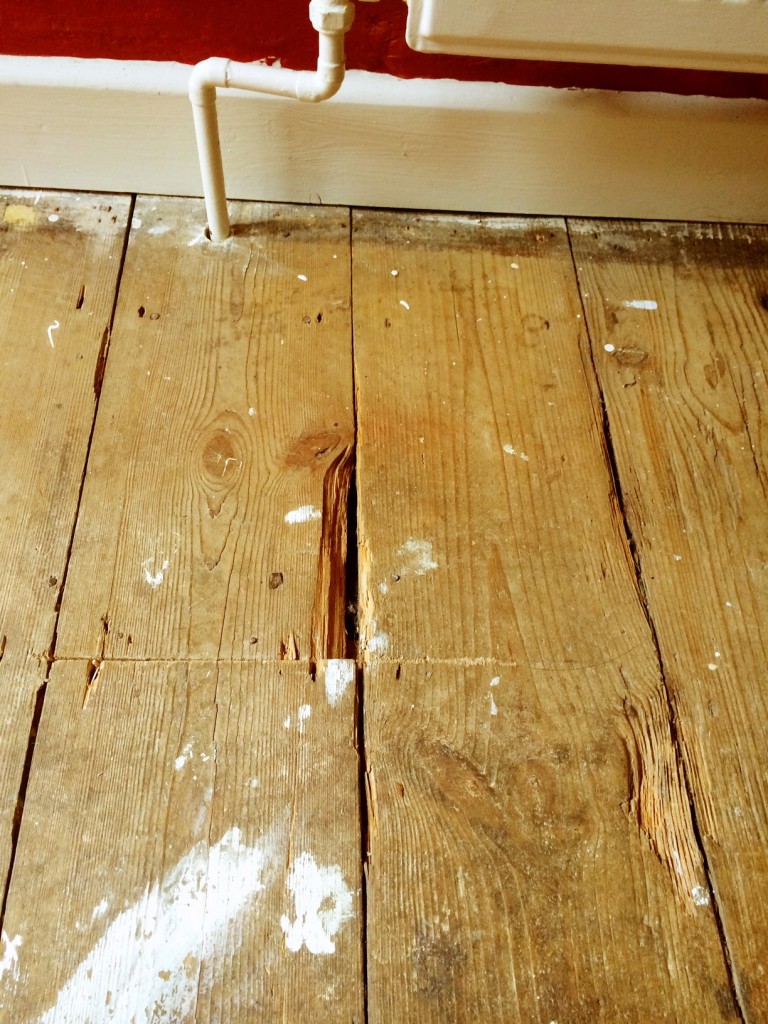
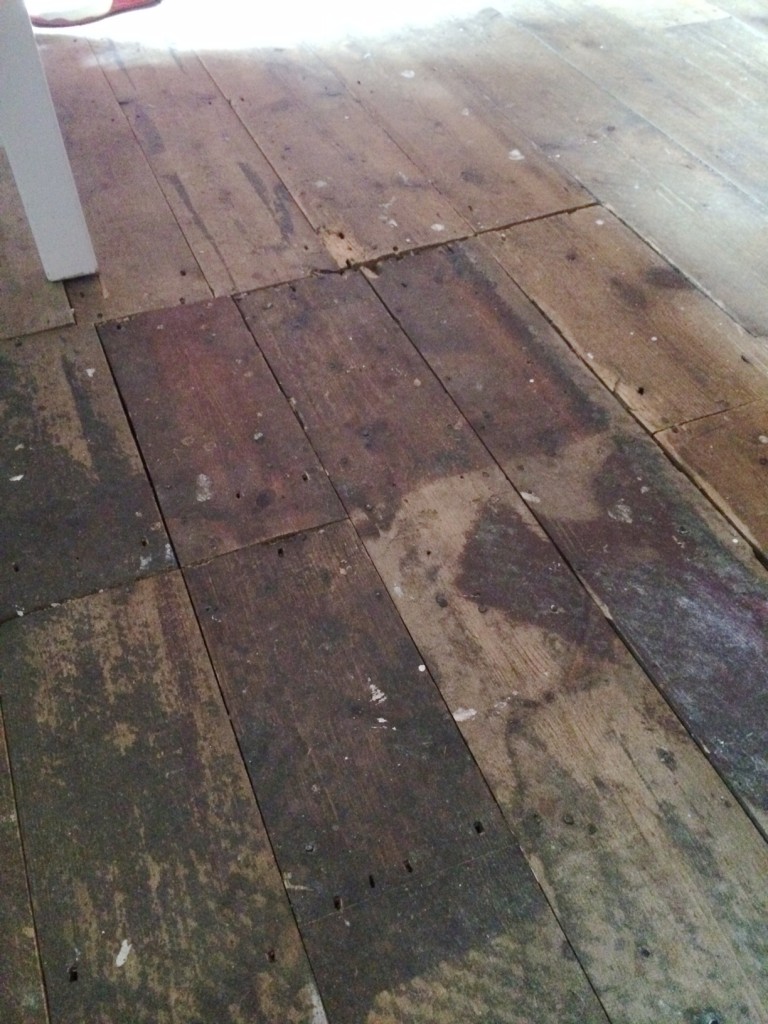
We had a look at the state of the boards and tried to work out what we could hope to achieve with what we had. Some of the boards were badly damaged where they’d been crowbarred up to, presumably, lay pipes for the central heating. Some of them had dozens of nails in. Dozens. Ridiculous. One of the dips in the floor turned out to be due to a board being more sunken than its neighbours. The other dip was slightly more problematic. One corner of the room had the floorboards replaced. The replacements, it turned out, were all cut to the same length and thinner than the original boards next to them, hence the sudden dip.

Floorboards with damaged edges

Floorboards with damaged edges

floor-patched

Corner patched with boards of the wrong depth

Last week

REPAIR AND REPLACE
We called in handy Mr Joiner-Painter for a consultation. His verdict fitted in with what we’d anticipated: lift the skinny boards and use them to board the bottom of the stairs and relay the whole section on the far side of the dining room so that the boards don’t all join in the same place. We’d need a few new boards to fill in the gaps.

Mr J-P came and started taking up boards and cutting and refitting them. He re-used as much he could then took me to the timber yard at Kent Blaxill (a local trade supplier, like B&Q for grown ups) to choose our new boards. It was quite exciting. I flirted shamelessly with the guy on the till and got a 10% discount usually only for trade customers. Result!

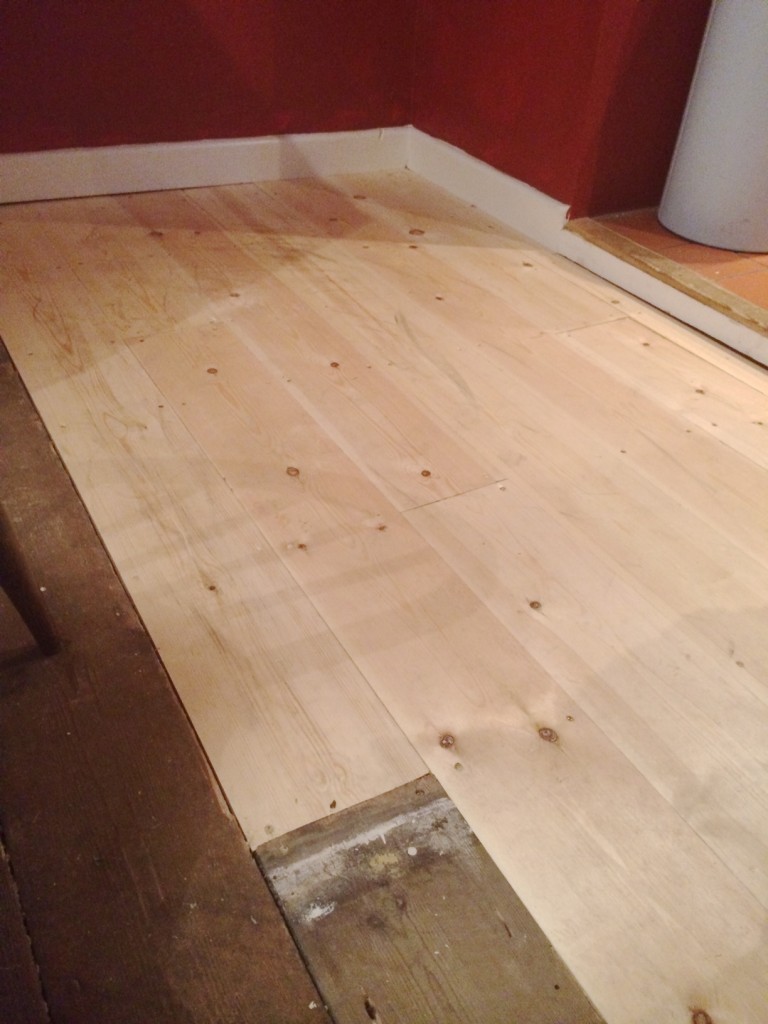
Back home with the new boards, and Mr J-P got on with laying the new boards. He proclaimed the joists in good nick; some of them have been replaced in the last 10 years, he says. So with the joists, the new boards and repaired original boards the dining room should have a sturdy floor for another 100 years.

floor-new-boards

New boards laid

Saturday

SANDSTORM
During the week we read blogs and FAQs and DIY forums until we were blue in the face, then booyaa ordered a drum floor sander and an edging sander. We guesstimated the number of sheets of different grades of sandpaper we’d need based on advice elsewhere. We had the sanders delivered on the Friday so we could start on Saturday after breakfast and finish the job by early evening. We were both hoping we’d get it all done in one day, but knowing we had Sunday to finish off if we needed it was a bonus.

So, Saturday morning we moved all of the furniture out of the room (yet again) and got started.

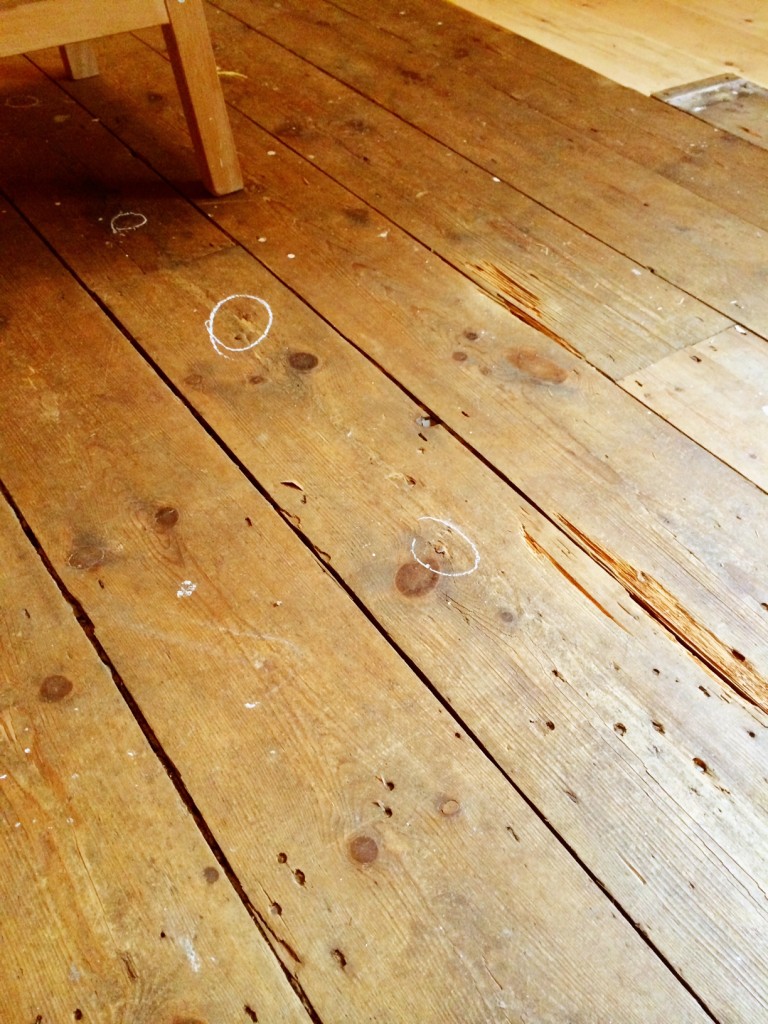
Everyone said over and over about punching in any nails as even a tiny nail head will tear the sander sheet, and they’re pricey, so you don’t want that. After breakfast we cleared the furniture from the dining room and booyaa got on with punching the nails. This was when we discovered just how many nails were in the floorboards. Ridiculous amounts. Those he couldn’t punch down any further he marked with a chalk circle so he knew to avoid that bit – we’d get as near as we could with the edge sander and after that it would be the mouse (my dinky palm sander intended for furniture restoration).

floor-marking-nails

Marking protruding nails (also: look how many nail holes are in those boards!)

After watching the instruction video one last time, he got his face mask, goggles and gloves on, tested the breaker switch and got going. We’d decided to go the wrong way across the boards first time, since the boards are so uneven. The sander hire video recommends a diagonal motion, but our room is just too small for that to be practical. So, on a clear run with no nails jutting out, he set off. Half way across the room the sanding sheet shredded… Gah! We had a look and saw there was a nail which was probably flush the board, but given how much the sander skims off the top of the board it was too high. Back to hands and knees and punching in nails again.

After the clear up (the sanding sheet was in a million bits all over the floor) we also saw that the edges of the boards which protrude were splintering badly. Change of plan! We decided we’d follow the direction of the boards, at least for now.

It took about an hour to do the whole of the old section of the floor with the coarse sanding sheet. booyaa said that once he’d realised that he needed to pull the machine back to slow it down that it was fairly easy to use.

Then, once he was feeling confident, he went across the boards with the coarse sanding sheet and smoothed off a few of the bigger differences in the board heights.

He went over the old boards again once with a medium sander and then over the whole floor, including the new boards, with the finest grade sanding sheet. After copious vacumming we could see the state of the floor. It was looking pretty good, but not, we thought, good enough to be able to stain and varnish. Too many patches. We noticed that there was a dark area at the very edge of the old boards where the sander hadn’t reached.

Now we could see it closely, we also worked out that some of the edges where we thought the boards had been crushed by a crowbar actually are actually woodworm damage. One of the patches is so big we’re not sure how sturdy that board really is. We’ll do some investigating and hope that woodfiller will repair it, though we’re both being optimistic and we know it. At some point we know we need to replace at least three more floorboards. At this point it dawns on us that it would have been cheaper (and easier) to have had a flooring company come in and replace the whole floor with engineered tongue and groove. It’s a crushing disappointment. We try to hang on to our reasons for doing this: we’re restoring the original features of the house. That’s the point. I’m not sure either of us is convinced.

Sunday

NEARLY THERE
After breakfast in the garden, a positive outcome of the dining table being out of bounds, booyaa got back into his smelly DIY clothes ready to use the edge sander on, yep, the edges of the room. It isn’t nearly as effective as the main sander. One disc disintegrates, another wears out. Three goes with the edge sander and a two inch strip of floor all along the skirting board remained resolutely dark.

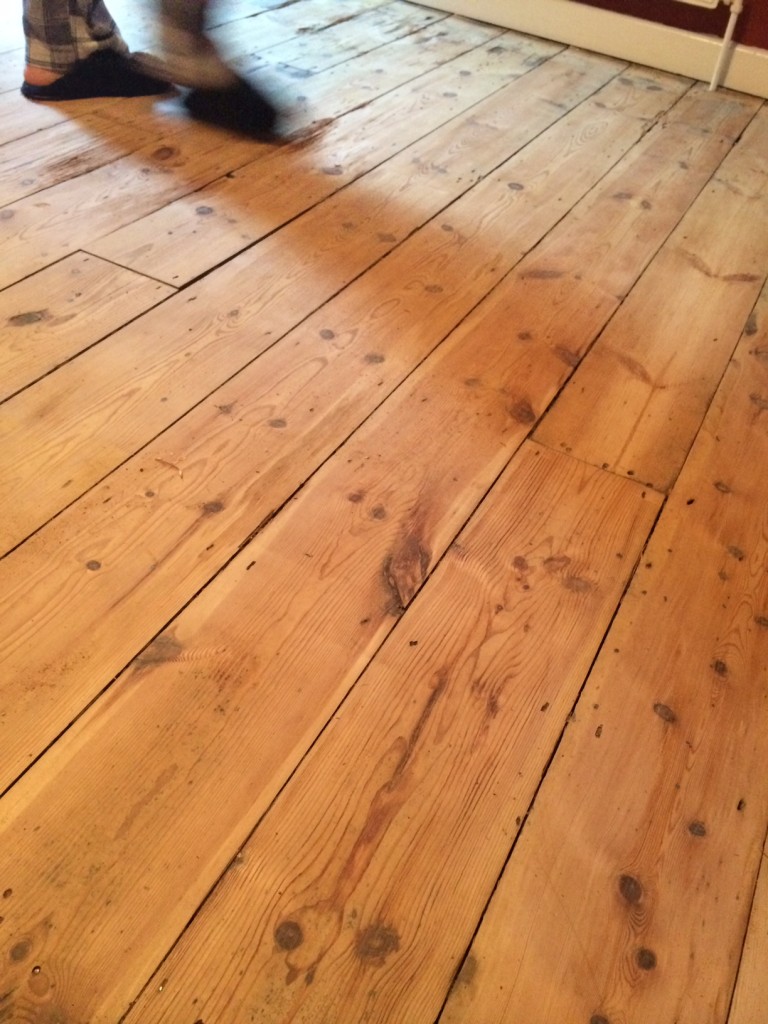
Another close up investigation of the edges shows that they have a greyish opaque finish, and we’ve decided we’re probably up and against old carpet glue. I tried a water-based white spirit alternative, but that doesn’t do anything (serves me right for being so darn eco-friendly, right?). Then booyaa had an epiphany. He cut the coarse sheets leftover from the belt sander and fitted them on the edge sander. It worked! We’re left with a few tiny patches which I’ll work on with the mouse over the next week.

sanded floorboards (and booyaa's feet)

sanded floorboards (and booyaa’s feet)

Next up: woodfiller to patch the damaged boards. Stain the new boards to blend in with the old. Varnish. Avoid the floor for a day while the varnish dries… Tune in next weekend to find out how it’s going.

I bet you look good on the dance floor…

Firestarter

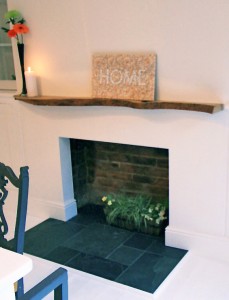
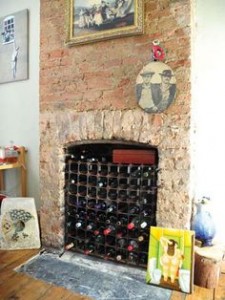
We want to install a woodburner in the living room so this project feels like a practice run. We decided to open up the fireplace in the dining room. We don’t need a fire there, I just want an empty brick recess where a fire would’ve been. It seems strange to me to have a chimney breast and not even a nod to its purpose. In my head I envisage something like this:

beautifully finished fireplace – from moregeous.wordpress.com

beautifully finished fireplace – from moregeous.wordpress.com

or lovely bare brick chimney and look at all that vino!

or lovely bare brick chimney breast – and look at all that vino!

We look up information on chimneys and fireplaces. We read blogs of people who’ve already done something similar. We trawl through the DIY forums and watch some timelapse of people renovating a boarded up fireplace. Then we gird our loins and go for it on Sunday after breakfast.

We move everything out of the way and since we can’t find the plastic dustsheet from painting we cut up bin bags to seal off the kitchen archway.

booyaa uses a crowbar to prise off the skirting board, which we’ll cut up and refit once the chimney breast is replastered around the new fireplace recess.

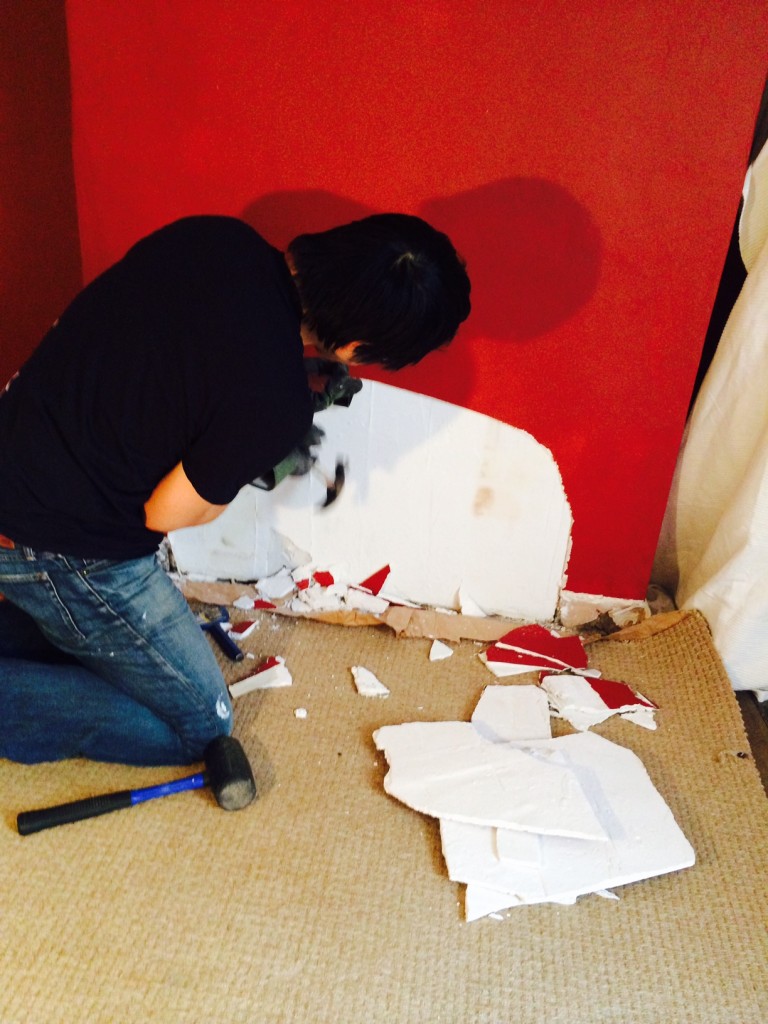
booyaa gets his dust mask and gloves on and starts chipping away at the plaster with a chisel. Great sheets of plaster come loose easily. We get quite excited that it’s going to be a really easy job.

plaster coming off easily

plaster coming off easily

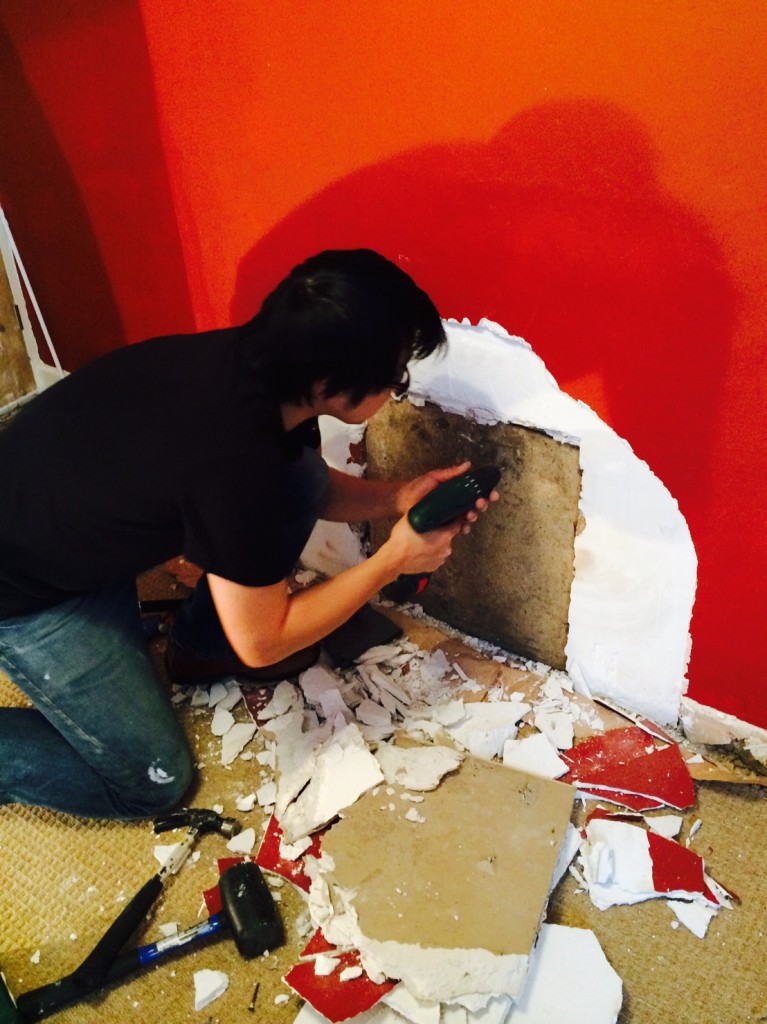
Ten minutes or so later we can see the board in ‘boarded up’. booyaa chips away a little more to expose the whole board. It’s screwed in (to what?) so a few whizzes of the electric screwdriver and we’ll have an unboarded fireplace!

removing the screws

removing the screws

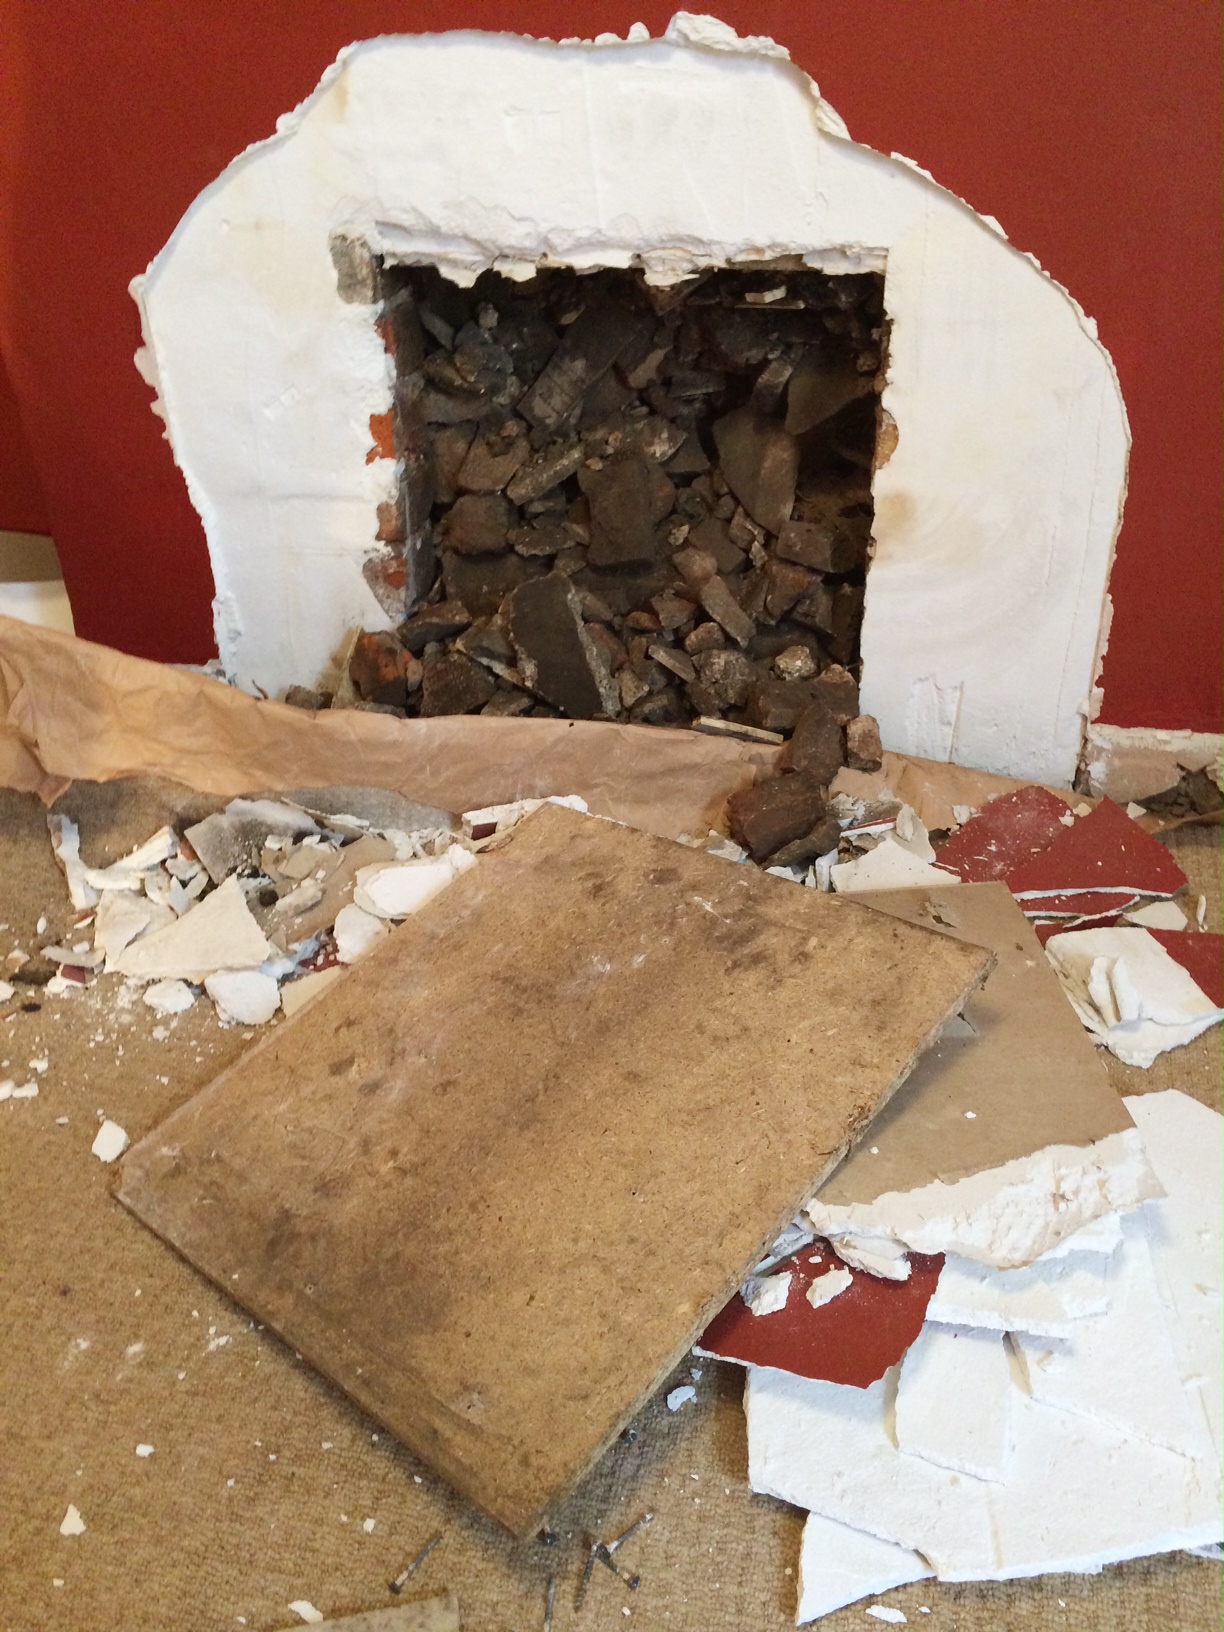
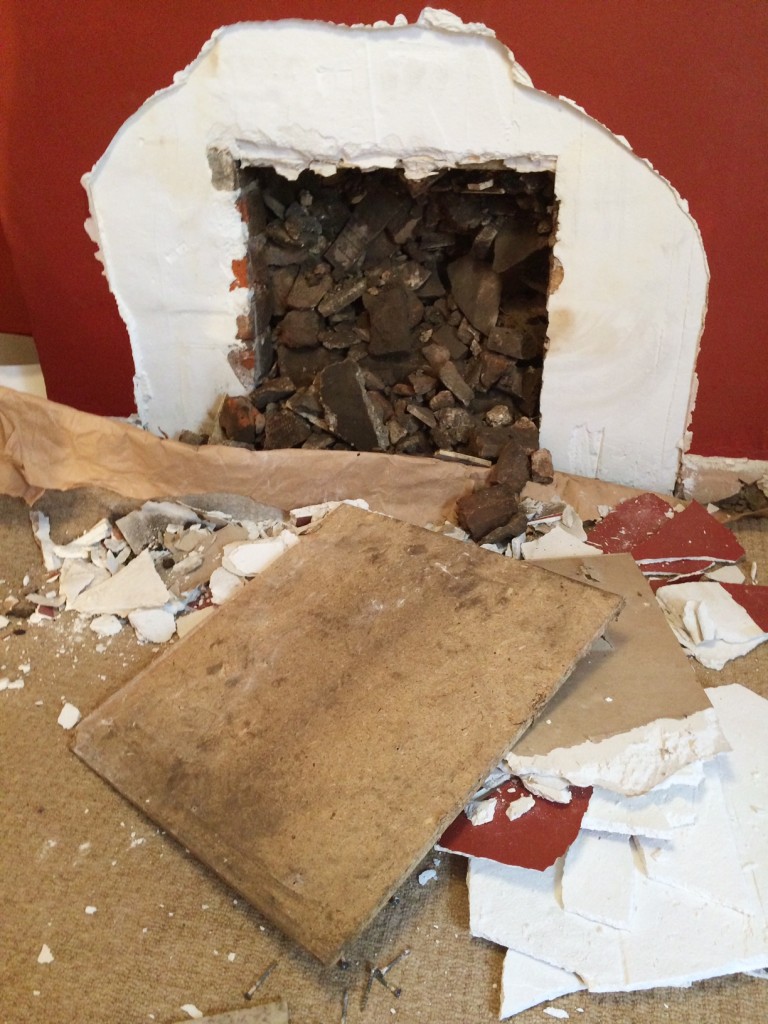
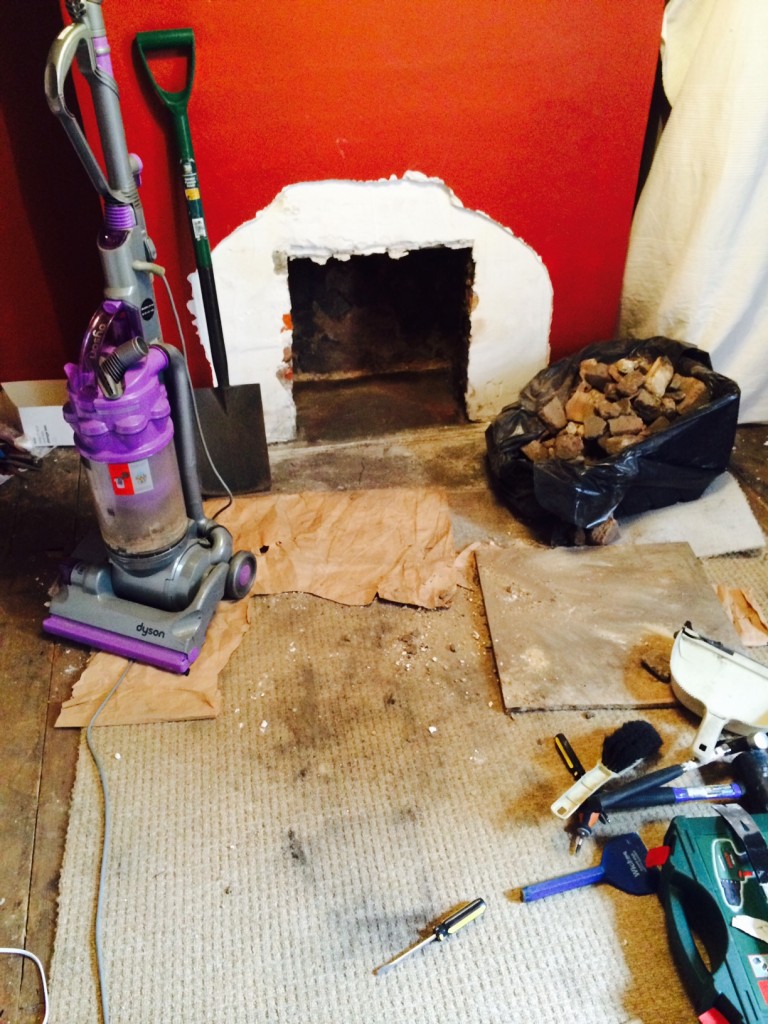
Oh. Too soon with the fanfare. The boarded up fireplace was hiding a substantial pile of very sooty rubble. Oh lordy.

Barney Rubble

Barney Rubble

So the clean up begins. Two bags of rubble to go to the tip. With no car, that’s going to be interesting. (Edit: it’s sitting in the back lane while we wait for the fairies to take it to the tip for us.)

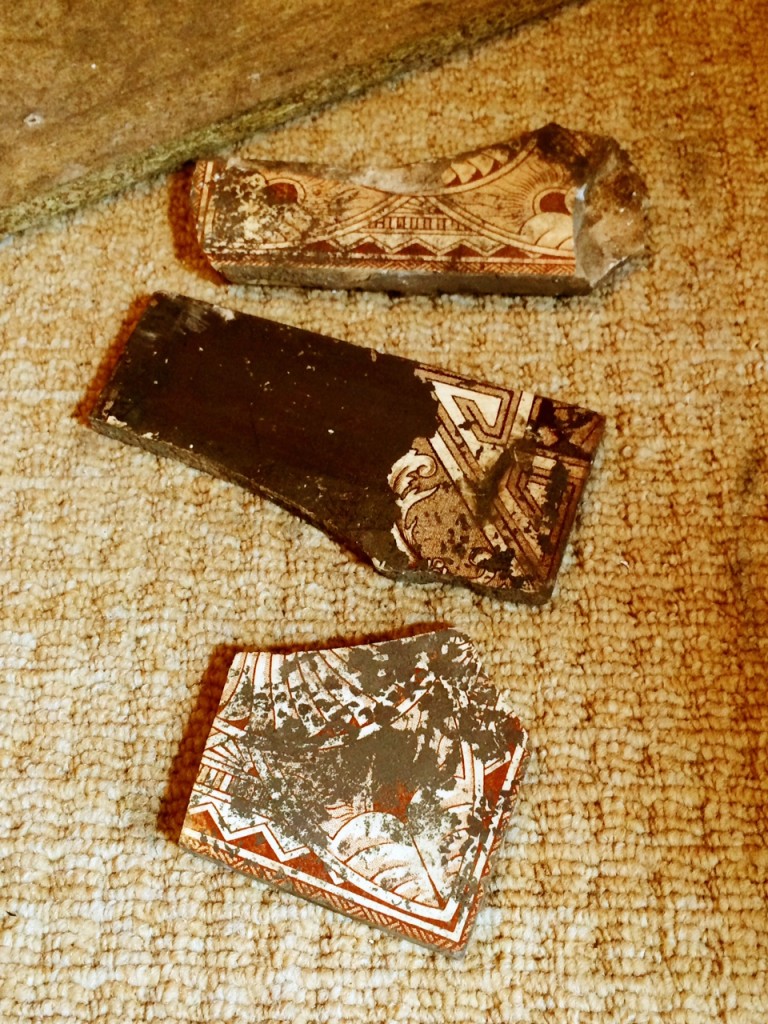
On the plus side, we found some remnants of what were probably the original hearth tiles. Not a single of one them had survived intact. Such a shame.

probably from the original fire surround

probably from the original fire surround

All in all it took us about 4 hours to complete this part of the project. Most of that was clearing the rubble and cleaning the soot.

clean up time

clean up time

booyaa looked like a Victorian urchin by the end of it. He was taken out to the garden and hosed down. Just kidding. He did have a very long shower and everything he’d been wearing went straight in the wash. He was exhausted and grouchy by the end of it. It’s not a project for the faint-hearted. Pie for dinner definitely helped soothe some of the aches.

Next steps

Given the amount of rubble we found and the gusts of wind that come down the chimney now the board is off we’re slightly concerned about the safety of the chimney. So we’ve arranged for a fireplace and chimney expert to come and tell us if we need to do anything with it.

Then we’ll tidy up the exterior, scrub the bricks and seal them with acrylic varnish, replace the skirting on the chimney breast and voilà – all done.

Further reading

Here are some of the places we found useful information about opening up a boarded fireplace.

Good photos of each step at this home renovation blog.

Little House on the Corner. We love this blog. They’ve already done many of the same projects as we have planned, and in a thoughtful modernising-whilst-being-true-to-the-heritage-of-the-building way that we hope we’re doing too. Here they’re installing a woodburner and achieving a modern, crisp finish.

Also useful was this Reader’s Digest post. (I know! Reader’s Digest being useful. Whatever next.)

And finally, for sanity-checking, we read through the Stove Fitters’ Manual.

(Aside: I recently heard an anecdote of a colleague saying, “Why does anyone bother writing a blog these days, who cares what you have to say?” etc. It struck me just how helpful it’s been for us to read other people’s blogs. I am eternally grateful to everyone out there blogging their renovation projects. Keep doing it! Ignore the sceptics. Haters gonna hate.)

sticky fingers

The kitchen worktops feel permanently sticky. If you touch them nothing comes off on to your fingers but there’s this annoying tackiness. I think it’s probably down to a badly implemented combo of Danish oil and varnish. We had a new worktop fitted along one side, so that we could move the sink and fit a dishwasher, and we decided to sand off the surface of the old worktop and then oil them both. Hopefully this way they’ll match by the time we’ve finished. The old worktop obviously is ‘seasoned’ now, so there might be a slight difference in colour, but we’re giving it a go.

So over the long weekend me and my hangover (so unfair! I had all of two glasses of wine last night) got out the little mouse sander and went to work. If you want to do this here are the things I learnt.

  • Whatever it was coating the worktop, there was a lot of it and it clogged up the sandpaper really quickly. booyaa suggested using a stiff brush to get rid of the build-up. That worked a treat. The layers of gunk weren’t wearing the sandpaper sheets out, it was just clog.
  • My secondary school woodwork teacher sat on my shoulder and reminded my to sand with the grain for the entire duration of the task. So that was nice.
  • Use the mouse’s nose to get into corners. If you have a nose extension (apparently it’s called a ‘detail finger attachment’ but we all know it’s a nose extension) you might find that useful for going over edges and corners. You’ll work out for yourself that the way you hold the mouse affects the range of sanding, and the little nose might help you even things up.
  • You’re going to get very dusty. It’s quite noisy and not really the ideal hangover activity. I used a very lightly dampened cloth to wipe away some of the dust so I could see where I needed to go over. A hoover is also a handy ally.
  • Sand until there’s not a single bit of sheen left. If it’s shiny, your oil won’t take. Since you’re going to all this effort you might as well get the best surface you can.
  • I used loose sandpaper and a sanding block to finish off the last few bits.

Oiling. This is not as messy as you might think, but I do recommend you do this once you’ve tidied up after dinner and leave it to dry overnight. You’ll need three coats before you can start using your worktop with gay abandon. In between, put all your trays on the worktop and use them. We had one for the kettle and tea-making gear. Another next to the sink for the compost caddy and soaps. The last one was for dirty dishes which don’t go in the dishwasher. That will save your sanity.

I used a fairly cheap own-brand Danish oil. Danish oil is a mix of linseed oil and varnish, and it’s sometimes called ‘wiping varnish’, which is a very accurate description. It’s designed to protect the wooden worktop but without creating a solid coat which varnish would do. I’ve since read up on these things and apparently the Best Ever Worktop Oil is called Osmo Top Oil, so I’ll be swapping to that in future. Here are your steps and recommendations for using standard Danish oil.

  • Make sure the surface is clean and dry. Use a lint-free cloth to spread the oil over the surface of the worktop.
  • Work slowly, apply a thin, even coat. Once you get to the end go back and wipe any excess oil away. There wasn’t any excess in my case, so perhaps I was a little stingy.
  • Make sure you cover the edges of the worktop too.
  • Leave to dry overnight.
  • If the grain lifts then sand lightly before applying another coat the next day.
  • After three coats the wood should be waterproofed and protected. Leave the final coat for 24 hours then, if you want, you can buff the surface to a shine. I chose not to.

(I tried taking before and after photos but you don’t appreciate the difference in a photo. At least, not with my poor photographic skills.)