pros and cons

tools of the trade

Planning and costing is quite a complex business.

You need to work out what to do first. You need to get quotes or check multiple places online. Then you need to agree which one you like best or work out a budget. There are lots of lists, snippets of information, emails in different inboxes. How do you keep track of it all?

We use spreadsheets on Google Drive to make detailed cost calculations. We generally have a list of requirements down the left, so for the new bathroom, for instance, it would have lines for the various trades, each of the items of sanitary ware, floor and wall tiles, paint, cabinets, accessories and so on. Then we have two columns, one for the budget option and another for the one we’d really like, or if it’s a ‘nice to have’. Then we have links to products. That means we can calculate the cost fairly accurately and we know when we’ll be able to afford to do that. We can decide if we’d rather wait and save a little longer so that we can pick from the top-end column.

Spreadsheets are fantastic for this kind of thing. We use the online version purely because that way it’s dynamic: we can both edit them and see the changes in real time. If you have a gmail account then you have access to Drive. You could share a static file on Dropbox or similar instead.

For jobs we’re going to do ourselves or other house-based to-dos we use Trello. By default you get three columns in Trello: To do, Doing, Done. You can colour-code cards (that’s a single item) so we’ve got ours linked to different rooms and projects. You can comment, add notes, assign to someone on your team, set a deadline and more. It’s really useful. I mostly use it on my laptop, but the iPhone app is fully functional. It’s a free service, you just need an email address to create an account.

To get started, create your board and assign it to the team or invite interested parties so that they can see everything on the board. Make a card for every to-do. Colour-code or sort them according to your needs. If you have a complex project you could set up a separate board for that so that you can have different labels and rules. You can create/name your own columns per project on one board, but to be honest I’d have a different board for each project instead so you still follow the to do/doing/done method. As you tick things off you move them across the columns. It’s a very satisfying end to the weekend, dragging items to the Done column.

The last thing I’d add is that for bigger changes, whether they’re big on work or money, then mulling things over, sleeping on it, is always worth it. Just because you’ve planned it, doesn’t mean you can’t change your mind if a better, neater, or cheaper solution comes up. So give it time. For me, the desire to want everything done right now is tempered by perfectionism, wanting to get it right first time. So we never make a final decision straight away. We come back to it a few days later and see how we feel, or leave it on a to-do list until we know we’ve exhausted all our options.

white lines (don’t do it)

We’re in the bathroom again.

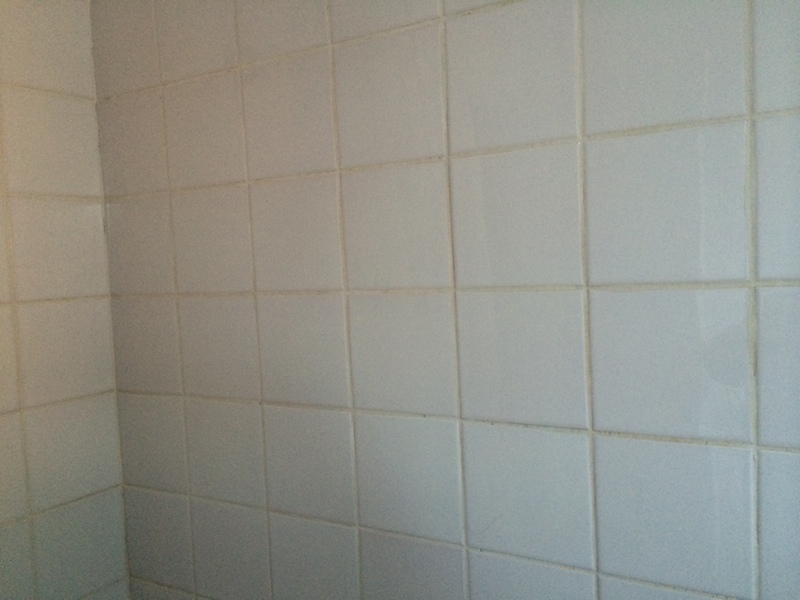
The grouting between the tiles is an off-white shade. At least, where it isn’t dank and in need of some good old-fashioned bleach, that is.

I can’t bear dank bathrooms. Ours is really uninspiring in the mornings. What with me still faffing over the paint colour and the tester pot blotches of every colour on the wall, well, it’s not the best place for your wake-up shower. So, it’s time to see how well this girl scrubs up.

bathroom-tiles-before

I washed all the tiles and the grout with bleachy water and let them dry. Then I used Unibond Grout Reviver in Ice White to touch up the grouting. The grout whitener comes in a tube with a sponge applicator, much like the white stuff you used to put on your tennis shoes all those years ago. It’s quite a task to rub the sponge over every line of grout over a wall and a half of tiling, but I put on the radio and listened to Iggy Pop on 6 Music and that kept me focused.

The instructions for the product suggest you leave it to dry for 30 mins before wiping off the excess with a damp cloth. Don’t make me laugh. If you leave it for 30 minutes you need to get a scourer and scrub every single tile. Which is what I did…

I also decided that it needed two coats. Some lines were super white straight away, but others looked a bit cleaner, not white.

bathroom after

The finished look is a vast improvement. The slight grey cast to the tiles seems to have gone since they’re no longer sitting alongside yellowing grout. You can still see where some grout lines are whiter than the others, but it’s still better than before.

My tips:

  • If you have yellowing grout just one light coat of grout reviver will knock back the yellow.
  • If you have frankly manky grout try a good scrub with a bleachy toothbrush then use two coats of the reviver to get your grout sparkling white.
  • Keep your application very even or you’ll end up with bright white blotches here and there, and you’ll have to touch up.
  • Wipe down the tiles within just a few minutes of application using a cloth and a flat hand to take the excess off the tiles but hopefully skim over the grout in between.
  • If like me you end up with dried white stuff all over your tiles use a window scraper to get the worst off and a green kitchen scourer to tidy up the rest.

If I were to do this again I think I’d go for the grout reviver pen, which is a more expensive option (you get less product for your money) but faster. You draw over the grout lines and don’t have to clean up the excess afterwards.

The bathroom is starting to come together. We’re missing a blind and some accessories but we’ll get that done once we’ve painted. What? No. No, I haven’t decided on a paint colour yet.

foot in the door

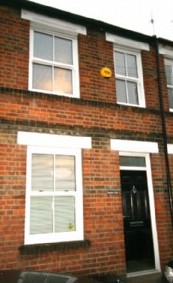
We bought a house! Years of saving, moving away from London because we couldn’t ever afford to buy a house there, and a slow but steady erosion of ideals have culminated in the purchase of a tiny little Victorian terraced house in Colchester.

The house we’ve bought is a 2—3 bed mid-terrace. There’s no front garden and there’s no hallway, you go from pavement to front door to living room. It’s a small house, with all the main rooms measuring 3.3×3.3m. That’s quite small. Especially when we’ve lived in a house where a 4-seater sofa didn’t look out of place. After the living room there’s a gap, you couldn’t call it a hallway, which leads up to the stairs. Then the dining room, with a door out to the back garden and a big understairs cupboard. The kitchen is tiny, with not much space for food, pans or cooking. There’s a back lobby, which I’ve discovered is very common in this part of the country, and it’s currently used for the fridge-freezer on one side and the washer on the other. The bathroom is the last room you come to on this floor.

The stairs cut horizontally across the house, so at the top of the stairs you turn left for the main bedroom, which has two windows, a cast-iron fireplace and a built-in cupboard. To the right there’s a second bedroom, with a window over the garden and a door into the tiny third bedroom. This would be great as a nursery, but it’s not private, since it’s only accessible from this room.

Outside the garden is entirely enclosed by fencing. There’s a large shed and a gate out to the back pathway that cuts along the back of all the gardens along the terrace. The garden is currently covered in several inches of coarse gravel making it really awkward to walk on. You sink as you crunch.

And that’s how it is as we move in.