DIY

sitting on the fence

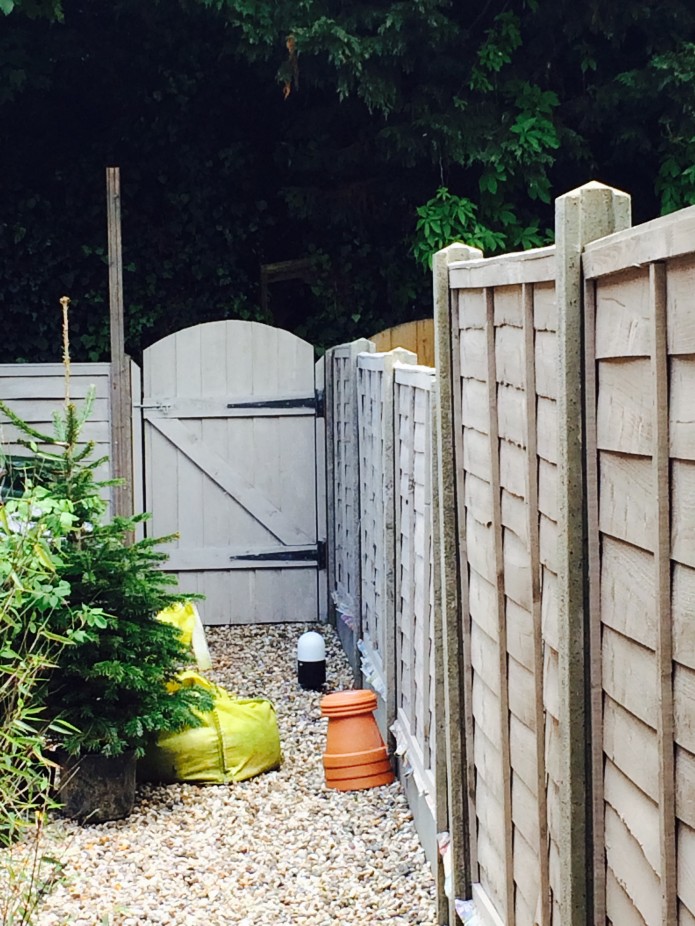
We spent the bank holiday weekend painting the garden fence.

I say we. It’s not easy painting a fence with one arm in a sling… so booyaa did the vast majority of the work. I don’t know where he finds the energy, but I’m grateful for it nonetheless.

We’ve been putting up with a very un-boolou garden for a year, and this year we’ve decided that it’s going to get done. Partly it stems from when we were painting the dining room and we took it in turns to keep Betsy entertained in the garden. Sitting out in the sunshine next to the small flower bed we created last year was really very pleasant and we’d both love to use the garden more than we do (which is barely at all). Between the uneven surface, the skiddy gravel, the trip hazard manhole covers, the slope upwards to the back, and the overhanging trees full of shade and pigeons*… well, it’s not a very welcoming space.

We now have a quote for landscaping that’s affordable, and are pencilled in for the last week of June for the work to happen. Between now and then we need to clear out the junk that’s accumulated at the back of the garden, paint the fence, pot up the plants we’ve not long since put in the ground (hugely nervous about that) and grow some annuals to fill out what will be about ten times our current growing space.

So this weekend we tackled the fence. I faffed about choosing the colour using the Cuprinol website colour tester. My first choice was ash black, which mimics the scorched weatherboard of the local (well, Suffolk) architecture, but decided it would be too strong a look for our small garden, and certainly wouldn’t look very urban Victorian terrace. I couldn’t possibly go ‘Forest Green’ or ‘Conker’ or whatever those fake-natural dark shades are, so I chose “Muted Clay” which looked modern and fresh, and a mid-tone greige (that’s grey-beige to the non-initiated). I hoped the ugly concrete fence posts would blend in a little, as they really stand out against the orangey-brown colour we started with and guessed that the green of the plants would stand out nicely against a light, neutral colour.

The weather was forecast to be dry but cloudy, so we thought we’d get the whole fence painted once round. We were even optimistic enough to think we might get both coats done. Ha ha ha. How naive we were. Rain stopped play after 3 panels on the first coat. It dried up again later and while I was cooking dinner booyaa went and stormed through to the end of one side. We got one coat on half of the fence done by the end of the day.

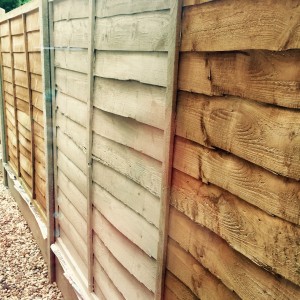
Orange-greige side-by-side comparison

Orange-greige side-by-side comparison

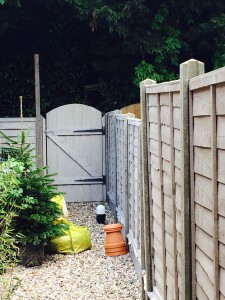
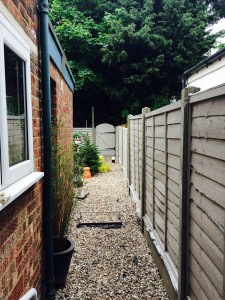
We think the fence was all replaced at the same time, but because it’s weathered differently in places the paint has changed the colour in a subtly different way too. The gate at the back, which is a better quality finish than the fence, has a much stronger colour. The barely touched by sun panels along the side return have changed the least. I mean, they’re not orange any more, but they’re not as strongly coloured as other parts of the fence. After just one coat the fence looked like it had had all the colour bleached out of it. It was a ghost fence.

Shades of greige

Different finish on different wood

Thank heavens for bank holidays, eh? Monday was forecast cloudy with possible showers in the afternoon. We got started after breakfast and finished the first coat on the rest of the fence and started on the second coat by early afternoon. We ran out of paint halfway through the second coat. With no more of our chosen colour in the local Wilko’s, and neither of us fancying a trip to B&Q on a bank holiday Monday, we’re hoping Wilko’s will have more in stock during the week so we can finish off next weekend. But for now, we’ve re-Betsy-proofed the garden and called it a day.

Where the second coat has dried it still looks like we’ve got a ghost fence. The plants show up really well against it, both of us are pleased to see the back of the orangey-brown colour we had before, and it achieves the aim of drowning out the otherwise really noticeable concrete fence posts. The fresh green plants look great against it, and I can’t wait for something blue to flower because I think that’s going to look really vibrant. But on its own it’s a bit meh. Lucky we’ll have a garden full of cosmos and cornflowers in a couple of months.

Side return

The Ghost Fence in all its glory

*Dad says they’re collared doves. They look like what most of us heathens think of as wood pigeons. They’re big, noisy things, that’s the important point.

a whiter shade of grey

Well, this has been a long time coming. Loooooooong time. Little Betsy is the reason. See, we’ve had the paint for months, but how do you paint a room (clear out the furniture, both get stuck in with painting, don’t use the room for the duration and avoid the woodwork for 4 hours at a time…) when there’s a small, hairy thing bouncing around the place wanting you to throw Mr Hedgehog for her?

We’d planned on doing the kitchen and dining room in one go, and even, if booyaa could take a day off work, possibly adding in the hallway to the same mammoth painting session. I reckoned 3 days would cover us to get the whole lot, start to finish, done. But we just can’t do that with Betsy around. For a start, she barks and cries if she’s shut out of the room we’re in, so you can imagine her being locked away for the entire day, three days in a row. Well, we finally had a breakthrough. This is another of booyaa’s “this might be a really stupid idea but what if…” absolutely brilliant solutions to a problem we’d been stuck on for weeks. We’ll do it all in tiny bits. It’ll take three weekends or more, and it will be harder work, with all the getting out/putting away and tidying up in between, but at least we’d get it done. So that’s what we’re doing.

weekend one

We started with the kitchen. On Friday evening we planned our strategy and after breakfast and a long walk in the park to tire out little Betsy, we got stuck in. We took down the last bit of broken blind fitting and all the pictures, filled some holes and repaired some massive dints in the corners at the edge of the kitchen. Then we cleared some of the bigger items in the kitchen, and moved the rest all on to one of the worktops. booyaa took some of the cupboard doors off, to make it easier to paint in the tiny gaps between the end cupboards and the wall. We covered the other worktop with a pile of old plastic dustcovers, and got to work with the basecoat.
Covered up kitchen, featuring blotchy basecoat in the background there

Covered up kitchen, featuring blotchy basecoat in the background there

The basecoat, bought on special offer from Wilko and an absolute bargain, is designed to cover strong colours and smooth over fine cracks. We figured it would be a good base for painting over the horrendous ox-blood colour in here before repainting in the very light colour we’ve chosen. I hoped it would also deal with the satin finish of the existing paint. Have you ever tried painting over satin paint? The fresh paint smears all over. It’s a real pain. And of course there’s also the grease that’s bound to have accumulated over time on all the surfaces. Did it work? Why yes, it did. It’s quite tricky to apply on rough plaster like ours, and you need a fairly stiff brush to get in all the little pockmarks. If you have crisp, smooth plaster then I expect it would go on fine with a roller. But then you probably wouldn’t need a crack-filling paint… Because the basecoat is so thick (it’s basically Polyfilla plus white paint, let’s face it) you have to leave it for 6 hours to dry. We tidied up and left it overnight.

Next day I decided it looked like it had covered enough of the dark red to start painting the light grey emulsion I’d chosen, so after breakfast I got started with my favourite cutting-in brush. For such a small area – most of the kitchen is cupboard or window – it took me forever to paint it. But I still managed to get the first coat finished with time for it to dry so that I could do the second coat before dinner. All this time booyaa was trying to keep Betsy entertained. She spent most of the weekend sitting at the baby gate and crying for me. I’d go over to say hello every now and again but she was quite seriously put out. She might have had a few more treats than are good for her this weekend, just to keep her sweet.

After a very welcome hot shower and lovely dinner I sat down for a rest/play with Betsy while booyaa tidied everything away. On Monday morning we marvelled at the brightness of the kitchen. On Monday evening we kept turning the lights down because we don’t need them on full now that the red isn’t sucking the light out of everything. Remarkable. We had to rehang the cupboard doors because you know once you’ve moved them you’ll never get them to sit quite the same ever again… and put the clock back on the wall, moved things back how we’d had them and so on. And then I really looked at the new wall colour and decided that yes, it works really well with the cream tiles and the cream/dark grey cupboards. Yes, it’s the colour I wanted and it’s going to look great in the dining room. It’s so very much brighter, lighter, cleaner in here, it’s great. But… I don’t know, there’s something I can’t put my finger on. After living with it for a week I think that it’s a bit too cool (not as in not warm, though it’s that too, but mostly I mean chic, grown up) and it looks like something out of Living etc rather than my house. Bizarro.
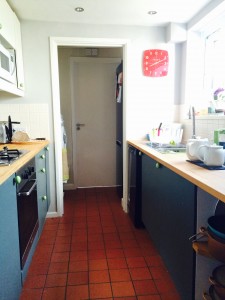
Hipster kitchen

Hipster kitchen

I’m looking forward to seeing the transformation of the dining room. It’s going to give so much light back to the room. Which is a good thing, really, since the low over-the-table light means it’s generally dark even with the light on.

weekend two

booyaa has taken the Monday off, so we have a whole three days to tackle the dining room. We’d originally said we’d do the dining room over two or three weekends. We’d get the ceiling done first and then do two walls at a time. This is to reduce the amount of furniture-moving we need to do. It’s mostly down to not having somewhere to put everything while we’re working, since we need the living room free so Betsy has room to play. But also the sideboard is absolutely chock-a-block with glassware and crockery and you have to empty it before you can move it. Where do you put all that stuff? You can’t just leave it on the dining room table for two days or you’ll be eating off a tray on the kitchen floor…

Saturday morning: same ritual as last week. Homemade bread for breakfast then a long, fun walk in the park so that Betsy Boo is happy and tired out, and therefore easier to look after for the rest of the day. Move things all over the place. Into the garden, the downstairs bathroom, in the spare room, fold this away, put this back in the loft, and so on. Cover everything with dust sheets.

I’d planned out how to maximise the time working versus waiting for things to dry, so we’re doing things in possibly an unorthodox manner. We start by painting a border of basecoat around the join of the ceiling so it can start drying to let us do the ceiling today, then onto the rest of the basecoat cutting in. While I’m cutting in booyaa is using totally cheating liquid sander on the woodwork. Then I sit in the garden enjoying the lovely afternoon sun with Betsy while booyaa rolls the walls with basecoat. We have to go over it in places because the basecoat is so thick it’s hard to apply and the pockmarked plaster is quite deep in places and needs stippling to cover it up. Yet again I’m wondering just how much effort to go to now to avoid seeing tiny red dots on the wall later.
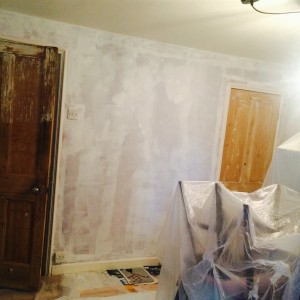
Blotchy basecoat (see also: grotty dip'n'strip doors)

More blotchy basecoat (see also: grotty dip’n’strip doors)

Next up I do the cutting in on the celing before booyaa rolls the rest of it. And that’s day one of this weekend pretty much over. We’re both exhausted and after cleaning brushes and washing rollers we opt for pizza from the local takeaway and an early night.

Sunday: up with the lark (that’s the Betsy alarm for you) so after breakfast, booyaa takes Betsy for a walk while I go straight back to the painting. I start on the cutting in and discover that I’ve completely lost my cutting-in mojo. I discovered while doing the living room that with a good angled brush and some patience I can paint a pretty good neat line freehand. No more low-tack tape that peels off your paint when you remove it. No no. But today I can’t paint a straight line. Panic! I decide to go as close as I can to the ceiling join and recognise that I’ll just have to go round with a tiny paintbrush later. While I take my turn to Betsy-sit booyaa comes in with the roller and gets the first coat of emulsion on the whole room before lunch. Whoop! While we’re waiting for that to dry we also do a coat up the stairs. We’re just doing up to the bannisters where the walls are pretty scuffed, so it’s pretty fast work. Then we get a couple of hours downtime. We get dinner ready to go in the oven. Early evening we get the second coat on in time for the dinner coming out of the oven. We are super impressed with ourselves.
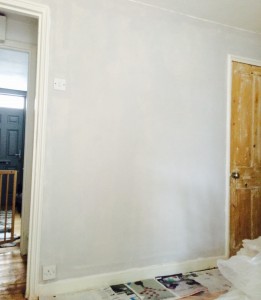
Same wall, with one coat of paint on (Betsy's jail through the door on the left)

Same wall, with one coat of paint on (Betsy’s jail through the door on the left)

Monday: going to be tricky today. I’ve set my out-of-office so we can both concentrate on getting the woodwork done. We do the first coat of eggshell and true to our experience of Farrow and Ball eggshell elsewhere in this house the first coat looks awful and ohmygodthiswillneverwork. We have a four-hour wait before we can do the second coat but Betsy has very definitely Had Enough. She sits and cries through the bars of her little prison. I’m aching and fed up too.
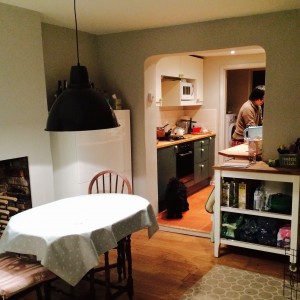
dining-kitchen-painted

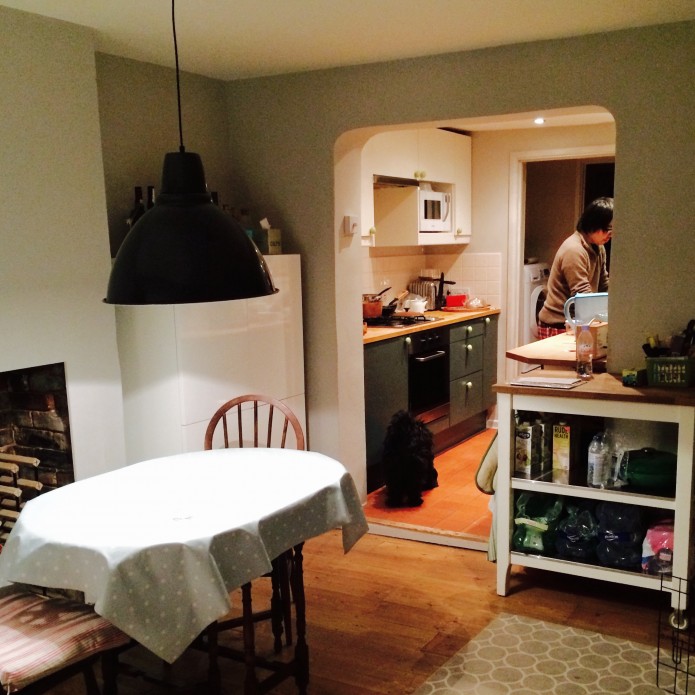
Dining room and kitchen at dinnertime

Usually I do most of the woodwork. booyaa doesn’t really have the patience, but given how very much I don’t want to paint another stroke, he takes over and finishes the second coat on the skirting board. We decide to cut our losses and leave the door surrounds and the radiator until next weekend. We clear up, put the room back together enough to have dinner at the table. It’s already feeling worth the effort. The lampshade I bought months ago with this paint colour in mind and that’s looked entirely uninspiring next to the ragey red all this time, has finally come into its own. I knew it would be just perfect in here. And despite our not-such-a-great-idea determination to have a low light over the dining table (which makes the rest of the room very dark since there’s no general light in here) it’s actually not dark in here at dinner time.
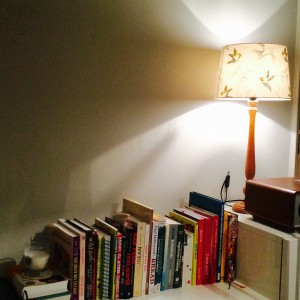
The lampshade that now looks lovely.

The lampshade that now looks lovely.

On Tuesday morning it’s the greatest pleasure to walk into the dining room and see that lovely calm colour and the room bathed in light. We don’t get much natural light in the dining room because next-door’s extension mostly keeps us in the shade, but what little light we get can now bounce around the room thanks to the pale wall colour. I always felt that the red colour was an angry colour and sucked in every drop of light, but I hadn’t realised how much. This is a tranquil, light space.

weekend three

We finish painting the door frames, do a couple of touch ups where the emulsion was a bit thin and put up some pictures. After three coats of eggshell on the woodwork we decide that the superquick, seems-too-good-to-be-true liquid sander is indeed too good to be true. Next time it’s elbow grease and a coat of F&B undercoat before we get to painting the eggshell. Another lesson learned.

Our last task for this room will be a separate project. We need to take off the doors, give them a really good sand and repair them. Then we can get started painting them. They’ve been dipped and stripped (we didn’t do it) but they didn’t come up very clean, one of them is in a bad way, so we’re not going to try to keep them bare wood. They’ll be painted dark grey to match the kitchen cupboards.

PRODUCTS USED

Wilko own brand Basecoat undercoat and filler
Polyfilla Liquid Sanding
Farrow and Ball Cornforth White Estate Emulsion (walls) and Estate Eggshell (radiator, skirting, door trim). Wimborne White Estate Emulsion (ceiling).
Still to come: F&B Estate Eggshell in Down Pipe on the doors.

50 shades of grey

Oh boy. This was finished months ago but I haven’t revisited the blog to update it.

The living room is a small room with one sash window which gets no direct sunlight all day and the front door which opens directly from the street. There’s a boarded-up fireplace which we intend to open up when we can afford to get the chimneys repaired and install a woodburner. One alcove to the side of the chimney breast has a low-level built-in cupboard and three shelves. The room was painted pale blue when we moved in, with woodwork in the usual white. It always felt cold and fairly unwelcoming.

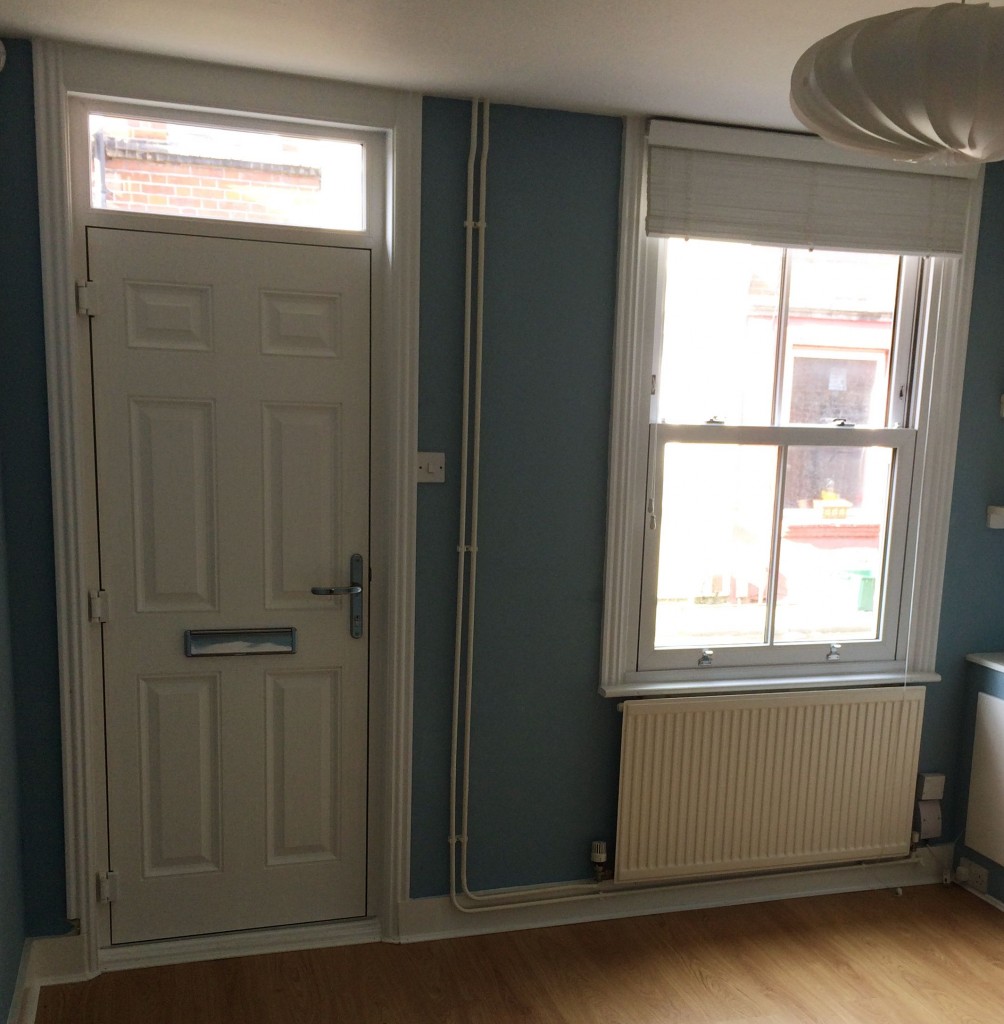
When we were deciding how to decorate in here we had two main concerns. One was the front door sticking out like a sore thumb. See Exhibit A:

Day 0: living room

white door and plasticky frame

The other was that it’s dark and cold all the time. We decided the best way to deal with is was to make it a dark but warm room. We never get sunlight here. A tiny shaft of setting sun comes through the fanlight just before sunset. That’s it. So, after raking through magazines and books (boy is Pinterest helpful here, even if it is a bit of a pain to use these days. Thanks spammers!) we bought some dark paint testers. We both adored the charcoal grey but decided it might be just a bit too dark, and opted for what my mum calls “battleship grey”.
Next was to find a solution for the front door and its shiny whiteness. It’s a new door, with pvc mouldings and a fake wood grain effect. Looks fine from the outside and from a distance, but close up it’s pretty ugly. I found a special (and non-scary) primer which we could then paint an undercoat and eggshell over. It’s designed especially to prime pvc windows and — somewhat bizarrely — block smoke stains from coming through subsequent coats of paint.
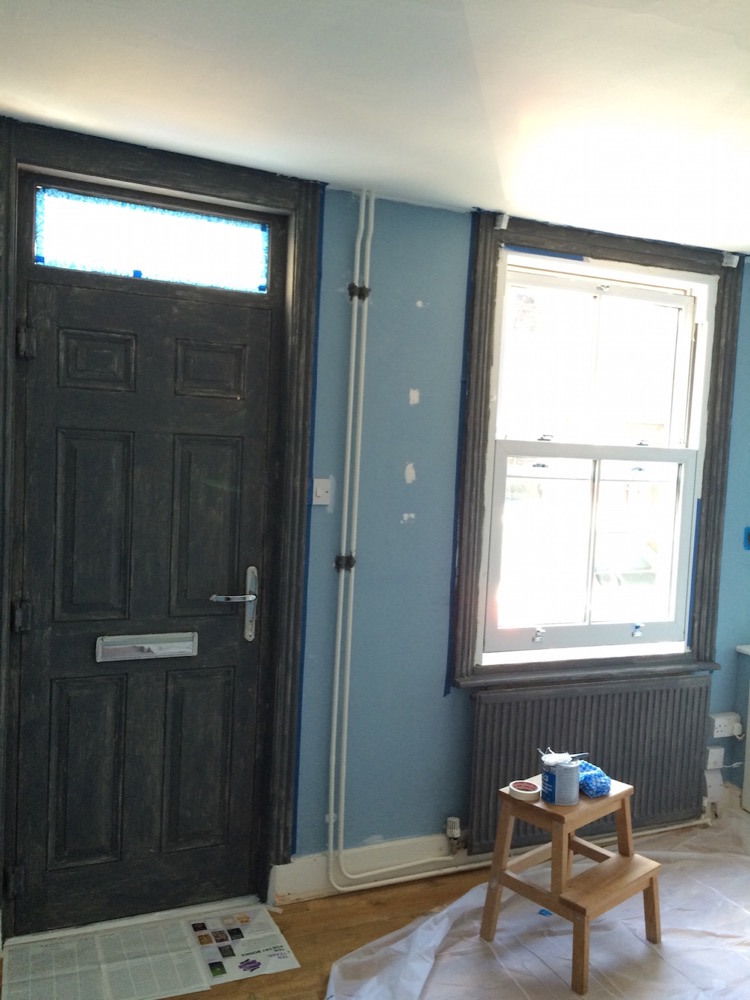
So, I picked a week when I had reduced commitments workwise and got stuck in. The room was empty as we’d just had the floor fitted, so a few plastic dust sheets went on the floor and I spent hours fiddling with masking tape, then up and down the step ladder, nervously applying the specialist primer, then an undercoat to the door, window and shelves. The undercoat was so very dark and even after two coats it still looked horrendous. I know that next time I do this I’ll get the primer tinted, too, as that will help.

livingroom-undercoat

special primer plus two coats of undercoat

We painted the ceiling F&B Wimborne White. To look at it you’d probably think it was just white, but I know it looks less harsh than a brilliant white would. I swear I’ll never use ordinary white paint again. Then I finished the woodwork, all of it: door, window, radiator, shelves, cupboard, skirting in F&B Plummett eggshell. Two coats of eggshell went on like a dream, despite our unprofessional approach to painting, and the finish is just beautiful. Smooth as silk.

The walls were done in the same colour, Plummett, in Estate Emulsion, which gives a very flat matt finish. We cut in quite generously with a good quality angled brush then two coats with a roller. There was one patch that needed going over where the first coat went on a bit too thin, but the bulk of the work was done in a day.

Having the walls and all the woodwork in the same colour means we were able to cover up some “irregularities”, like where there was a weird gap in the skirting, the door now blends in and at night seems just like part of the wall. I love that the less broken up space feels tidier, uniform.

livingroom-door-painted

yay for the door blending in

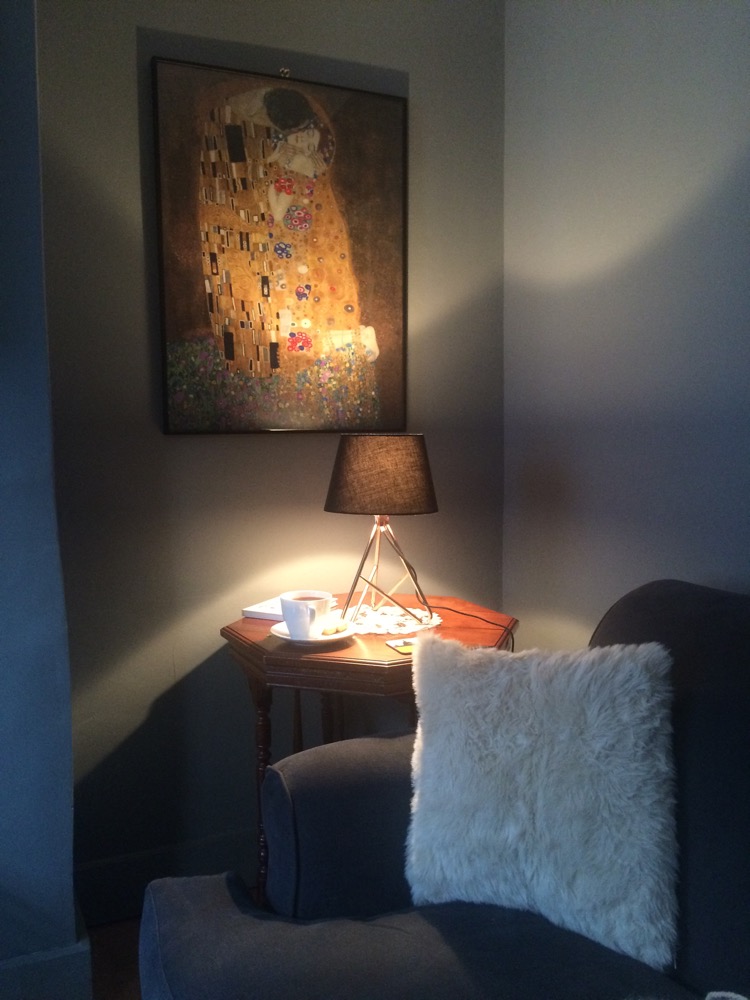
Depending on the time of day the room varies from a mid- to dark-grey. But it’s beautifully rich and has tones of blue and purple in it. Yes, it’s quite dark, but it’s not a room we use much during the day and it really comes into its own in the evenings, with the warm, cosy feel of dark walls.

my corner, being all cosy

my corner, being all cosy

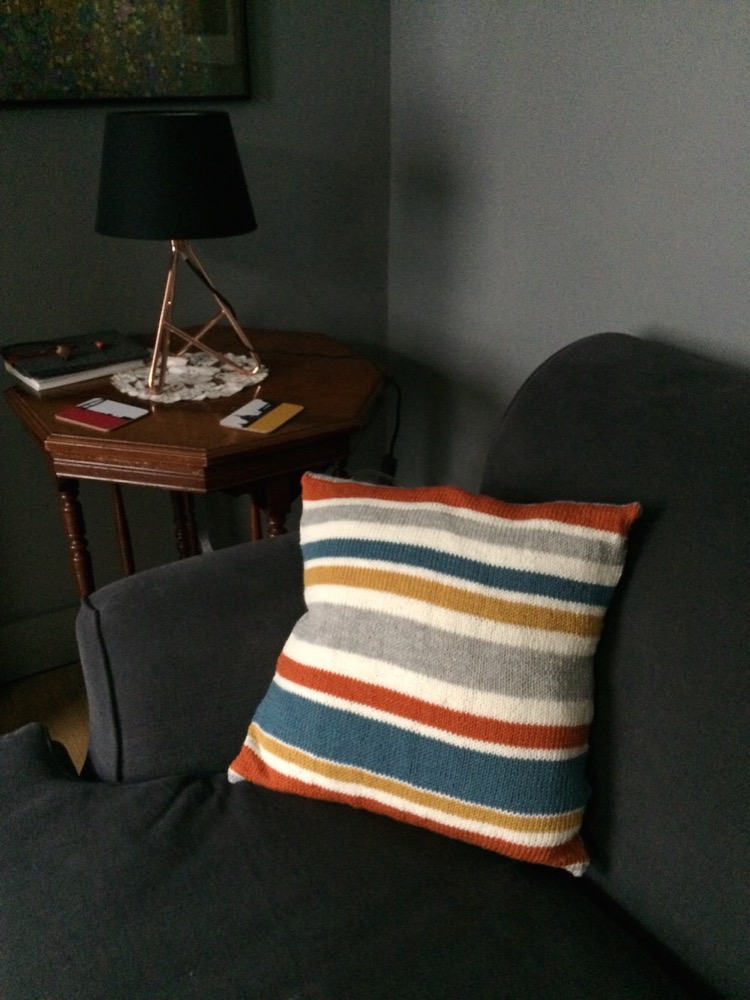
We’ve chosen a few copper accessories and some strong ochre/gold colours around the place. I knitted a cushion including ochre, copper and a teal blue and we’re slowly increasing the colour in the room. Putting pictures on the walls really helped to bring the room together.

I made that!

I made that!

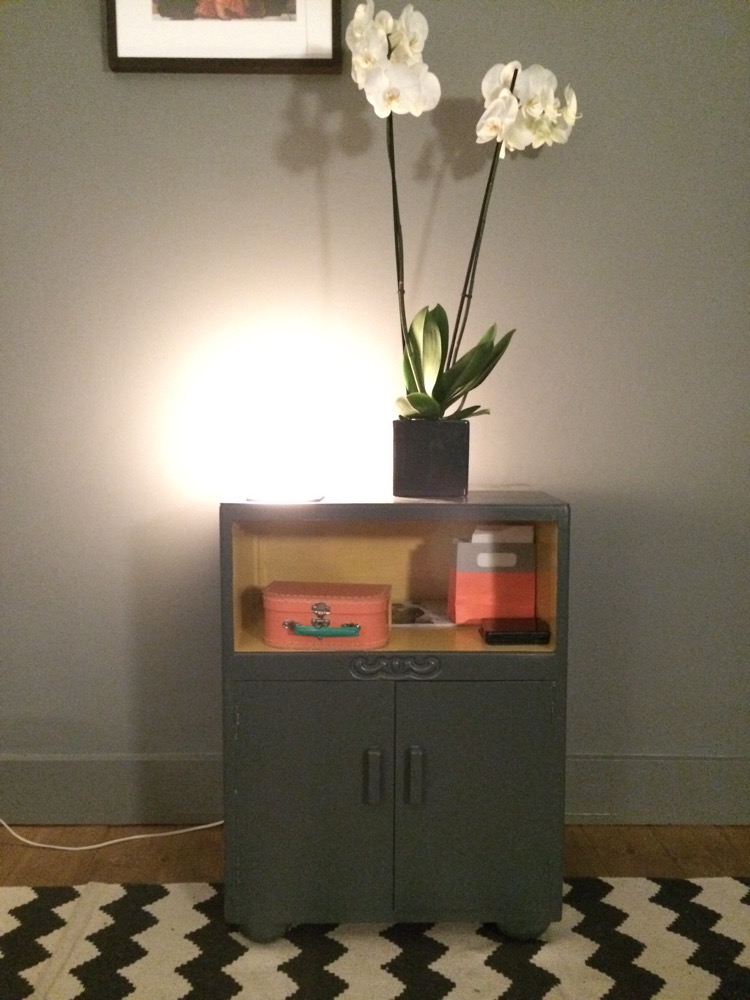
I painted the old hallway shoe cupboard (separate how-to post coming up) in an even darker grey with a bright gold inside, and that’s got a new lease of life since I still can’t quite conscience £280 for the console table I want. Mum and Dad brought me the octagonal table that had been sitting in the spare room with the second tv on it for the past 15 years. It’s now tucked in the corner at my side of the sofa. It’s nice and high to give me plenty of light when I’m knitting. The light was a bit of a find. A copper tube base twisted into a tripod and a plain black shade from John Lewis for a bargainous £40.

old shoe cupboard looking smart in its new clothes

old shoe cupboard looking smart in its new clothes

The sofa was a bit of a push-the-boat-out. It was expensive but it’s lovely. It’s comfy, hardwearing, elegant and has a big gap behind the curved back where Tinker can hide. I knew she’d love it, and indeed she did, sneaking treats and hiding behind the sofa when she visited. Someone managed to not get a photo…

new sofa looking tempting there

new sofa looking welcoming

Still to do: find or make a cosy rug. The chevrons are excellent but it’s not a very easy rug to look after, plus, despite insulating the floor in here, we could do with a warm rug on the floor. I’m seriously considering making one, something like this. I’ve got some yarn to make a pouf-footstool type thing. It’s a rich ochre and will look great next to the greys. Then we need new curtains. We’re going to have a set of curtains covering the door and the window, pretty much wall-to-wall, so it keeps the warmth in during the winter. It’s pretty pricey to get curtains that wide and I’m not up to making something like that, so we’ll have to wait a couple of months before we can do that. In the meantime, we’ve got some lightweight silvery-coloured curtains from Wilko’s for about £20. They don’t do much for the temperature but they do add to the cocoony feel late at night.

We were both somewhat apprehensive about the colour scheme in here. It made sense, but we still weren’t sure it would work. Luckily, we both love it. We’re really proud of the change we’ve made to what was an uninteresting and not very welcoming room. Random visitors (delivery lady, broadband engineer) have commented on how lovely it is. Friends and family have also complimented us on how well it works. It feels great to come in and here and feel the welcoming vibe. And it’s us. I feel very strongly that this house should reflect us and our way of life. I don’t want an identikit of whatever the high street thinks your house should look like. I want it to be different, welcoming and very clearly ours, and I think we’ve achieved it.

more floor

The floor in the living room is laminate straight over concrete. A couple of the neighbours have concrete floors in the front room, so I think something must’ve happened to make people rip out the wood and lay concrete. (Flood? Though I can’t see how the river could get this far. Really bad woodworm? Possibly. After all, there was woodworm elsewhere in the house. Some bonkers 1960s craze? Who knows.)


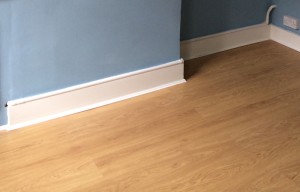
laminate flooring and gas pipe running along the top of the skirting board

laminate flooring and gas pipe running along the top of the skirting board

Anyway, I’m sure you can imagine that makes for a cold, cold floor. Not such an issue in summer, but it was very chilly when we moved in early Spring, and we’re not looking forward to an icy floor through the depths of winter.

Because the floor’s concrete we don’t have much room to manoeuvre. We don’t want the whole pneumatic-drilling-the-floor kind of work, so we had to find a way of insulating and recovering in less than 2 inches before the door wouldn’t open. You can buy sheets of polystyrene insulation which are about an inch thick. Bingo.

So, this week the builders came and took off the skirting boards and lifted the laminate flooring. Then the gas engineer came to move the gas pipe, which was running along the top of the skirting boards, and lay it out of the way for when we get a woodburner. This step wasn’t linked to the new floor except that since we’re lifting the floor it seemed like a good time to do it. (You can see the pipe above the skirting in the photo at the top.)

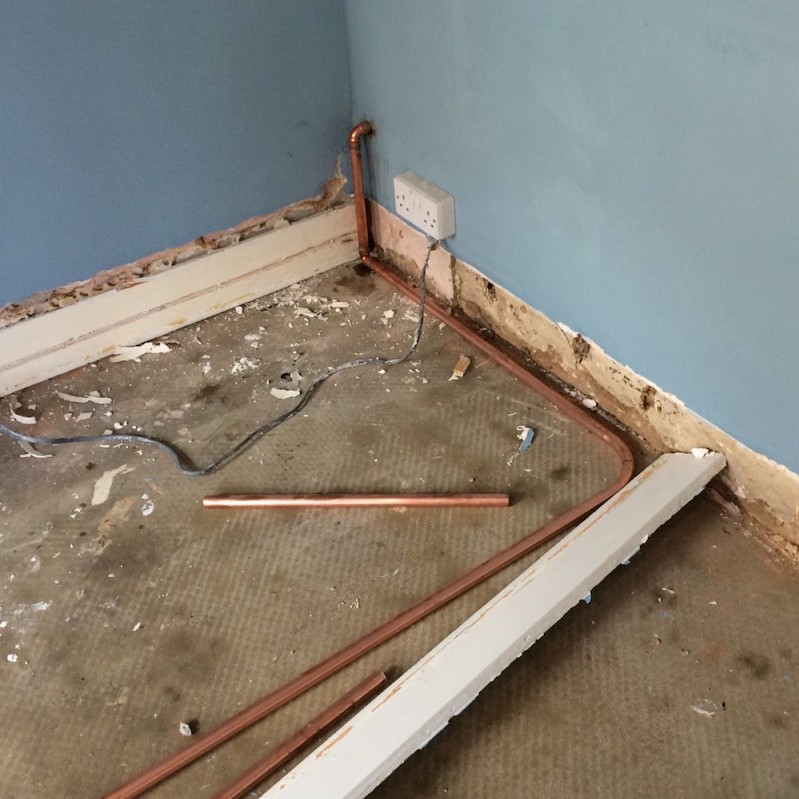
One wall of skirting had been routed out to hide some cabling. We didn’t see that until it became clear that the skirting was somehow tied to a plug. Interesting.

concrete floor, new pipe, cable routing

concrete floor, new pipe, cable routing

The next day the sheets of insulation went down, followed by half a tree of tongue and groove. The old skirting boards were reused. The badly damaged pieces were flipped over. We considered getting new skirting but we had enough to reuse so it seemed pointless to buy new.

And now it’s time to sand everything, floorboards, skirting, cupboard doors, the lot. Then we’ll be repeating the process from the dining room of staining and varnishing the floorboards. Cue aching arms by Sunday evening.

Saturday and Sunday

The stickers on the floorboards were an absolute nightmare to get off. I tried a combination of damping them with water and scraping with a metal spatula and soaking off the adhesive with rubbing alcohol. I was concerned we’d end up with square patches, so, while I sanded the rest of the woodwork that I’d started on Saturday, booyaa sanded all of the floor with the orbital sander.

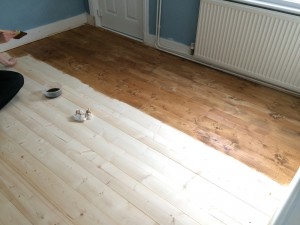
By then we were both exhausted, but we found enough energy to stain the floor. That was my job. When you start painting on the stain you panic that it’s horrendously dark and artificial looking and you’ve made a huge mistake. But we remembered feeling this way with the dining room floor and that turned out really well once it was finished. And, as I carried on painting myself out of the room, the first boards were drying and starting to look like old pine, as planned.

livingroom-floor-staining

action shot of me painting on the scary brown stain

Then I went to have a long, extremely welcome shower while the stain dried. Then first coat of hard wax went on. That was booyaa’s job. It’s really hard work. You have to drag the applicator in one firm sweep from one side of the room to the other, with no stopping and going back over because that will make it patchy. It takes 4-5 hours to dry, but we’re leaving it overnight to be on the safe side.

Clean up time and dinner. Luckily dinner is easy. So very tired.

Tomorrow the second coat of hard wax varnish goes on and we’re done.

Tuesday

livingroom-floor-varnished

tongue and groove stained and varnished

All done! New floor!

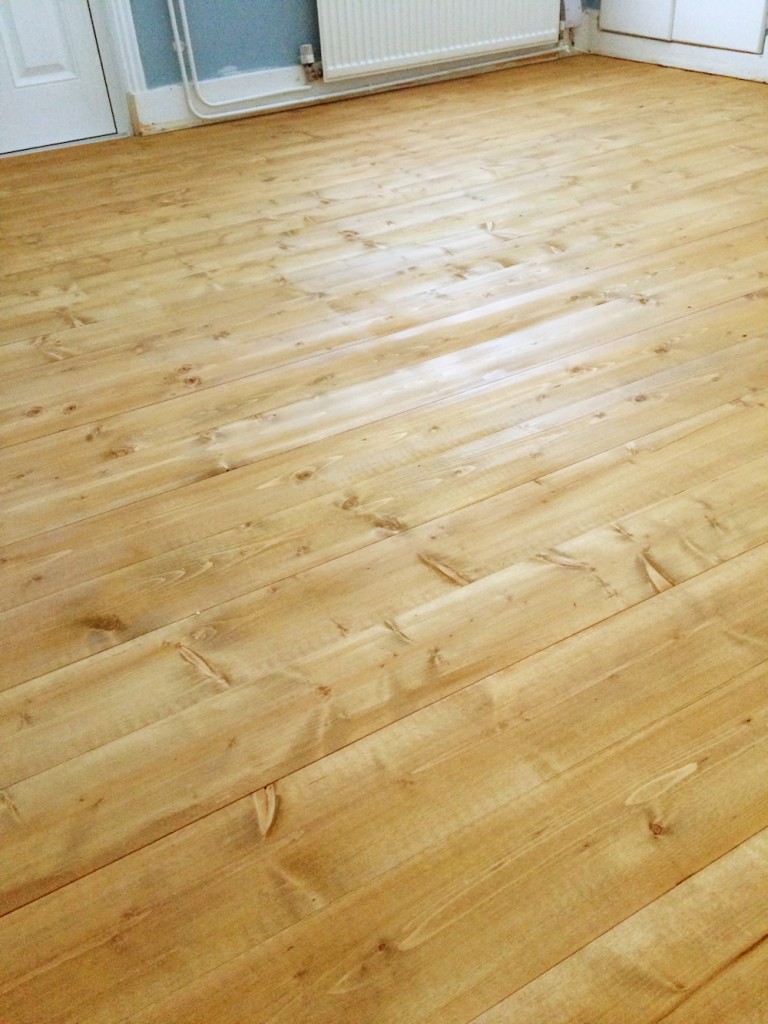
The wood isn’t as attractive as the wood we have in the dining room. They’re different products from different places. In the dining room the grain is really nice with a few knots and the planks are quite wide. The living room wood is narrow, it was much paler to start with so the finish is lighter now, and there aren’t that many boards with attractive grain. The knots are weird, triangular shaped, like the wood was cut at an angle. I’m pleased that most of it ends up being covered up by rugs and furniture. But is it warm? Because that was the main reason for doing this. And the answer is: yes it is! I mean, it’s not like having underfloor heating (I wish) but it’s markedly less chilly than before.

And now it’s time to paint the living room. I’m getting fed up of spending my evenings at the dining room table.

how to adjust a door hinge

I know, a serious post title. Whatever next?

After replacing the living room floor (which I’ll post about later this week) we found that the front door stuck when you opened it fully. The door’s been a bit of a pain since we moved in, as it needs a good slam to close. Then the type of lock is a newfangled thing that we’re not used to. So this was enough to spur me into action.

I looked up adjusting the uPVC door. Amid loads of really unhelpful advice and confusing explanations I found two forums which made it really clear. Thanks, community.screwfix.com and mybuilder.com.

You can adjust vertically and horizontally. So if your door has a gap at the top and scrapes along the floor, you need to jack it up. If you have a gap down one side or your lock is too tight you’ll want to move it sideways. When there are three hinges the combination of adjustment options gives you a fair bit of control.

Our door tilted to the right at the top, which means when it swings open the lock side of the door hits the floor before the rest of the bottom of the door. You can see the gap between the door and the frame is wider at the top than at the bottom. To straighten the door I needed to tighten on the horizontal. The way you do that is by turning the screw that sits on the side of the hinge. In my case it was a clockwise to tighten, as it should be. Tighty righty, loosey lefty.

Different types of hinges and different manufacturers offer different adjustment options. Some have adjustments within the pin itself. In that case you need to pop the cap off the top of the hinge and use a screwdriver to lift/lower the door on the pin. Ours only has the hex screw set into the right of the hinge. The pin isn’t adjustable.

So, allen key in hand, I adjusted the top hinge, which was clearly the culprit, and then tightened the middle hinge a little, as advised, to keep the door straight. We tested the door and adjusted bit by bit until the door stopped sticking on the floor when it was fully open and the gap between the door and frame was even all the way down.

booyaa locked himself out and let himself in again to test that my changes hadn’t affected the locking mechanism (which can happen, if you move the door the lock doesn’t line up the same as it used to) and – bonus! – you don’t need to slam the door to close it anymore. I was so happy. I patted myself on the back and demanded booyaa do the same.

ready for the floor

This has been a long journey. But we’re nearly there.

After discovering we have had woodworm we treated the floors before going any further. It’s very unlikely the woodworm are still hanging around, there’s no sign that they are active, but just to be on the safe side.

Talking of safe sides… woodworm treatments vary but some of them are exceptionally toxic, to humans, plants, other insects (like bees) and pets. I did some research and looked into what I could get hold of fairly quickly and we opted for a middle-ground. It’s a synthetic insecticide and in lab tests if ingested it does harm small mammals and some insects but the claim is that bees will be warned off before they get near enough for the insecticide to do any damage. You have to wear gloves and masks to apply it, but within an hour it’s safe for all.

It didn’t give a ‘time to dry’ on the packaging but we anticipated from overnight to 24 hours. How wrong we were. Five days later and it was finally dry.

So we resume the process.

First up: wood hardener. Because some of the boards have exceptionally damaged patches we had to use this or risk one of us putting our foot through a floorboard in the near future. It still feels a little risky given just how fragile some of the parts are along the path that leads from the dining room door to the kitchen.

This is actually a ‘wet rot’ treatment, but Dad recommended it as an easy way to toughen up the flaking wood before applying the wood filler. booyaa chopped up bits of wood to make little bits of scaffolding for the most damaged areas. He slotted them in to keep the fragile wood in place while treating them.

The hardener darkened the treated areas considerably and we couldn’t tell if it was because it was still drying out.  After a week we decided that the dark patches were here to stay.

Some of the patches had toughened up a little. They were more stable and looked able to support the weight of wood filler. But there was one floorboard in particular that moved ominously if you stood on it. We finally plucked up the courage to investigate properly. That was when we saw that the board wasn’t just damaged on top. It was also falling apart on the underside. Lawks.

Much hand-wringing ensued. We decided that two or three boards were beyond repair. Time to bite the bullet. I called in Mr Joiner-Painter again. He said, “If I were you I wouldn’t bugger about. Pull these two…” prod, poke, mumble “probably these four boards up and replace them.” So that was that.

Mr J-P was booked in ten days hence to do more floor replacing. When he lifted up the boards he found what we’d expected, that the boards that looked ok from the top but felt wobbly to walk on were badly damaged underneath. But it was worse than we’d all thought. He salvaged what he could and we were left with one old board as an island in a sea of new boards, and then one third of the original floor grouped up to one side. 8 more boards had gone “next door”.

It was sad. And frustrating. And expensive. But I didn’t want an unsafe floor and it felt like we were spending time and money and not making progress. At least now we could get on with finishing the floor and use the room properly again.

On Friday night we cleared the room – again – so that we could get started first thing Saturday. I say first thing. By the time we’ve had breakfast and a second cup of coffee it’s always nearly midday by the time we actually do any work.

We finished off the few bits of sanding around the edge of the old wood, and gave all of the new wood a medium sand to make sure it was clean and ready for staining.

We used one coat of woodstain in ‘Victorian Pine’ on the brand new wood and left it to dry. We were hoping we might be lucky and the new wood would stain to match the old wood. Just like that. My backup plan was to do another coat of the stain across the whole floor.

I bought a floor stain brush and a big sponge for the stain application, having read arguments for both sides. We tried both and decided that the brush gave a better finish. The big chunky sponge wasn’t great for applying the stain but it was good for mopping up spills and excess stain.

The first coat went on and the colour was an astonishingly good match. We were both impressed. And quietly relieved.

Once the stain was dry we were ready for the first coat of varnish. It’s not traditional varnish. It’s what’s called a “hard wax oil” which makes no sense whatsoever to me, but it’s an as green as you get combination of oils and waxes which will, after two coats, protect the floor as much as varnish would. The plus side, on top of the eco credentials, is that it nourishes the floor at the same time.

For the oil we bought a fancy applicator which is designed to make the job cleaner and faster.

One of the plus sides of this type of non-varnish varnish is that it doesn’t need sanding between coats. We also bought the fast-dry formula so we don’t need to avoid the dining room floor for 24 hours. Because that would be interesting, since the only way you can currently get to the bathroom is via the dining room… We tossed ideas around about how we’re going to manage with no access to the kitchen or bathroom for what could be up to 8 hours.

The obvious solution was for the drying time to be overnight. Make sure we’re ready for bed bar this last coat of varnish. We could have jars of cleaner for the brushes and hand wipes ready, as we have no access to water once the dining rooom floor is out of bounds. Once the varnish is on we go straight to bed. We can both sleep for 10 hours if we put our minds to it, so the floor would be usable when we woke up. booyaa’s addition to this plan was (are you ready for this?) that we get a chamber pot “for emergencies”.

The plan was to do the coats on consecutive nights.

We applied the first coat, which is supposed to dry in 4 hours if the room is sufficiently well-ventilated. Since we couldn’t think of a better way of doing it, we left the windows slightly ajar, thinking that with 8 hours to dry it would work out fine. And it did.

But our consecutive nights plan was somewhat scuppered. The quantities recommended for the size of our dining room were hopelessly underestimated. We ended up leaving it at one coat and ordering another can of not-varnish and doing it two days later.

Same game of getting ready for bed and doing the varnish at 10pm and crossing your fingers you didn’t need to go to the loo in the middle of the night.

Look Ma, no holes!

Look Ma, no holes!

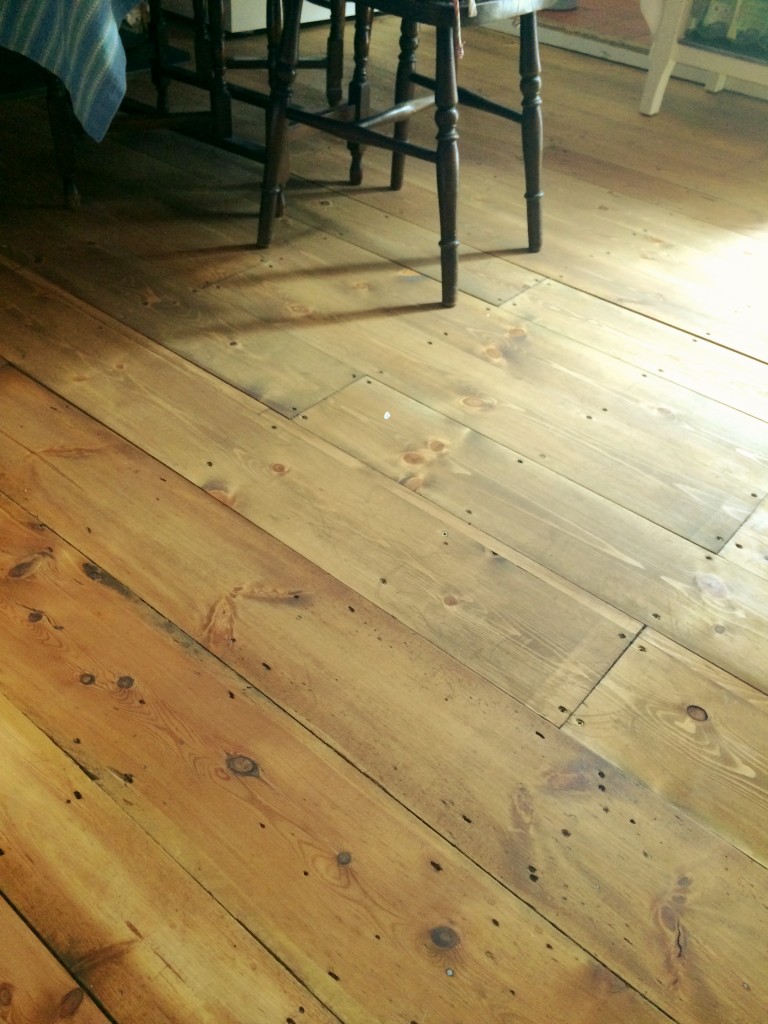
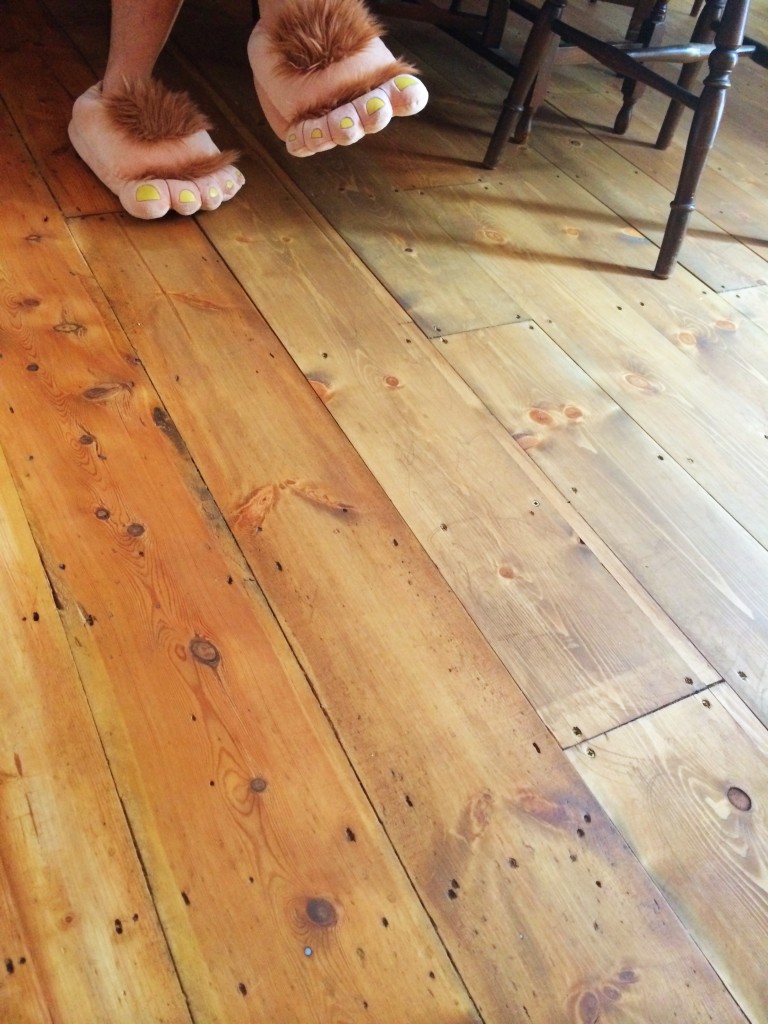
The final result is a very subtle matt finish. In a few places where the varnish went on a little thick there’s the merest hint of sheen. Mostly it looks like it’s bare wood. After applying the not-varnish we noticed that the original boards have a red hue which the new boards don’t have, so there is a difference between the old part and the new, but the new boards still, miraculously, look aged.

Old boards (nearest) against new boards. And a hobbit's snuck in there too.

Old boards (nearest) against new boards. And a hobbit’s snuck in there too.

Well, it’s been a long journey, but we have a nice floor now. We both like it. And it’s ready to dance on.


(One of those occasions where the cover is vastly superior to the original. Go Lissy.)


PRODUCTS:
Mann’s water-based floor stain in Victorian Pine
Osmo Polyx Oil Rapid in Matt
Both from wood-finishes-direct.com

endless DIY

Sometimes you have to remind yourself to take a break.

We don’t go out much and we’re not big tv watchers either, but we do have one hobby that will take up as much time as we give it. That’s LOTRO, also known as Lord of the Rings Online. It’s a massively immersive game where you take your character into a rich, visual interpretation of Tolkien’s Middle Earth and there you interact with hundreds of other characters played by other real people, just like you. It’s not everyone’s idea of fun, I know, but we both love it. We play together, helping each other out and fighting orcs, goblins and trolls together. We could easily (and sometimes do) spend three or four hours playing. And sometimes we take a break for dinner before going back online for another couple of hours.

But when there’s this much DIY on the to-do list, well we tend to limit our game time to an hour here and there. This weekend we had a long session, to the detriment of our sleep patterns… A couple of weeks ago, after long sessions of DIY every weekend, booyaa went on strike, as it were. He downed tools and we spent the weekend playing LOTRO and cooking nice food, and we tried to simply enjoy our house for a couple of days. That was really nice. We’d both like to do that more often.

So we’re talking about rounding up some of the bigger projects. Looking at what we can complete and trying to have some time off before we start anything new.

So, current state of play for the bigger projects.

  • Finish off the dining room fireplace – we’re getting someone in to do that for us. Just waiting for them to slot us into their schedule.
  • Finish off the floor in the dining room – that was supposed to happen this weekend but one of the steps in the process took longer than expected and held up the whole project. Hopefully we’ll get the rest done next weekend.
  • Decorate kitchen, dining room, living room and staircase – all in one go, as soon as we’ve got the fireplace and floor finished in the dining room. Again, we’re not doing this ourselves. We’ve got quotes and it’s honestly not worth the hassle. Outsourced!
  • Landscape the garden – we don’t think we can afford to get someone in to do this (though we haven’t requested quotes) and it seems like too much for us to do ourselves, so we’re scaling back our plans and going to build just one flower bed for now. As long as there’s something to enjoy this summer.

Since we couldn’t work on the newly-sanded floor this weekend we spent about half of our time doing some of the smaller jobs that have been on the list for weeks. Plenty of things we’d started but never finished, or we were waiting for something to be able to complete it. Or just excuses ;) But we tore through a bunch of stuff:

Re-fitted the bedroom blinds and curtain poles (one of the blinds had a dodgy mechanism so we were waiting for a replacement; in the meantime we realised we’d have to move it around so that we could the drill into the tight corner we had to deal with). Now, to make the curtains. (Procrastination klaxon!)

We have a built-in cupboard in our bedroom. It’s just a rack of shelves in an alcove, nothing fancy. We’ve had each of the shelves piled up with bags of out-of-season clothes, spare duvets, guest bedding and so on. But we have so little clothes hanging space in this house, just the one tiny wardrobe, that we decided to convert it into a wardrobe. We’ve put two rails in, one at the back and high up for dresses and coats and the other at the front lower down for shirts. It’s a bit weird, but the space was too deep to waste. We’ve still got the highest and lowest shelves to use, too. So all in all, it’s maxed out all the possible storage space.

Following on from this, we sorted through some of those bags of clothes and bedding and vacuum-bagged as much as we could. Each of the bags then went into a plastic box and in the loft, out of the way.

Emptied the garden shed. We didn’t have much choice about this: someone answered our ad on Gumtree, so it had to be done! With any luck they’ll also take some of our gravel to use as a base for the shed.

booyaa fitted the TV bracket in the living room. We started this weeks back, but the wall crumbled and we had to fill it with polyfilla, then we couldn’t get the huge bolts lined up and had to redo it. Ugh. It’s a very unforgiving piece of kit. You need a specialist drill bit and screwdriver because the bolts are so long and the slot is too wide for your average screwdriver. But at last it’s up and the tv is hidden away in the alcove. We can stop using the hallway shoe cabinet as a tv stand, to my immense relief.

Lastly, we hung up the hanging plant pot in the bathroom for our spider plant. It’s been sitting on the windowsill for weeks. Tiny job, but still.

And that’s where we’re at with tiny jobs. Next weekend we’ll revisit the dining room floor. The major jobs on the list will take up the next four to six weeks, but we’re not doing most of it, so it looks like we’ll get our weekends back very soon. Hurray! More time to enjoy the work we’ve done so far.

utterly floored

This has been a ton more effort – and cost – than we’d anticipated. It goes in four stages: ripping up carpet and repairing floorboards; sanding the floor; finishing with varnish or paint. Here are stages 1, 2 and 3.

Three weeks ago

ICKY CARPET
The carpet in the dining room and up the stairs smelled of cat pee (even after dousing it repeatedly with a cat-pee treatment spray) and was a depressing beige colour. Both of us had decided we wanted to pull it up and restore the floorboards underneath. Bare floors look great and are easy to keep clean – and since we’re planning on getting a pair of puppies soon it’s a more sensible option.

What concerned us, though, was that in a number of places you could feel a depression in the floor under the carpet. I was worried we’d have unusable boards. We did a quick exploratory carpet lift in the tiny square at the bottom of the stairs and our hearts sank. It was covered in two pieces of board of the sort you’d use to board out a loft. Boards on the floor, yes. Floorboards, no.

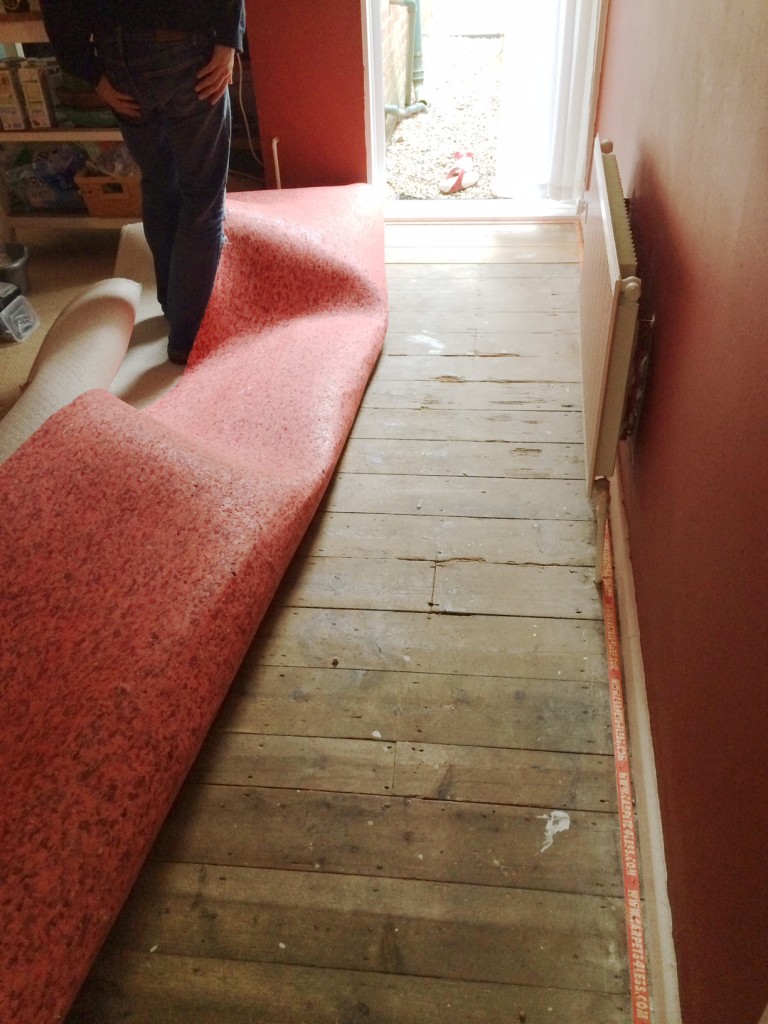
A week later we removed the whole carpet. We cut it into strips and rolled it up. It’s in the shed. Another thing that needs to go to the tip. What we found when we lifted the carpet was a fairly decent if dirty and smelly floor. We let it air for a few days and then I gave it a really good scrub. It came up a shade lighter and didn’t smell quite so musty. Progress!

floor-removing-carpet

Pulling up the carpet

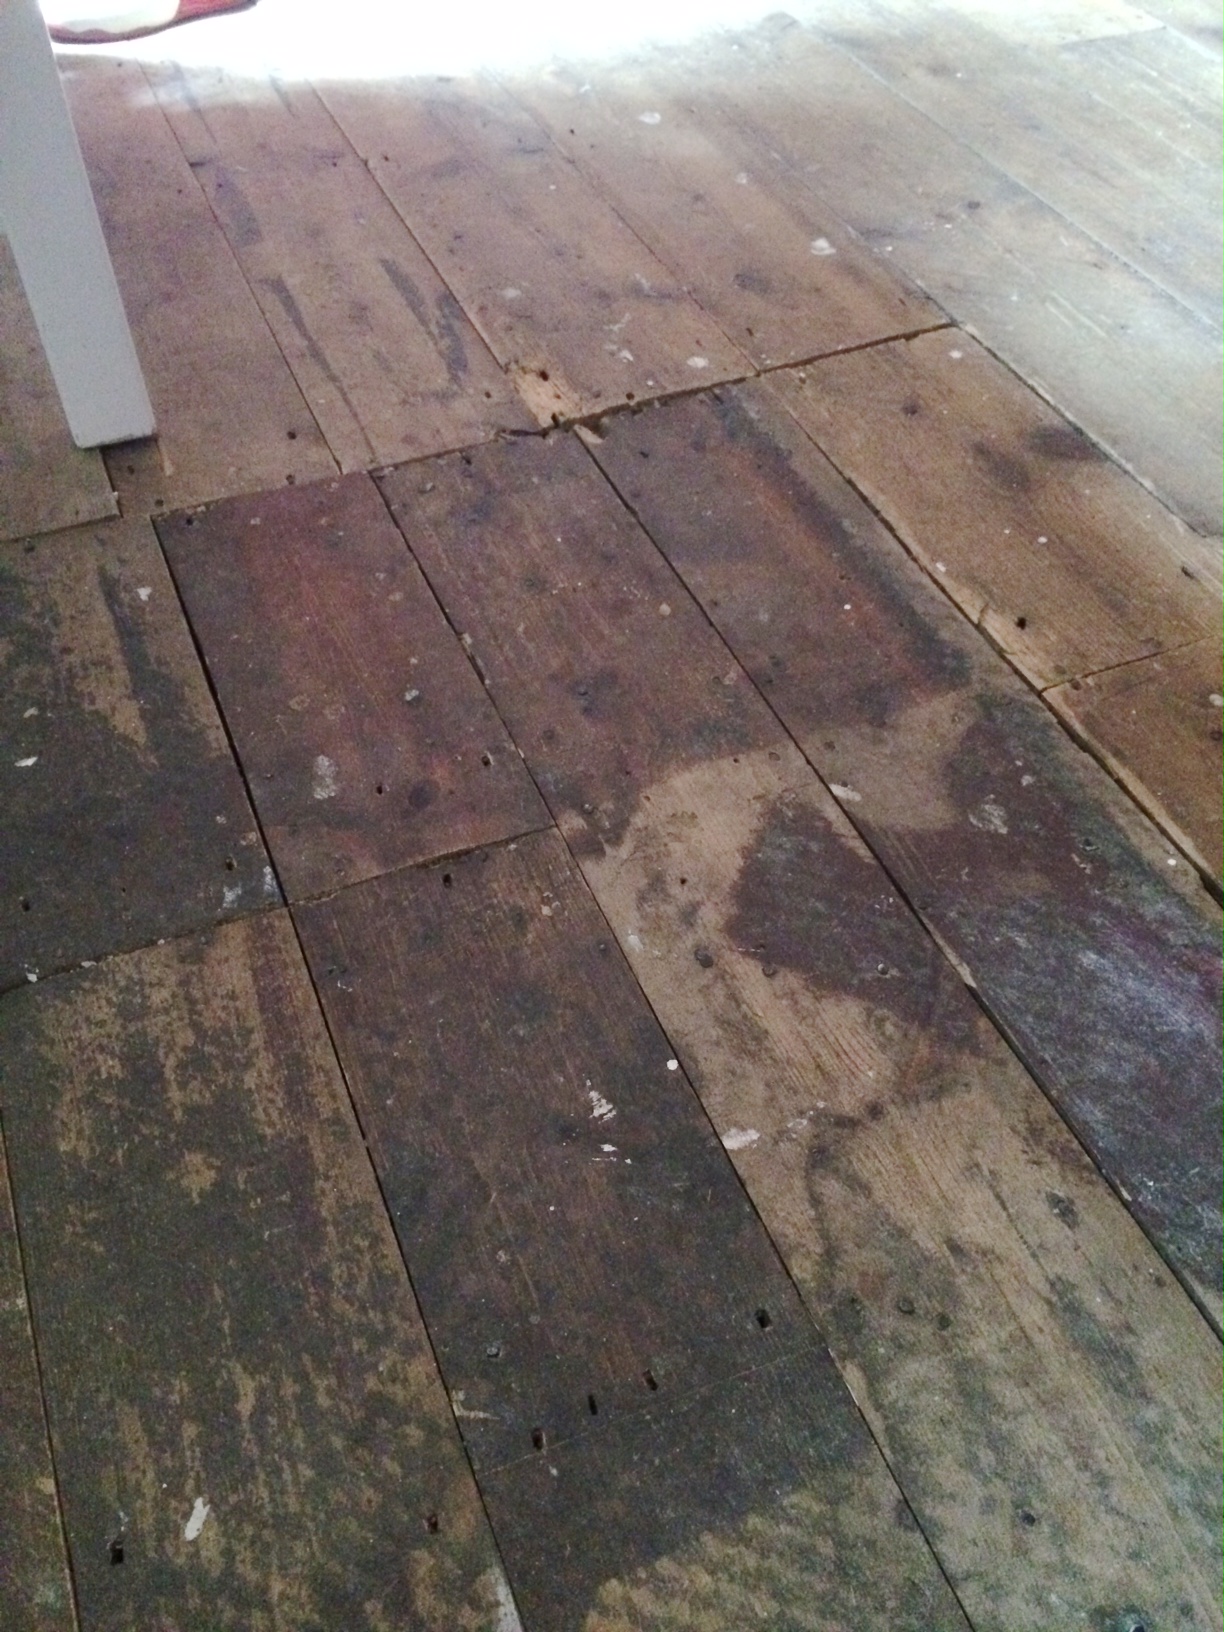
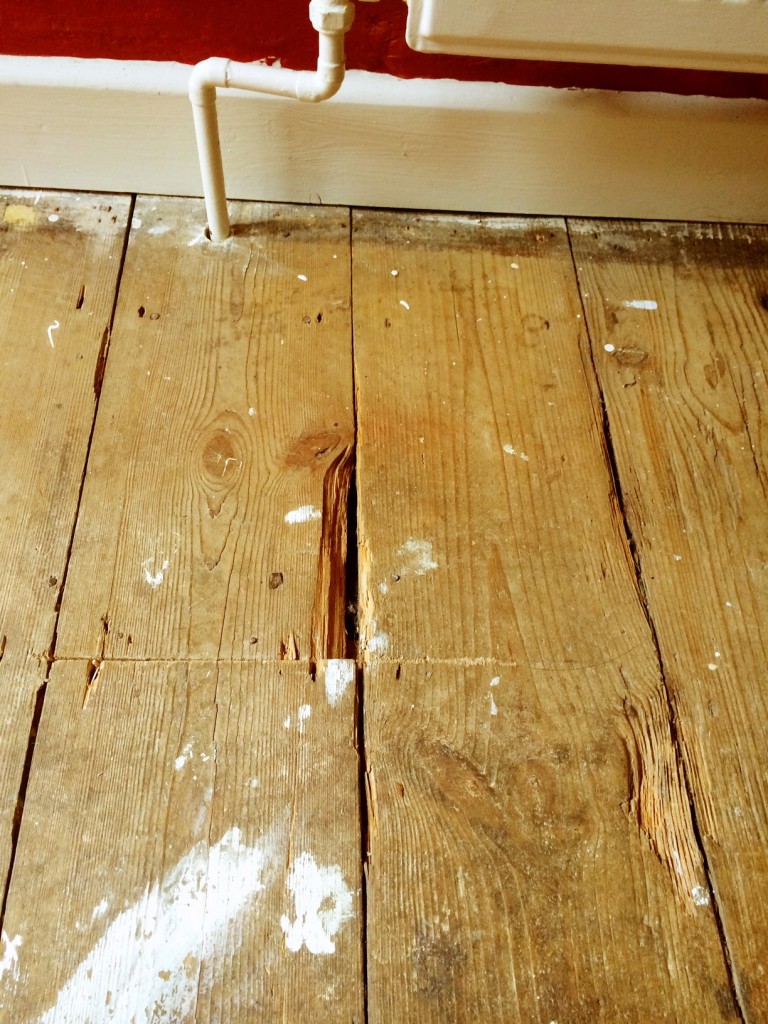
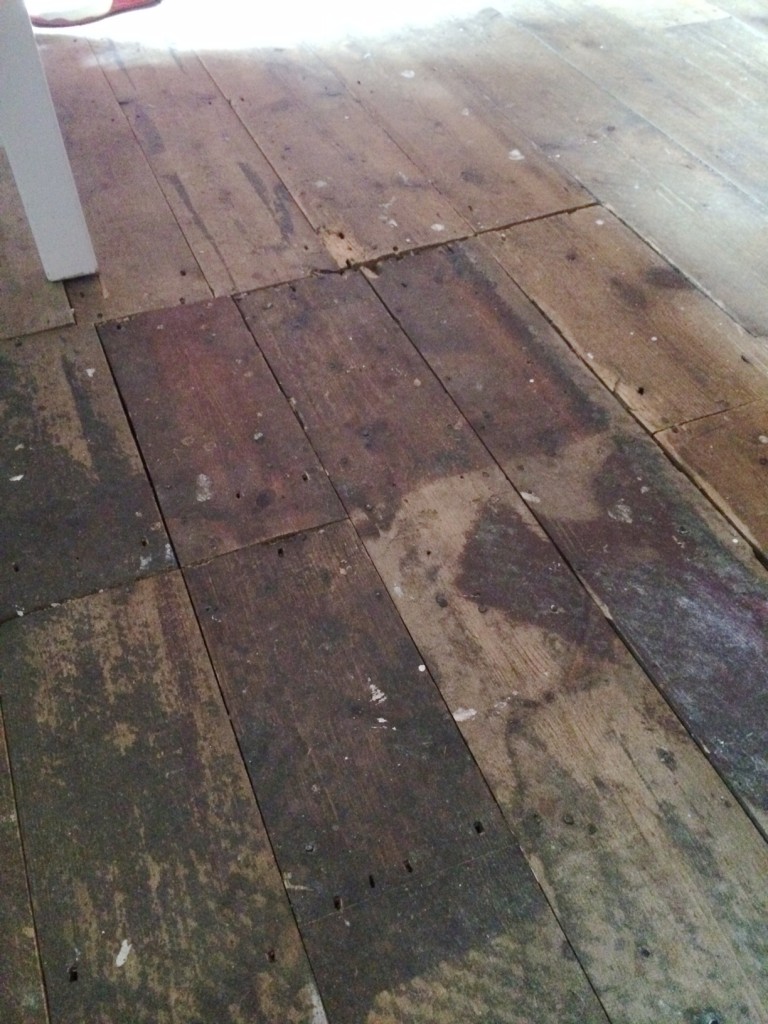
We had a look at the state of the boards and tried to work out what we could hope to achieve with what we had. Some of the boards were badly damaged where they’d been crowbarred up to, presumably, lay pipes for the central heating. Some of them had dozens of nails in. Dozens. Ridiculous. One of the dips in the floor turned out to be due to a board being more sunken than its neighbours. The other dip was slightly more problematic. One corner of the room had the floorboards replaced. The replacements, it turned out, were all cut to the same length and thinner than the original boards next to them, hence the sudden dip.

Floorboards with damaged edges

Floorboards with damaged edges

floor-patched

Corner patched with boards of the wrong depth

Last week

REPAIR AND REPLACE
We called in handy Mr Joiner-Painter for a consultation. His verdict fitted in with what we’d anticipated: lift the skinny boards and use them to board the bottom of the stairs and relay the whole section on the far side of the dining room so that the boards don’t all join in the same place. We’d need a few new boards to fill in the gaps.

Mr J-P came and started taking up boards and cutting and refitting them. He re-used as much he could then took me to the timber yard at Kent Blaxill (a local trade supplier, like B&Q for grown ups) to choose our new boards. It was quite exciting. I flirted shamelessly with the guy on the till and got a 10% discount usually only for trade customers. Result!

Back home with the new boards, and Mr J-P got on with laying the new boards. He proclaimed the joists in good nick; some of them have been replaced in the last 10 years, he says. So with the joists, the new boards and repaired original boards the dining room should have a sturdy floor for another 100 years.

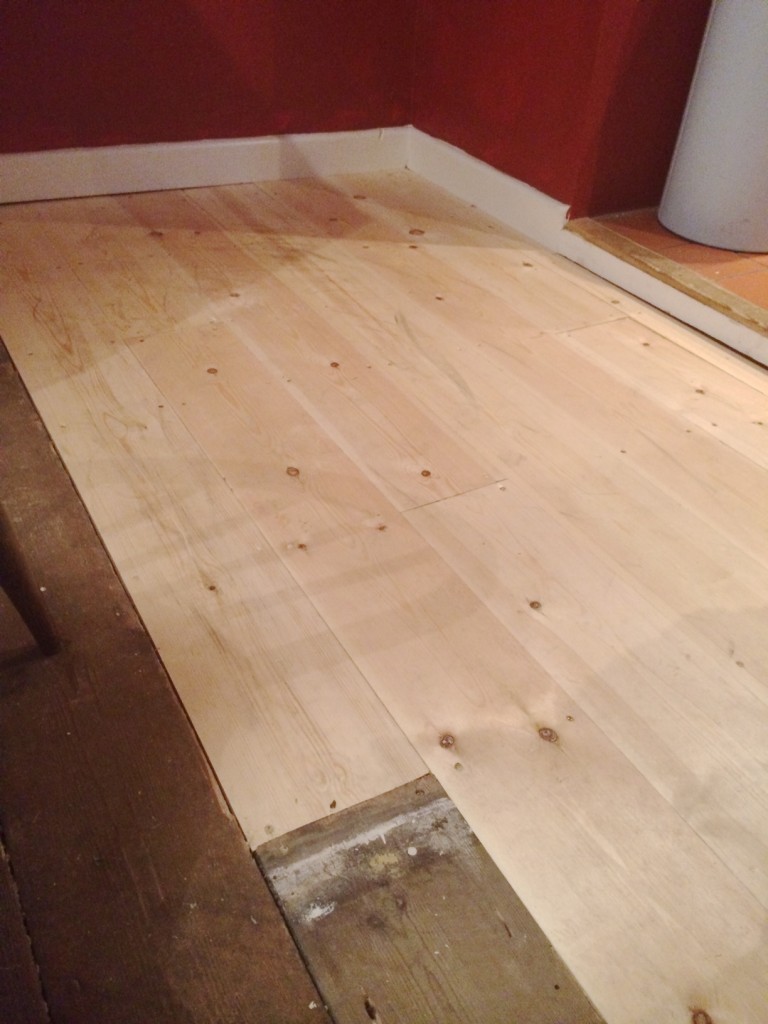
floor-new-boards

New boards laid

Saturday

SANDSTORM
During the week we read blogs and FAQs and DIY forums until we were blue in the face, then booyaa ordered a drum floor sander and an edging sander. We guesstimated the number of sheets of different grades of sandpaper we’d need based on advice elsewhere. We had the sanders delivered on the Friday so we could start on Saturday after breakfast and finish the job by early evening. We were both hoping we’d get it all done in one day, but knowing we had Sunday to finish off if we needed it was a bonus.

So, Saturday morning we moved all of the furniture out of the room (yet again) and got started.

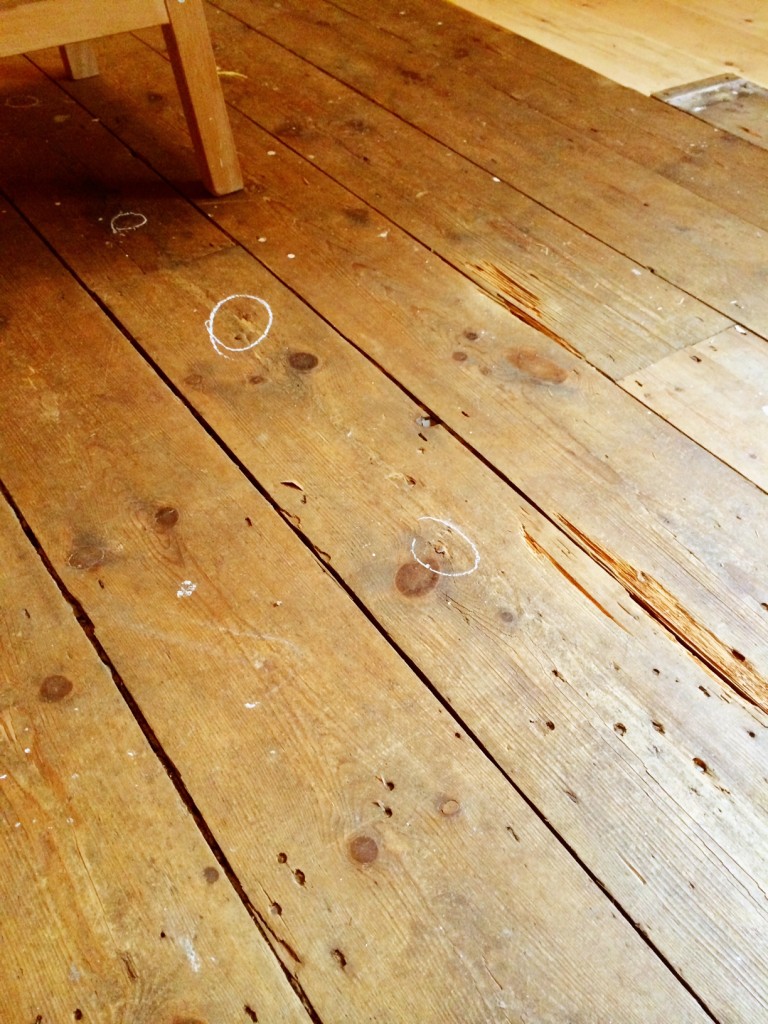
Everyone said over and over about punching in any nails as even a tiny nail head will tear the sander sheet, and they’re pricey, so you don’t want that. After breakfast we cleared the furniture from the dining room and booyaa got on with punching the nails. This was when we discovered just how many nails were in the floorboards. Ridiculous amounts. Those he couldn’t punch down any further he marked with a chalk circle so he knew to avoid that bit – we’d get as near as we could with the edge sander and after that it would be the mouse (my dinky palm sander intended for furniture restoration).

floor-marking-nails

Marking protruding nails (also: look how many nail holes are in those boards!)

After watching the instruction video one last time, he got his face mask, goggles and gloves on, tested the breaker switch and got going. We’d decided to go the wrong way across the boards first time, since the boards are so uneven. The sander hire video recommends a diagonal motion, but our room is just too small for that to be practical. So, on a clear run with no nails jutting out, he set off. Half way across the room the sanding sheet shredded… Gah! We had a look and saw there was a nail which was probably flush the board, but given how much the sander skims off the top of the board it was too high. Back to hands and knees and punching in nails again.

After the clear up (the sanding sheet was in a million bits all over the floor) we also saw that the edges of the boards which protrude were splintering badly. Change of plan! We decided we’d follow the direction of the boards, at least for now.

It took about an hour to do the whole of the old section of the floor with the coarse sanding sheet. booyaa said that once he’d realised that he needed to pull the machine back to slow it down that it was fairly easy to use.

Then, once he was feeling confident, he went across the boards with the coarse sanding sheet and smoothed off a few of the bigger differences in the board heights.

He went over the old boards again once with a medium sander and then over the whole floor, including the new boards, with the finest grade sanding sheet. After copious vacumming we could see the state of the floor. It was looking pretty good, but not, we thought, good enough to be able to stain and varnish. Too many patches. We noticed that there was a dark area at the very edge of the old boards where the sander hadn’t reached.

Now we could see it closely, we also worked out that some of the edges where we thought the boards had been crushed by a crowbar actually are actually woodworm damage. One of the patches is so big we’re not sure how sturdy that board really is. We’ll do some investigating and hope that woodfiller will repair it, though we’re both being optimistic and we know it. At some point we know we need to replace at least three more floorboards. At this point it dawns on us that it would have been cheaper (and easier) to have had a flooring company come in and replace the whole floor with engineered tongue and groove. It’s a crushing disappointment. We try to hang on to our reasons for doing this: we’re restoring the original features of the house. That’s the point. I’m not sure either of us is convinced.

Sunday

NEARLY THERE
After breakfast in the garden, a positive outcome of the dining table being out of bounds, booyaa got back into his smelly DIY clothes ready to use the edge sander on, yep, the edges of the room. It isn’t nearly as effective as the main sander. One disc disintegrates, another wears out. Three goes with the edge sander and a two inch strip of floor all along the skirting board remained resolutely dark.

Another close up investigation of the edges shows that they have a greyish opaque finish, and we’ve decided we’re probably up and against old carpet glue. I tried a water-based white spirit alternative, but that doesn’t do anything (serves me right for being so darn eco-friendly, right?). Then booyaa had an epiphany. He cut the coarse sheets leftover from the belt sander and fitted them on the edge sander. It worked! We’re left with a few tiny patches which I’ll work on with the mouse over the next week.

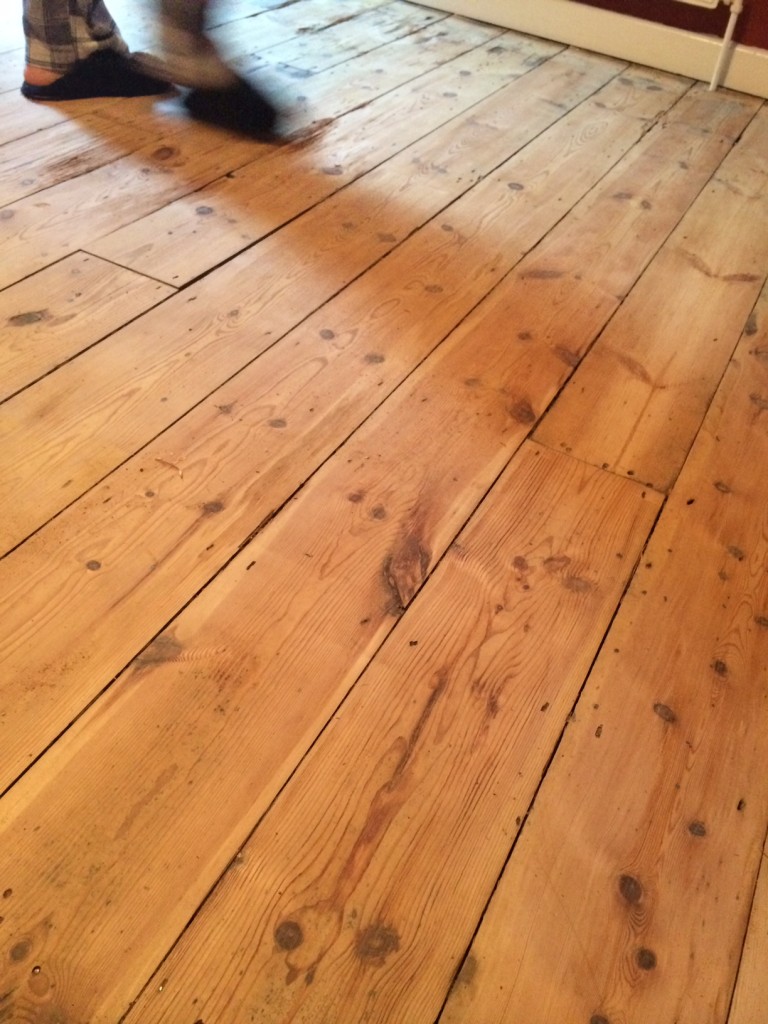
sanded floorboards (and booyaa's feet)

sanded floorboards (and booyaa’s feet)

Next up: woodfiller to patch the damaged boards. Stain the new boards to blend in with the old. Varnish. Avoid the floor for a day while the varnish dries… Tune in next weekend to find out how it’s going.

I bet you look good on the dance floor…

Firestarter

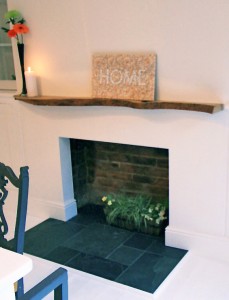
We want to install a woodburner in the living room so this project feels like a practice run. We decided to open up the fireplace in the dining room. We don’t need a fire there, I just want an empty brick recess where a fire would’ve been. It seems strange to me to have a chimney breast and not even a nod to its purpose. In my head I envisage something like this:

beautifully finished fireplace – from moregeous.wordpress.com

beautifully finished fireplace – from moregeous.wordpress.com

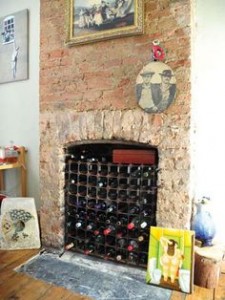
or lovely bare brick chimney and look at all that vino!

or lovely bare brick chimney breast – and look at all that vino!

We look up information on chimneys and fireplaces. We read blogs of people who’ve already done something similar. We trawl through the DIY forums and watch some timelapse of people renovating a boarded up fireplace. Then we gird our loins and go for it on Sunday after breakfast.

We move everything out of the way and since we can’t find the plastic dustsheet from painting we cut up bin bags to seal off the kitchen archway.

booyaa uses a crowbar to prise off the skirting board, which we’ll cut up and refit once the chimney breast is replastered around the new fireplace recess.

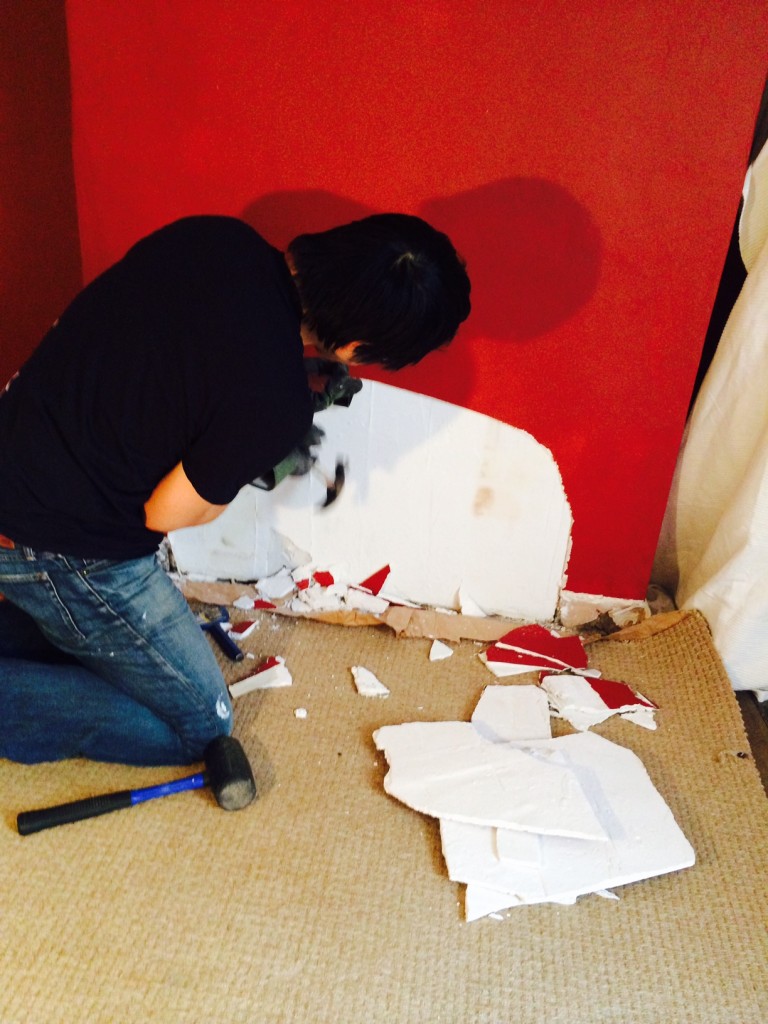
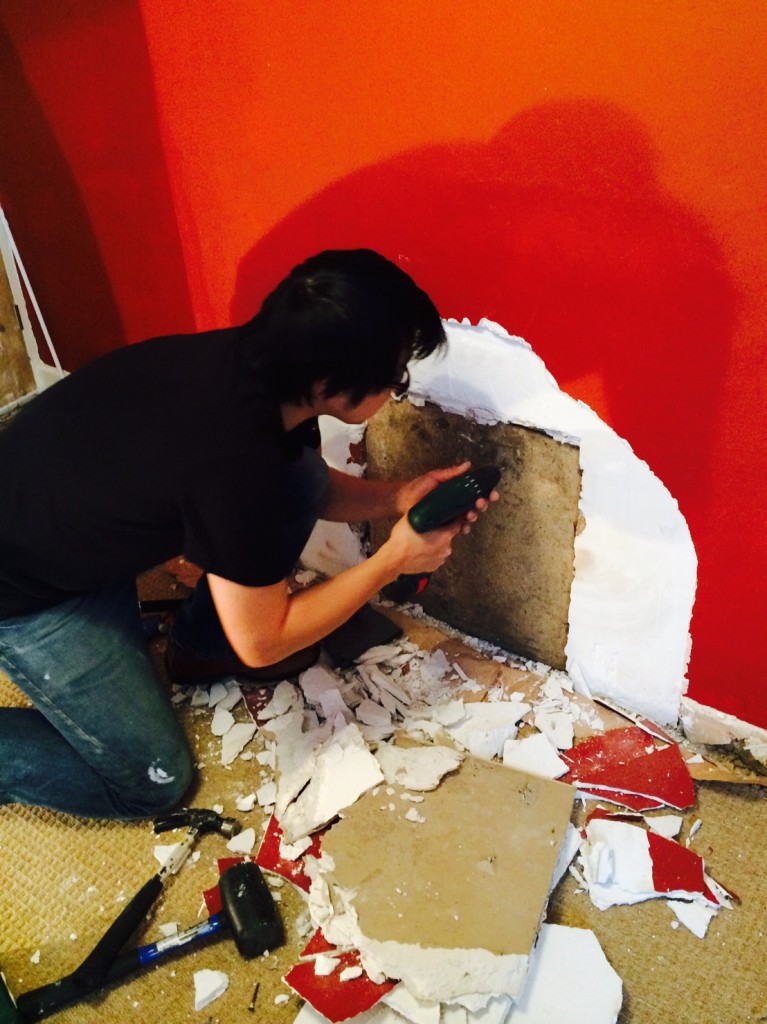
booyaa gets his dust mask and gloves on and starts chipping away at the plaster with a chisel. Great sheets of plaster come loose easily. We get quite excited that it’s going to be a really easy job.

plaster coming off easily

plaster coming off easily

Ten minutes or so later we can see the board in ‘boarded up’. booyaa chips away a little more to expose the whole board. It’s screwed in (to what?) so a few whizzes of the electric screwdriver and we’ll have an unboarded fireplace!

removing the screws

removing the screws

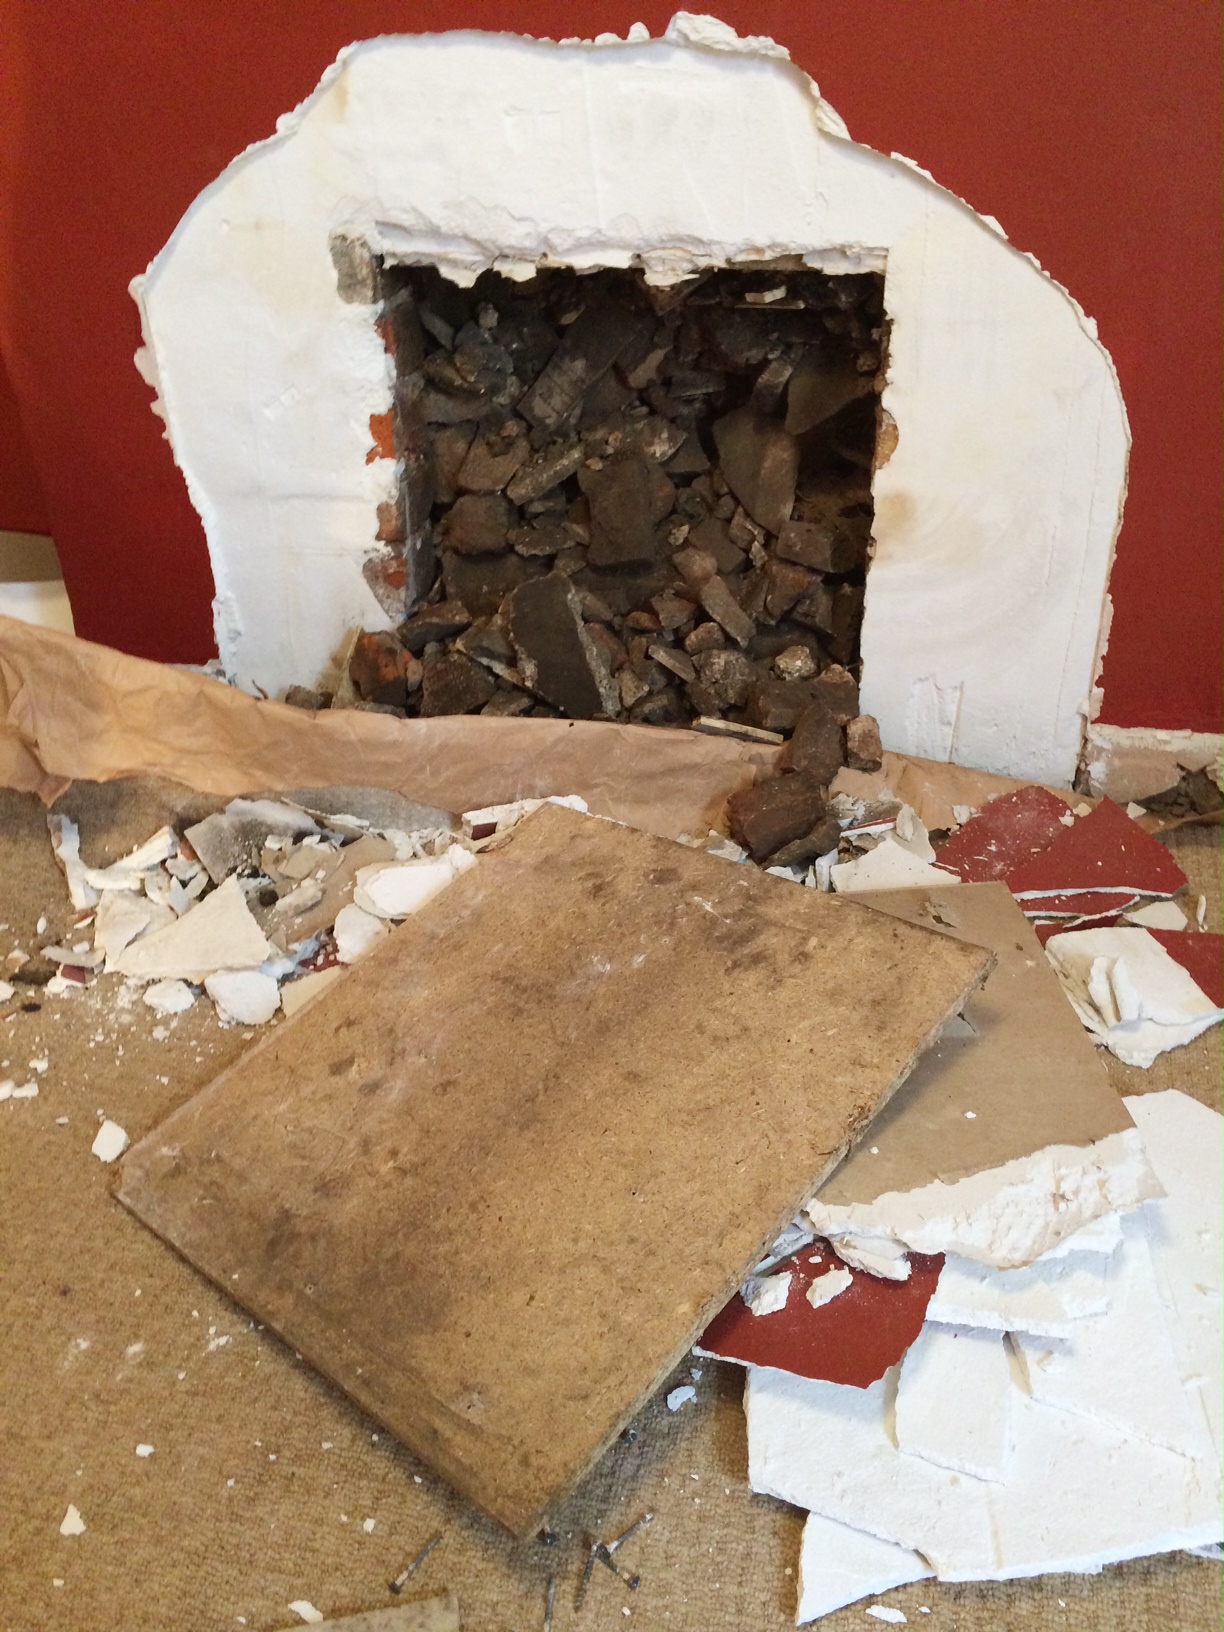
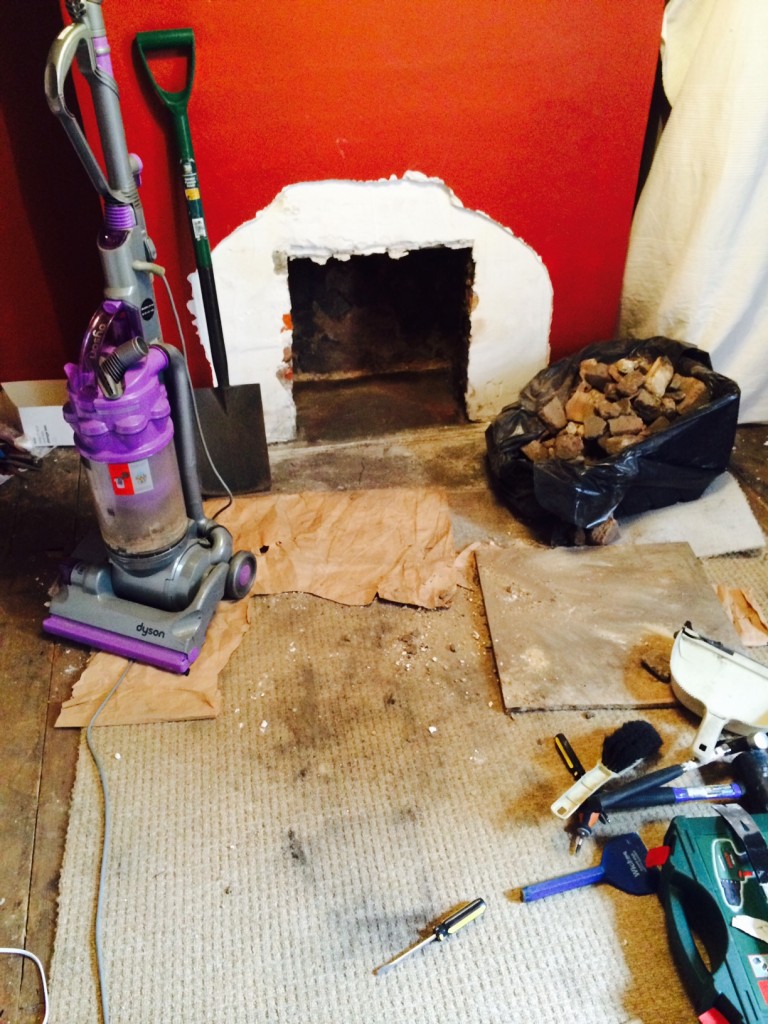
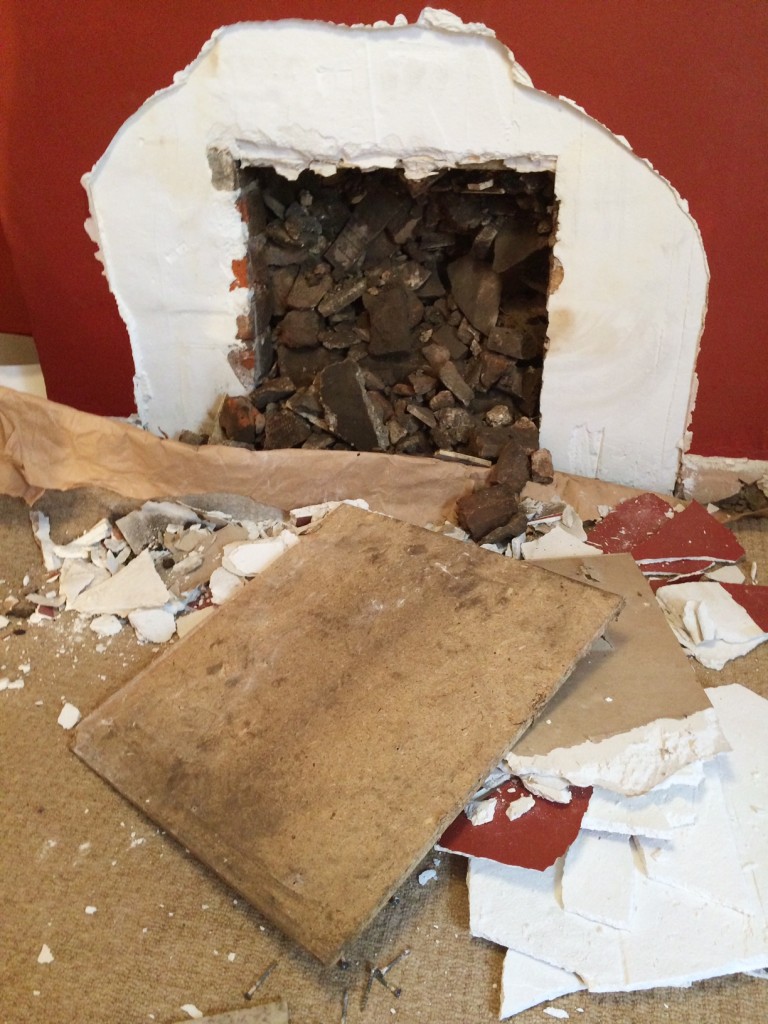
Oh. Too soon with the fanfare. The boarded up fireplace was hiding a substantial pile of very sooty rubble. Oh lordy.

Barney Rubble

Barney Rubble

So the clean up begins. Two bags of rubble to go to the tip. With no car, that’s going to be interesting. (Edit: it’s sitting in the back lane while we wait for the fairies to take it to the tip for us.)

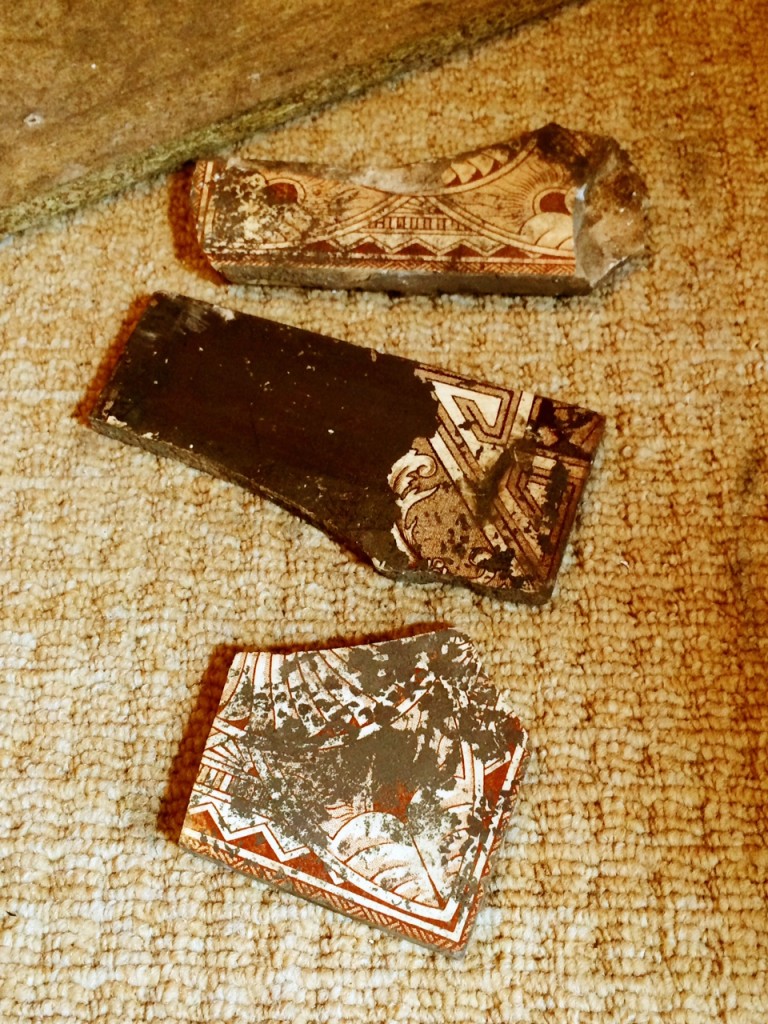
On the plus side, we found some remnants of what were probably the original hearth tiles. Not a single of one them had survived intact. Such a shame.

probably from the original fire surround

probably from the original fire surround

All in all it took us about 4 hours to complete this part of the project. Most of that was clearing the rubble and cleaning the soot.

clean up time

clean up time

booyaa looked like a Victorian urchin by the end of it. He was taken out to the garden and hosed down. Just kidding. He did have a very long shower and everything he’d been wearing went straight in the wash. He was exhausted and grouchy by the end of it. It’s not a project for the faint-hearted. Pie for dinner definitely helped soothe some of the aches.

Next steps

Given the amount of rubble we found and the gusts of wind that come down the chimney now the board is off we’re slightly concerned about the safety of the chimney. So we’ve arranged for a fireplace and chimney expert to come and tell us if we need to do anything with it.

Then we’ll tidy up the exterior, scrub the bricks and seal them with acrylic varnish, replace the skirting on the chimney breast and voilà – all done.

Further reading

Here are some of the places we found useful information about opening up a boarded fireplace.

Good photos of each step at this home renovation blog.

Little House on the Corner. We love this blog. They’ve already done many of the same projects as we have planned, and in a thoughtful modernising-whilst-being-true-to-the-heritage-of-the-building way that we hope we’re doing too. Here they’re installing a woodburner and achieving a modern, crisp finish.

Also useful was this Reader’s Digest post. (I know! Reader’s Digest being useful. Whatever next.)

And finally, for sanity-checking, we read through the Stove Fitters’ Manual.

(Aside: I recently heard an anecdote of a colleague saying, “Why does anyone bother writing a blog these days, who cares what you have to say?” etc. It struck me just how helpful it’s been for us to read other people’s blogs. I am eternally grateful to everyone out there blogging their renovation projects. Keep doing it! Ignore the sceptics. Haters gonna hate.)

sticky fingers

The kitchen worktops feel permanently sticky. If you touch them nothing comes off on to your fingers but there’s this annoying tackiness. I think it’s probably down to a badly implemented combo of Danish oil and varnish. We had a new worktop fitted along one side, so that we could move the sink and fit a dishwasher, and we decided to sand off the surface of the old worktop and then oil them both. Hopefully this way they’ll match by the time we’ve finished. The old worktop obviously is ‘seasoned’ now, so there might be a slight difference in colour, but we’re giving it a go.

So over the long weekend me and my hangover (so unfair! I had all of two glasses of wine last night) got out the little mouse sander and went to work. If you want to do this here are the things I learnt.

  • Whatever it was coating the worktop, there was a lot of it and it clogged up the sandpaper really quickly. booyaa suggested using a stiff brush to get rid of the build-up. That worked a treat. The layers of gunk weren’t wearing the sandpaper sheets out, it was just clog.
  • My secondary school woodwork teacher sat on my shoulder and reminded my to sand with the grain for the entire duration of the task. So that was nice.
  • Use the mouse’s nose to get into corners. If you have a nose extension (apparently it’s called a ‘detail finger attachment’ but we all know it’s a nose extension) you might find that useful for going over edges and corners. You’ll work out for yourself that the way you hold the mouse affects the range of sanding, and the little nose might help you even things up.
  • You’re going to get very dusty. It’s quite noisy and not really the ideal hangover activity. I used a very lightly dampened cloth to wipe away some of the dust so I could see where I needed to go over. A hoover is also a handy ally.
  • Sand until there’s not a single bit of sheen left. If it’s shiny, your oil won’t take. Since you’re going to all this effort you might as well get the best surface you can.
  • I used loose sandpaper and a sanding block to finish off the last few bits.

Oiling. This is not as messy as you might think, but I do recommend you do this once you’ve tidied up after dinner and leave it to dry overnight. You’ll need three coats before you can start using your worktop with gay abandon. In between, put all your trays on the worktop and use them. We had one for the kettle and tea-making gear. Another next to the sink for the compost caddy and soaps. The last one was for dirty dishes which don’t go in the dishwasher. That will save your sanity.

I used a fairly cheap own-brand Danish oil. Danish oil is a mix of linseed oil and varnish, and it’s sometimes called ‘wiping varnish’, which is a very accurate description. It’s designed to protect the wooden worktop but without creating a solid coat which varnish would do. I’ve since read up on these things and apparently the Best Ever Worktop Oil is called Osmo Top Oil, so I’ll be swapping to that in future. Here are your steps and recommendations for using standard Danish oil.

  • Make sure the surface is clean and dry. Use a lint-free cloth to spread the oil over the surface of the worktop.
  • Work slowly, apply a thin, even coat. Once you get to the end go back and wipe any excess oil away. There wasn’t any excess in my case, so perhaps I was a little stingy.
  • Make sure you cover the edges of the worktop too.
  • Leave to dry overnight.
  • If the grain lifts then sand lightly before applying another coat the next day.
  • After three coats the wood should be waterproofed and protected. Leave the final coat for 24 hours then, if you want, you can buff the surface to a shine. I chose not to.

(I tried taking before and after photos but you don’t appreciate the difference in a photo. At least, not with my poor photographic skills.)